
These biscoff waffles are simple and easy to make yet never compromise on taste! You only need less than 10 ingredients, can make it in one bowl, and ready in 15 mins. And as always, vegan. A perfect balance of a soft fluffy inside with a slightly crispy outside and edge, these biscoff waffles make a great dessert-like breakfast or snack with tea and coffee.
*This post may contain affiliate links. For full disclosure visit our Affiliate Disclosure page.
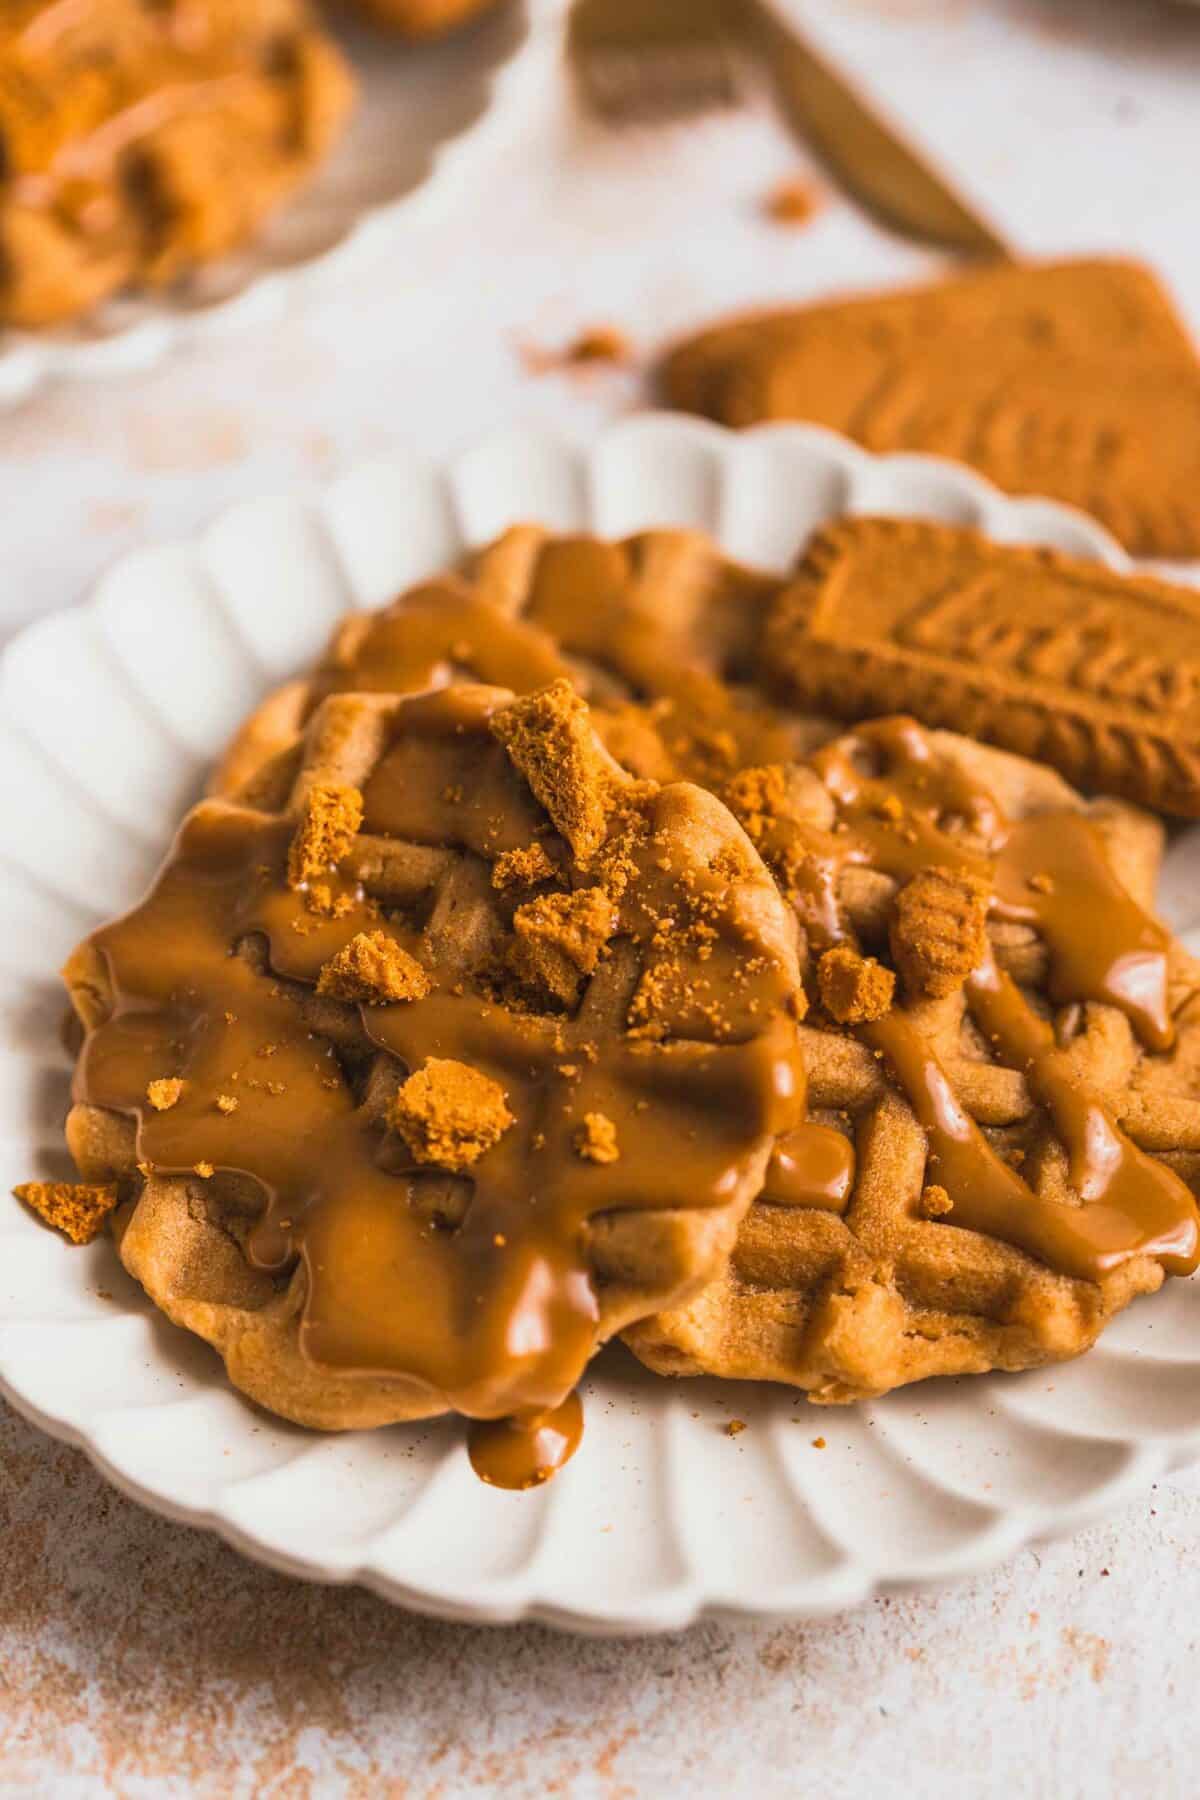
Table of Contents
Today, we’re diving deep into the world of waffles, but not just any waffles—these are made with the spread loved everywhere in the world, Lotus biscoff! Imagine now – waking up to the aroma of freshly made waffles, with the heavenly scent of Biscoff wafting through your home. Literally, they smell so good it works like a home aroma scent. This is most definitely one of the best breakfast champions I’ve made and the best part is it’s 100% vegan and so delicious! Make sure to check out my biscoff butter cookies, biscoff cheesecake, biscoff cupcakes and more if you are a biscoff lover!
Recipe overview – why you’ll love this vegan biscoff waffle recipe
- Level: Easy
- Taste: Cosy and caramelly biscoff
- Texture: Soft and fluffy with a slightly crispy edge
- Diet: Plant-based, dairy-free, eggless, soy-free, can be gluten-free
- Time: 15 mins
- Occasion: Breakfast, dessert
Main ingredients and substitutions
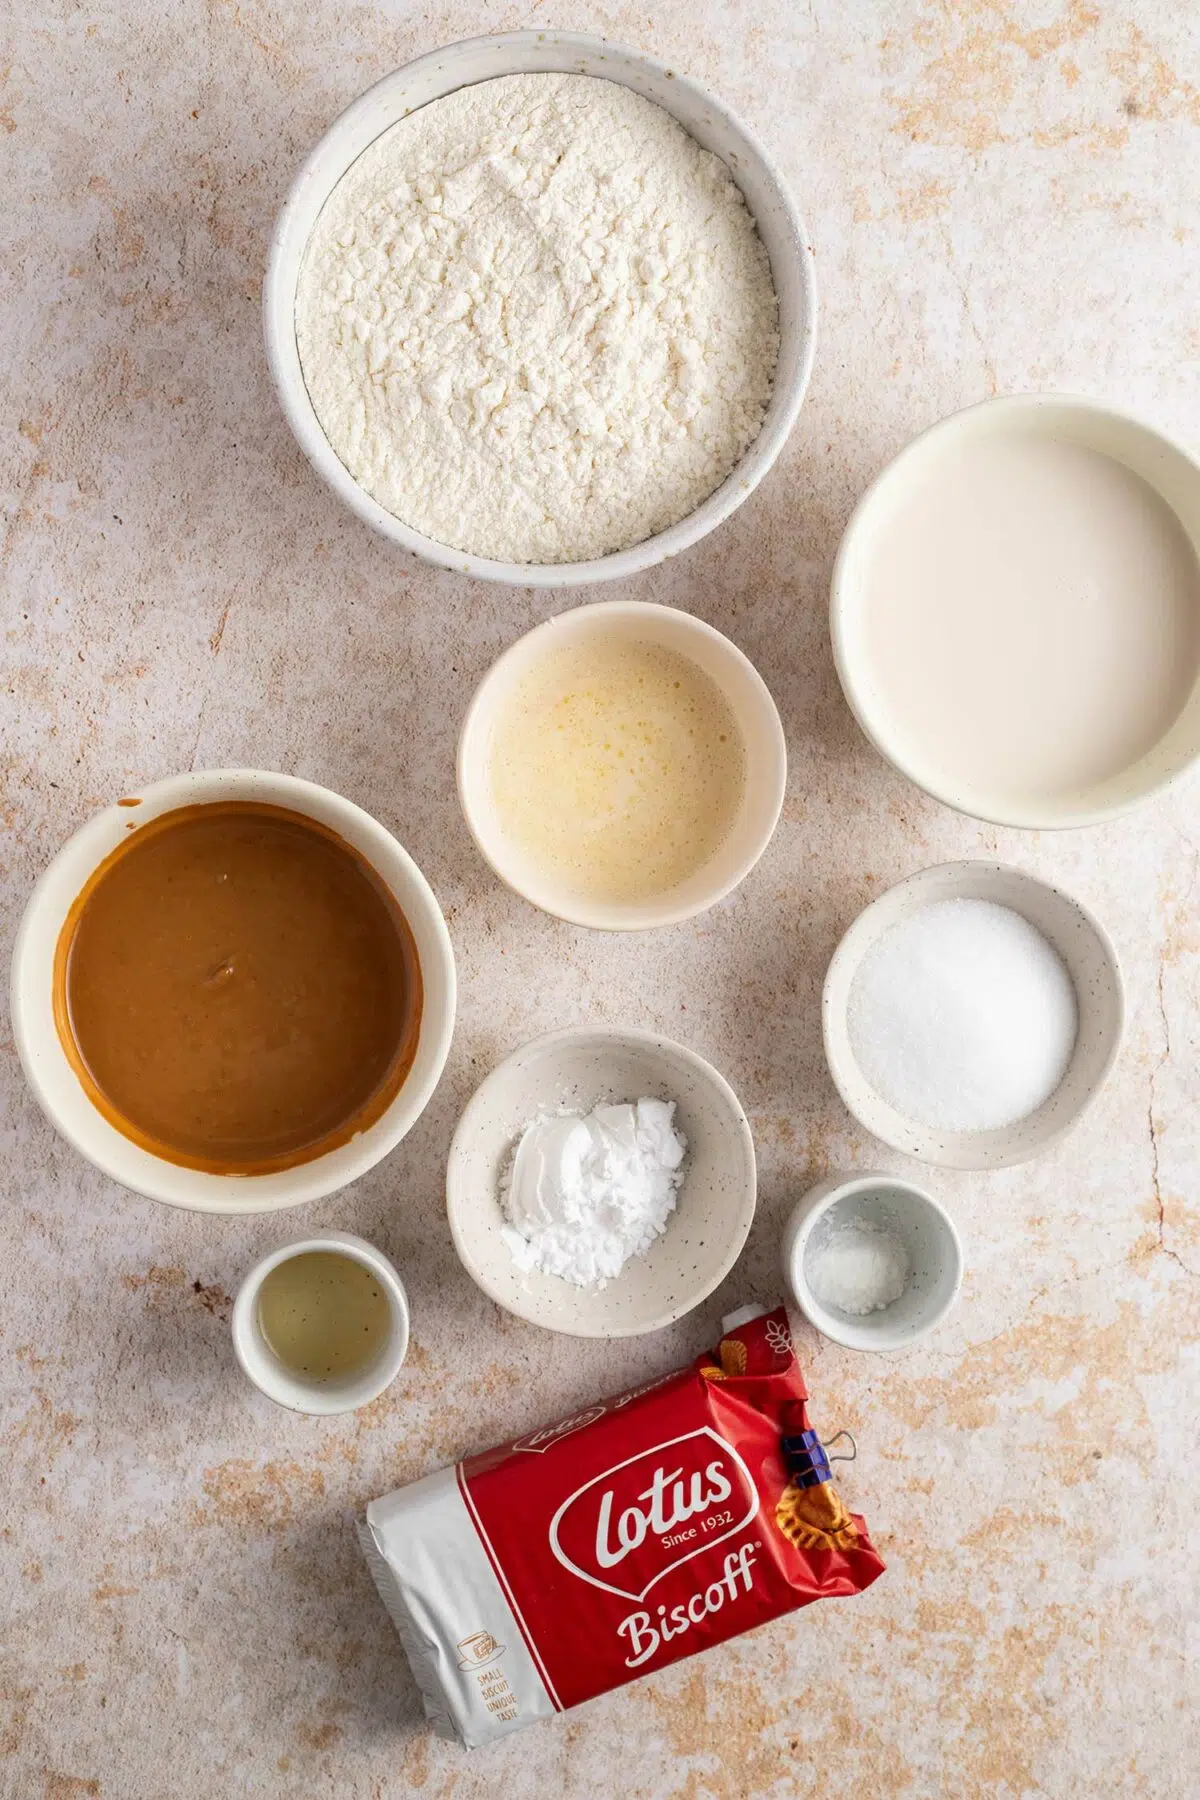
One of the beauties of this recipe is its simplicity. You only need your everyday vegan staples like flour, plant-based milk, and some sugar for sweetness. And a dollop of Biscoff Spread will transform these waffles from basic to a masterpiece of breakfast! It’s all about fuss-free ingredients coming together to create something truly mouthwatering in your kitchen.
*Use room temperature ingredients unless otherwise instructed.
Plain Flour: Our trusty base for all things delicious, plain flour. If you want to make it gluten-free, go ahead and swap it with a 1:1 gluten-free flour blend. I like King Arthurs or Bob’s Red Mill!
Almond Milk: This gives our waffles a lovely nutty flavour that goes so well with the biscoff. Oat milk, soy milk, rice milk, etc. will work perfectly as well if you don’t want to use almond milk.
Biscoff Spread: Our flavour hero, biscoff spread! If you want to go nutty, almond or peanut butter will still make these waffles a delicious breakfast.
Vegan Butter: Vegan butter is the secret to that rich, luxurious texture and cosy aroma. If you’re a coconut lover or want to make them healthy, swap this with coconut butter!
Vanilla Extract: For that classic, comforting aroma. You’ve got vanilla paste? Even better!
Tapioca Flour: Tapioca flour creates a soft texture in waffles. Cornstarch is a good pinch hitter.
Granulated Sugar: I added some granulated sugar to create a crispy edge in the waffles. Feel free to sub in coconut sugar if you want to make it healthy. It would add a caramelly colour and flavour.
Other ingredients: Baking powder and apple cider vinegar.
Note: Substitution may change the final taste and texture of this recipe.
*I use bone char-free sugars for all of my recipes. I cover the topic in my article Vegan Baking 101. Go to the “Is sugar vegan?” section to learn more!
Recommended equipment for this recipe
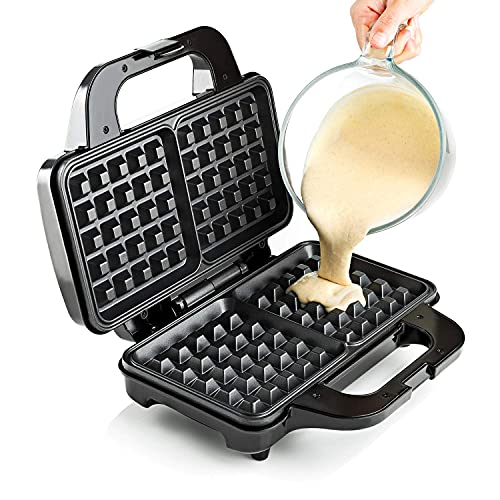
Waffle maker: The most important piece of equipment you’ll need for this recipe. A non-stick waffle maker makes it easy to remove the waffles without breaking them apart.
Mixing Bowls: Opt for large, wide mixing bowls that give you plenty of space to mix your ingredients together.
Ladle or Pouring Jug: For easy pouring of the waffle batter into the iron.
*The ingredient list and measurement for this recipe can be found in the recipe card at the bottom.
How to make vegan biscoff waffles
Step 1: Preheat the Waffle Iron and Make Vegan Buttermilk
Before doing anything else, preheat your waffle maker. A hot waffle maker ensures that the waffles will cook evenly and have a crispy edge with a soft texture. My waffle maker has a light that turns on and off when the plates are ready for cooking. If yours doesn’t have one, a good rule of thumb is to allow it to heat for about 5-10 minutes.
In a medium-sized bowl, mix the almond milk and apple cider vinegar to make vegan buttermilk. Set aside until it thickens a little. Because it’s almond milk, it won’t curdle as much as soy milk but it’s okay! It still works perfectly.
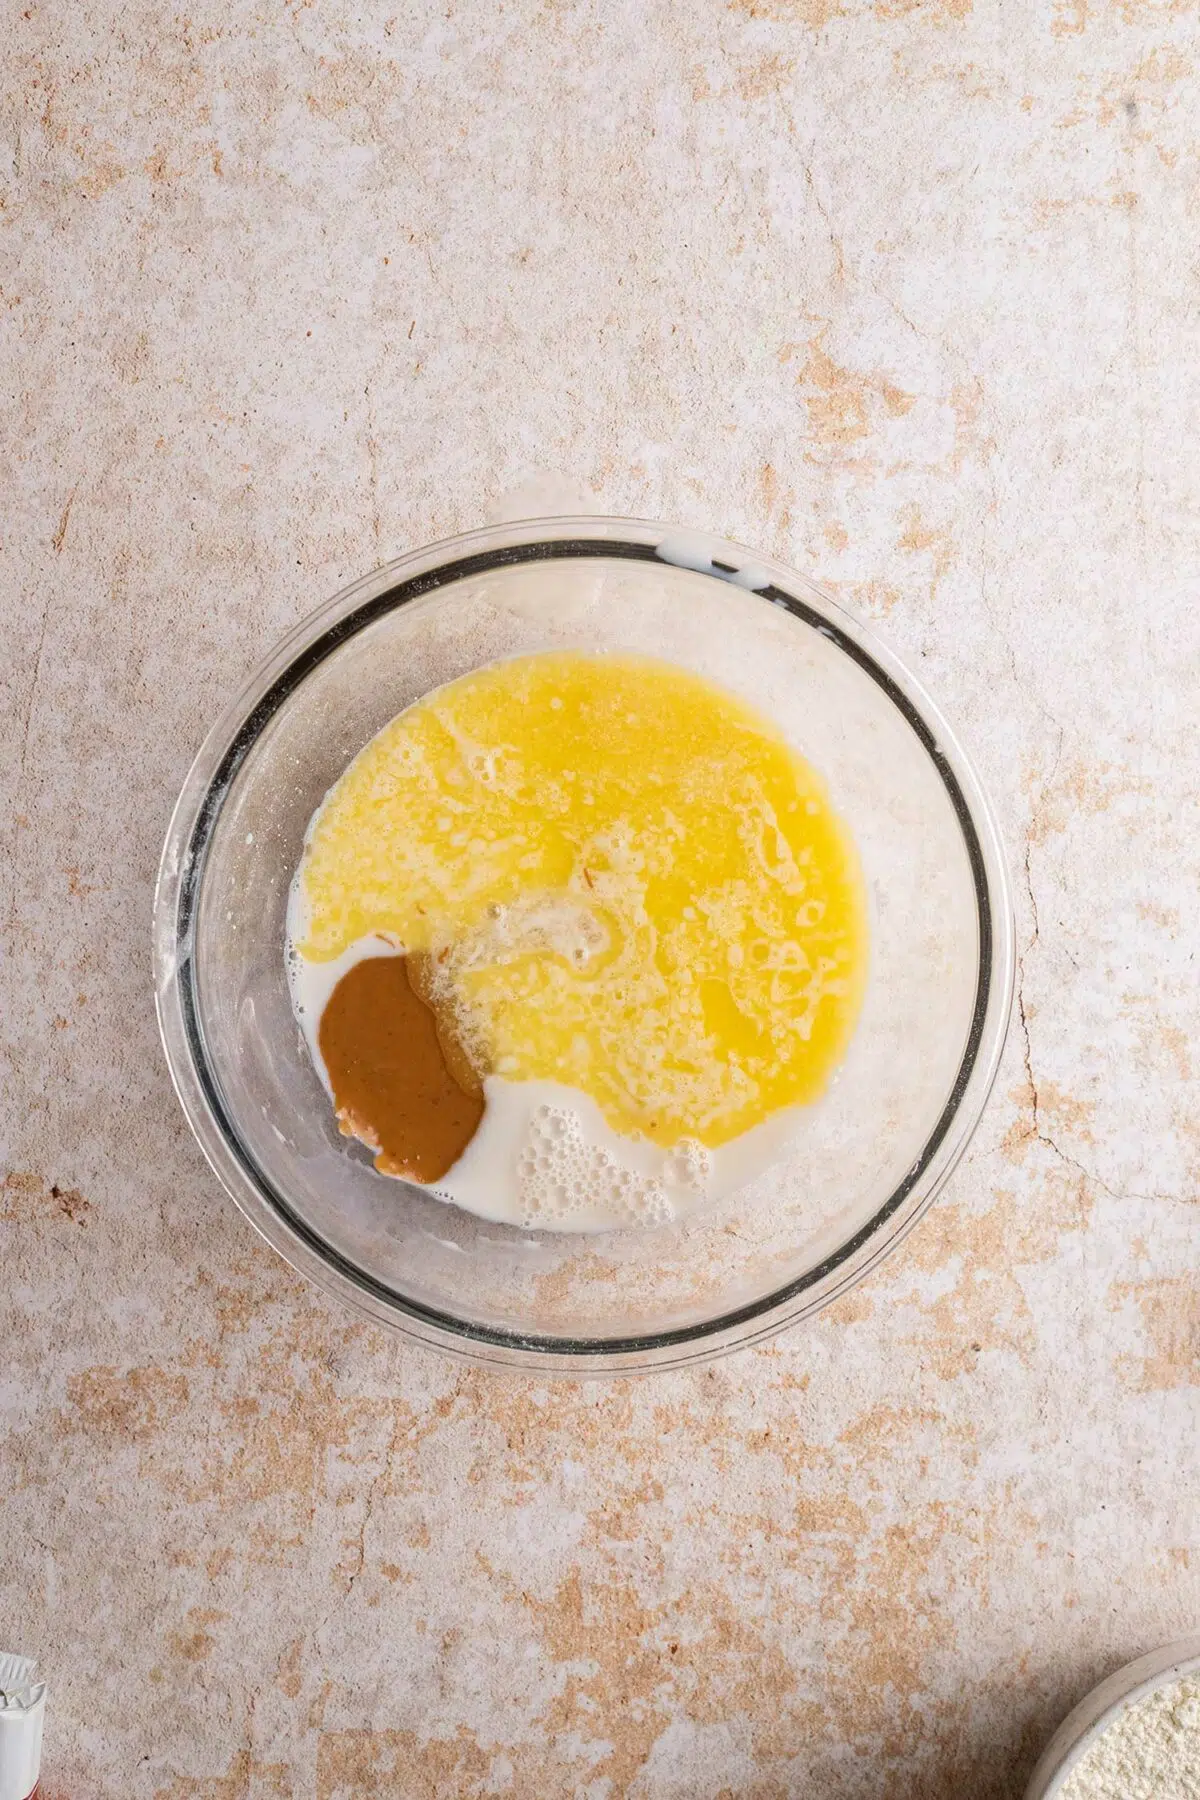
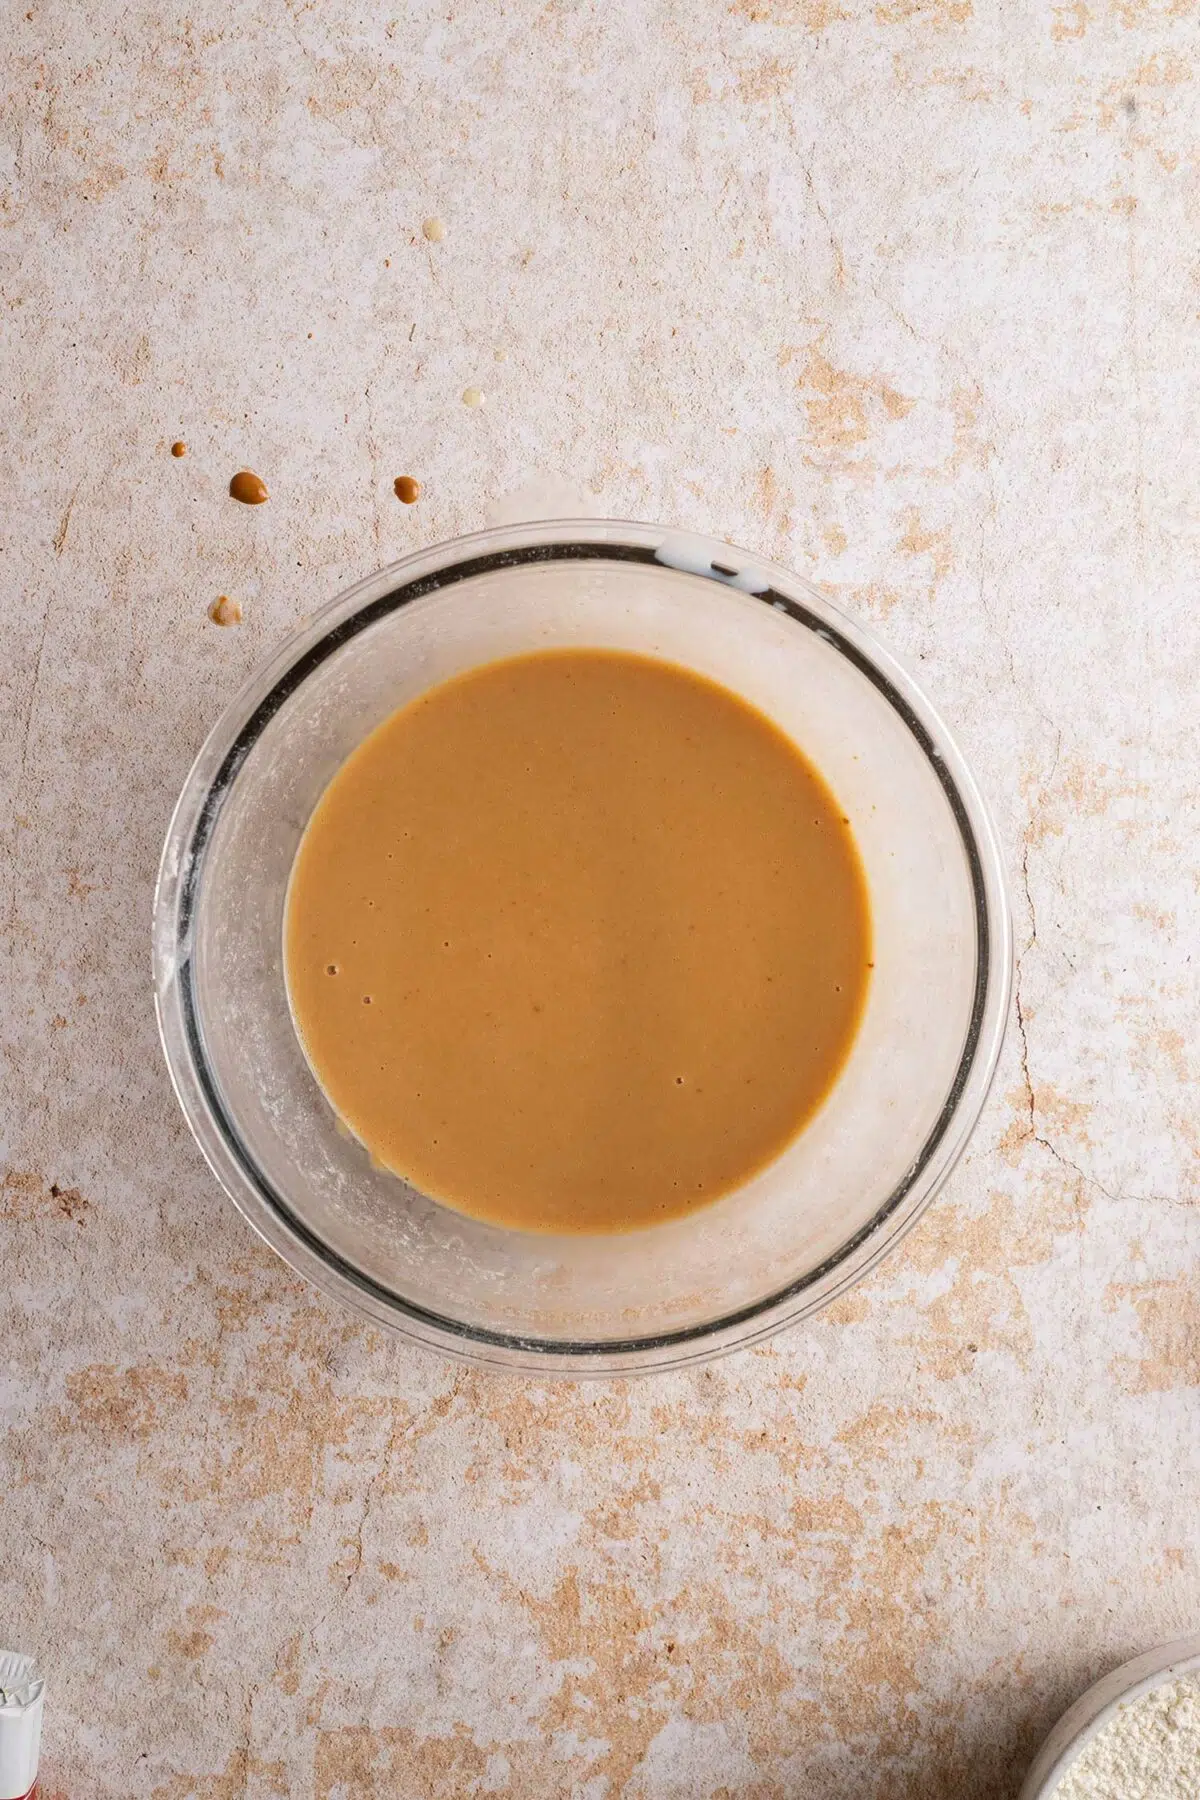
Step 2: Combine Wet Ingredients
In a large mixing bowl, pour the almond milk, melted vegan butter, Biscoff spread, vegan buttermilk from step 1, and vanilla extract and mix with a whisk until they form a smooth mixture.
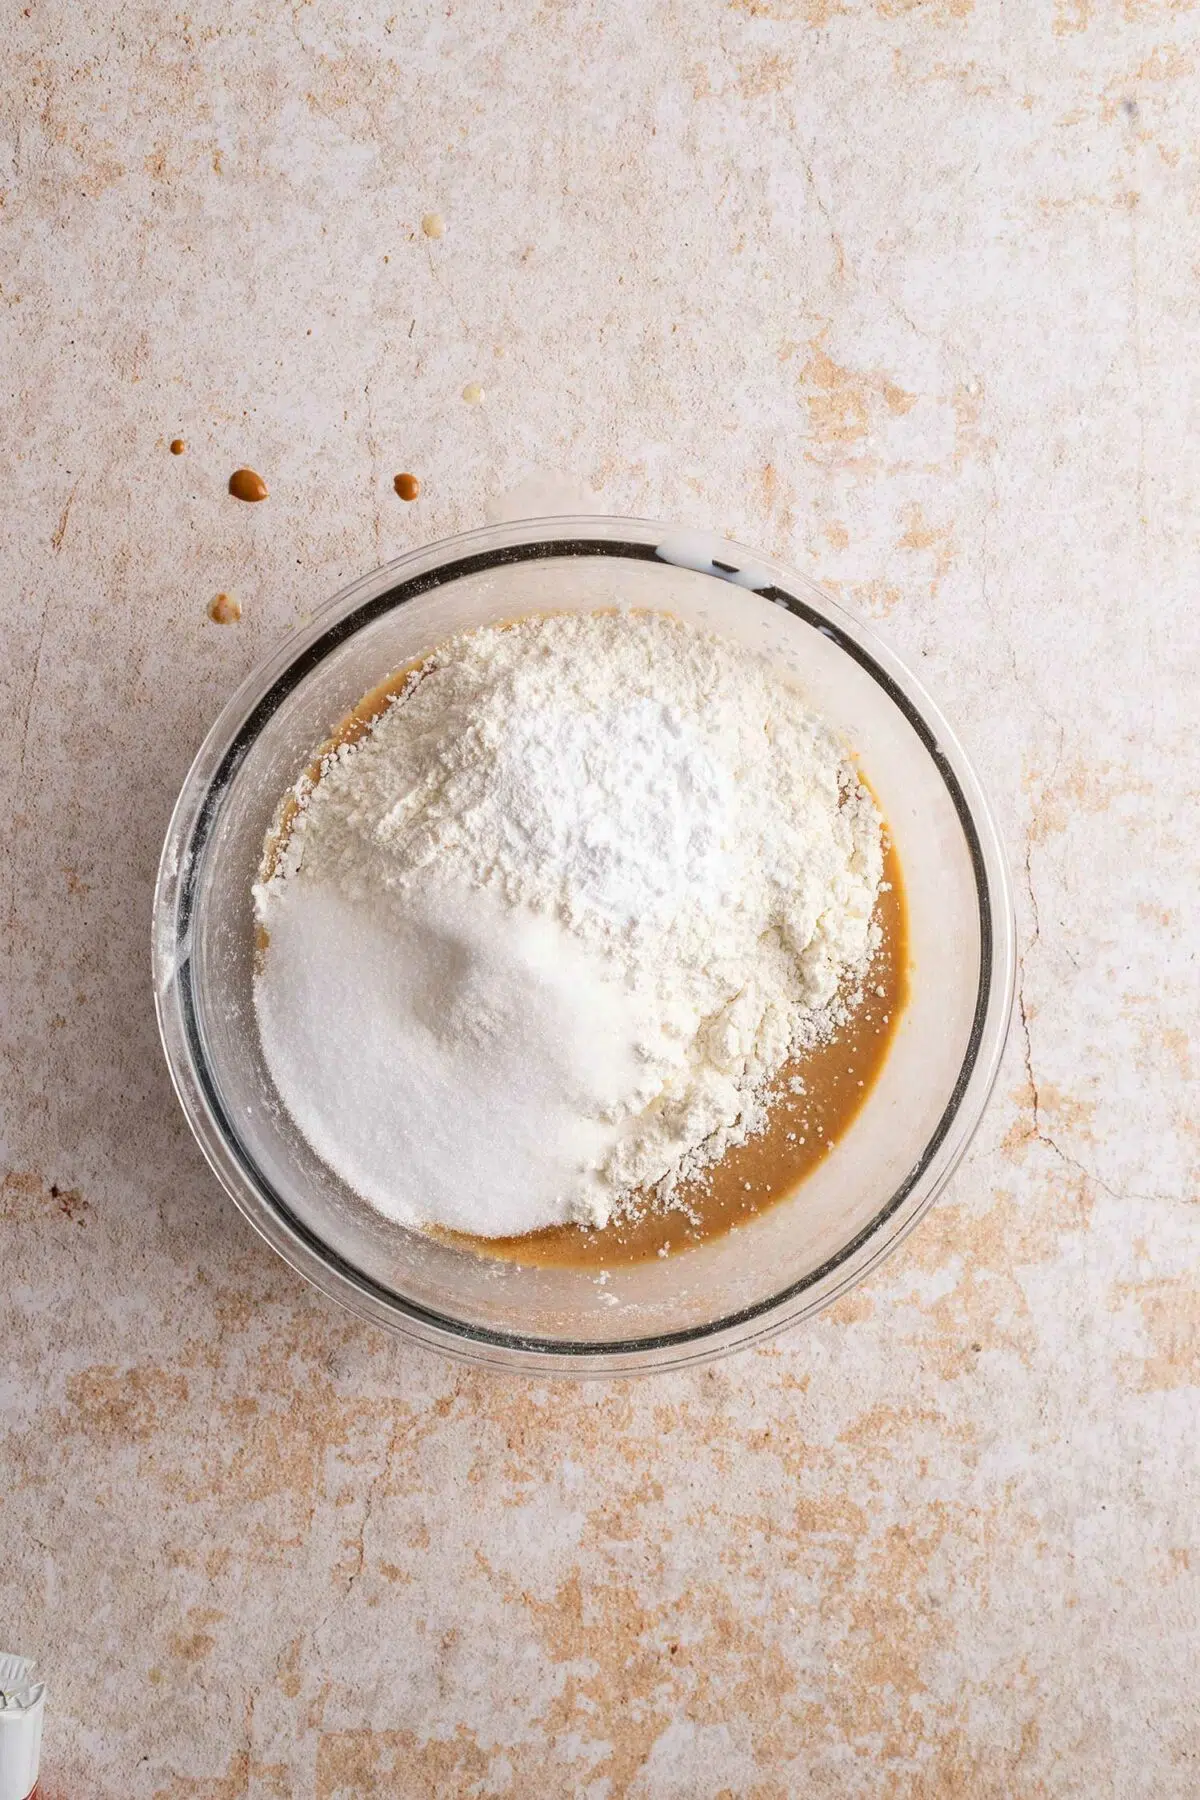
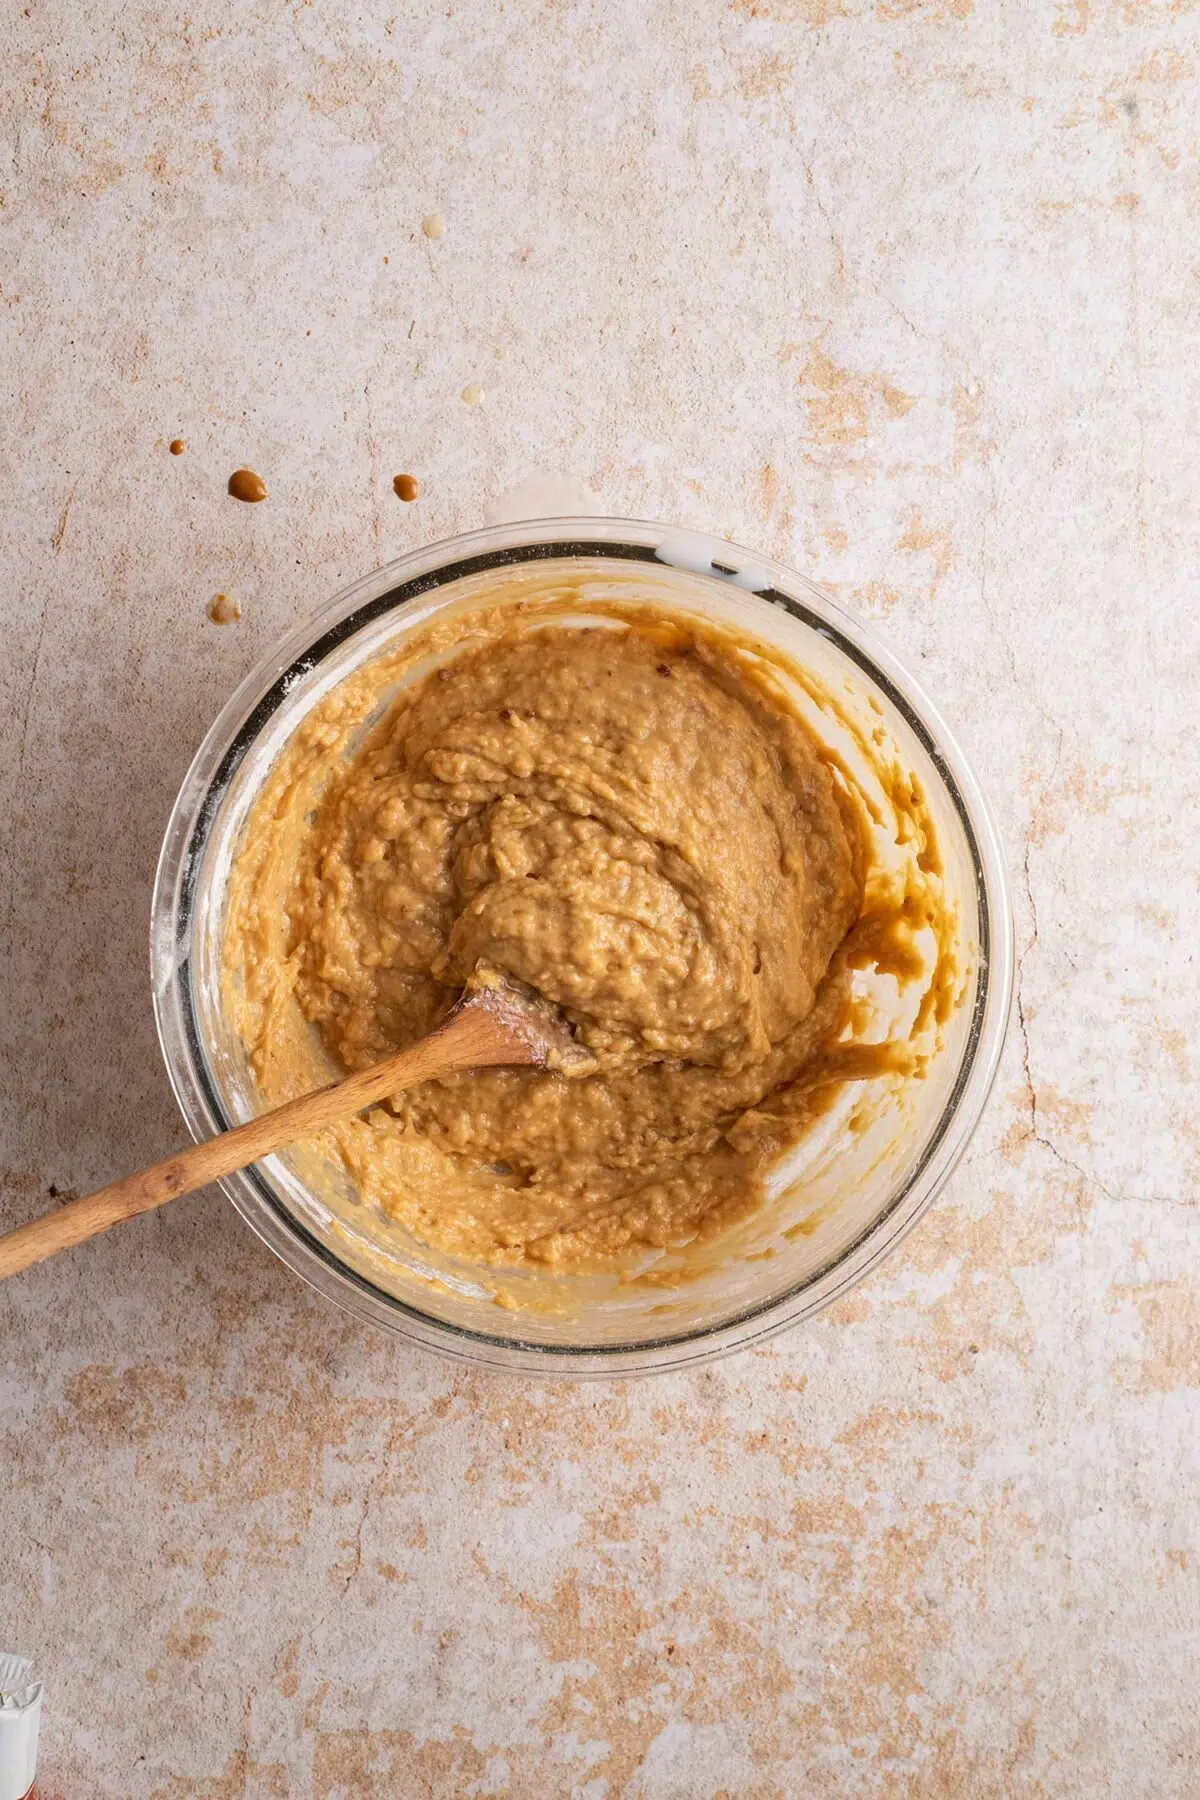
Step 3: Add Dry Ingredients and Make Batter
Add the plain flour, baking powder, tapioca flour, and granulated sugar to the wet mixture and mix with a large wooden spoon or a silicon spatula. Ensure to sift the flour beforehand to prevent lumps in the batter! Mixing until just combined is key here as mixing too much forms too much gluten in the batter and it can cause the waffles to be chewy and rubbery. Which you don’t want!
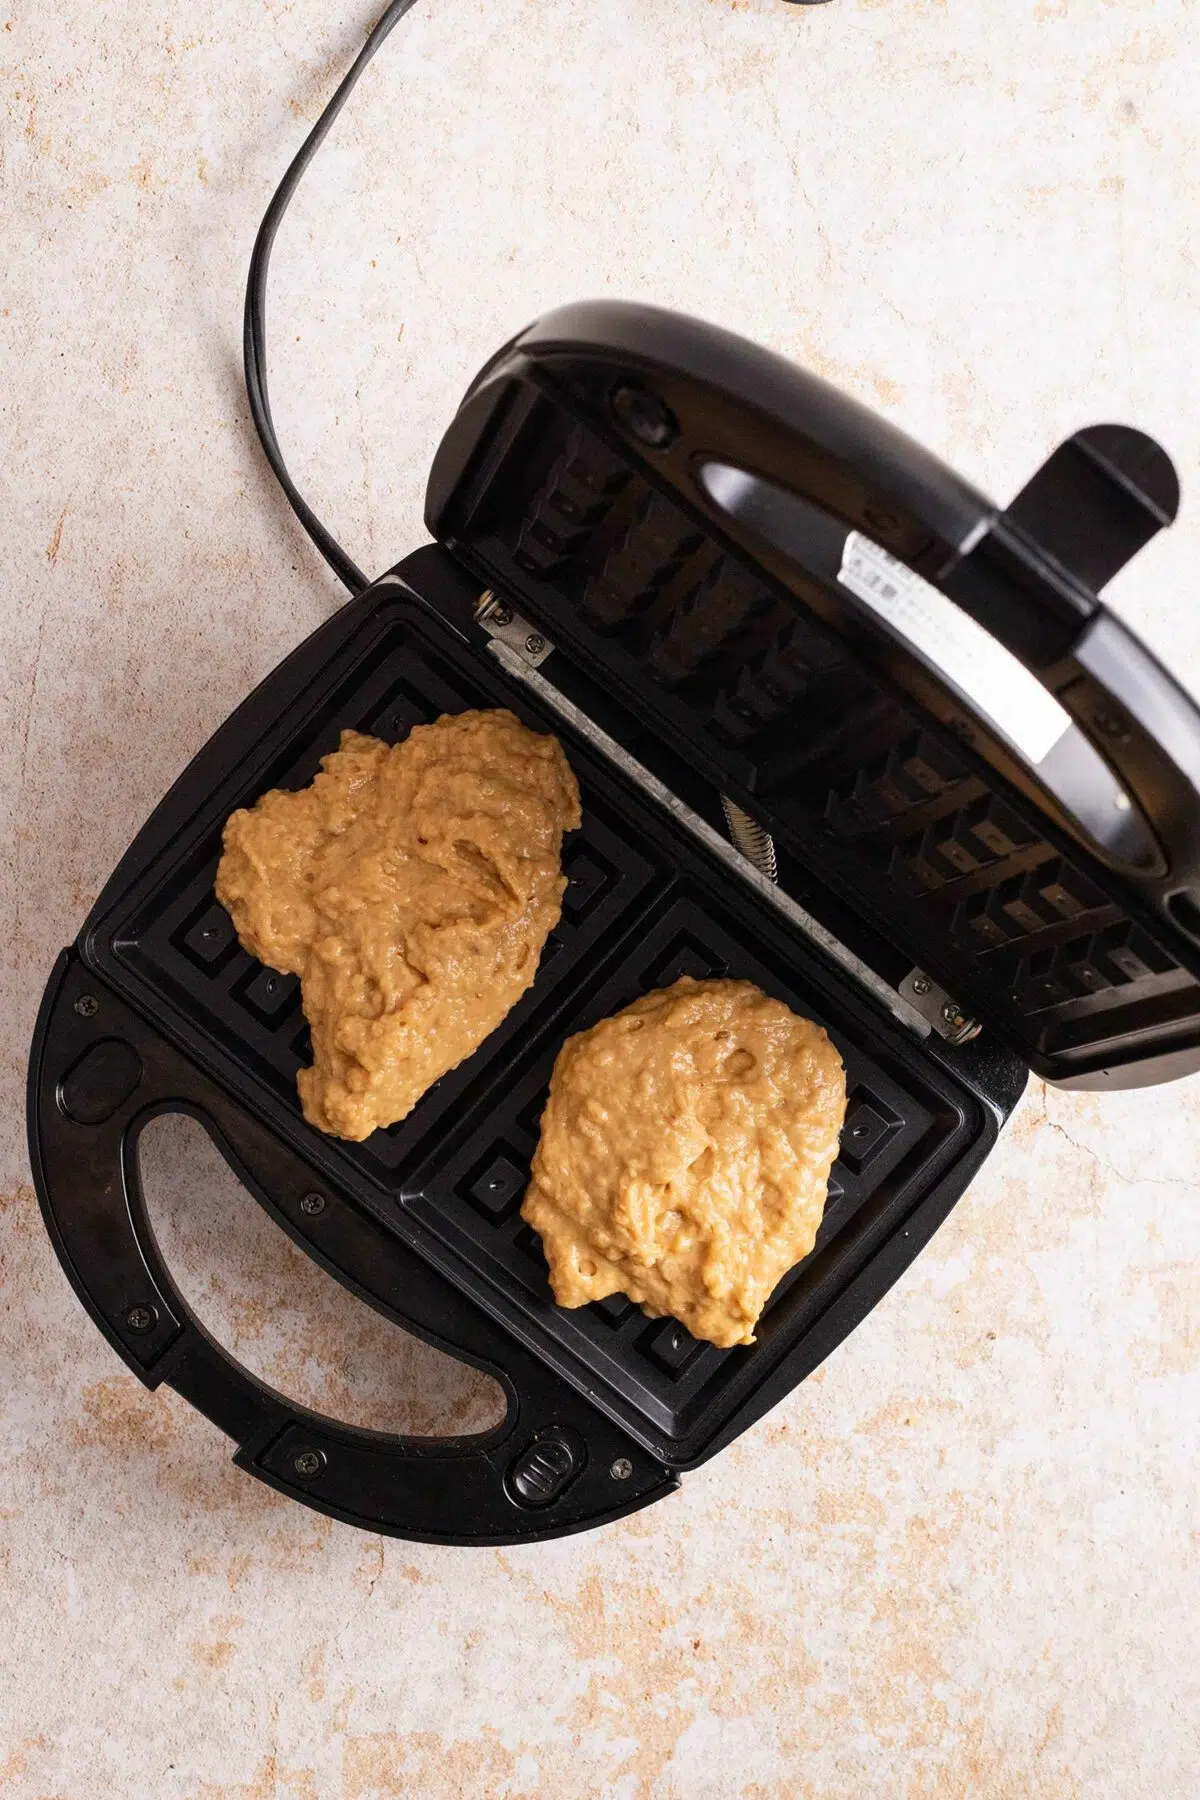
Step 5: Cook the Waffles
Using a pastry brush, lightly grease the hot waffle iron with some oil of your choice. I used some coconut oil. Pour the batter into the waffle maker to just cover the waffle grid, and close the lid. Cook for approximately 5-7 minutes, until the waffles are golden brown. Every waffle maker is different, so the first waffle is often a test of your waffle maker’s cooking time.
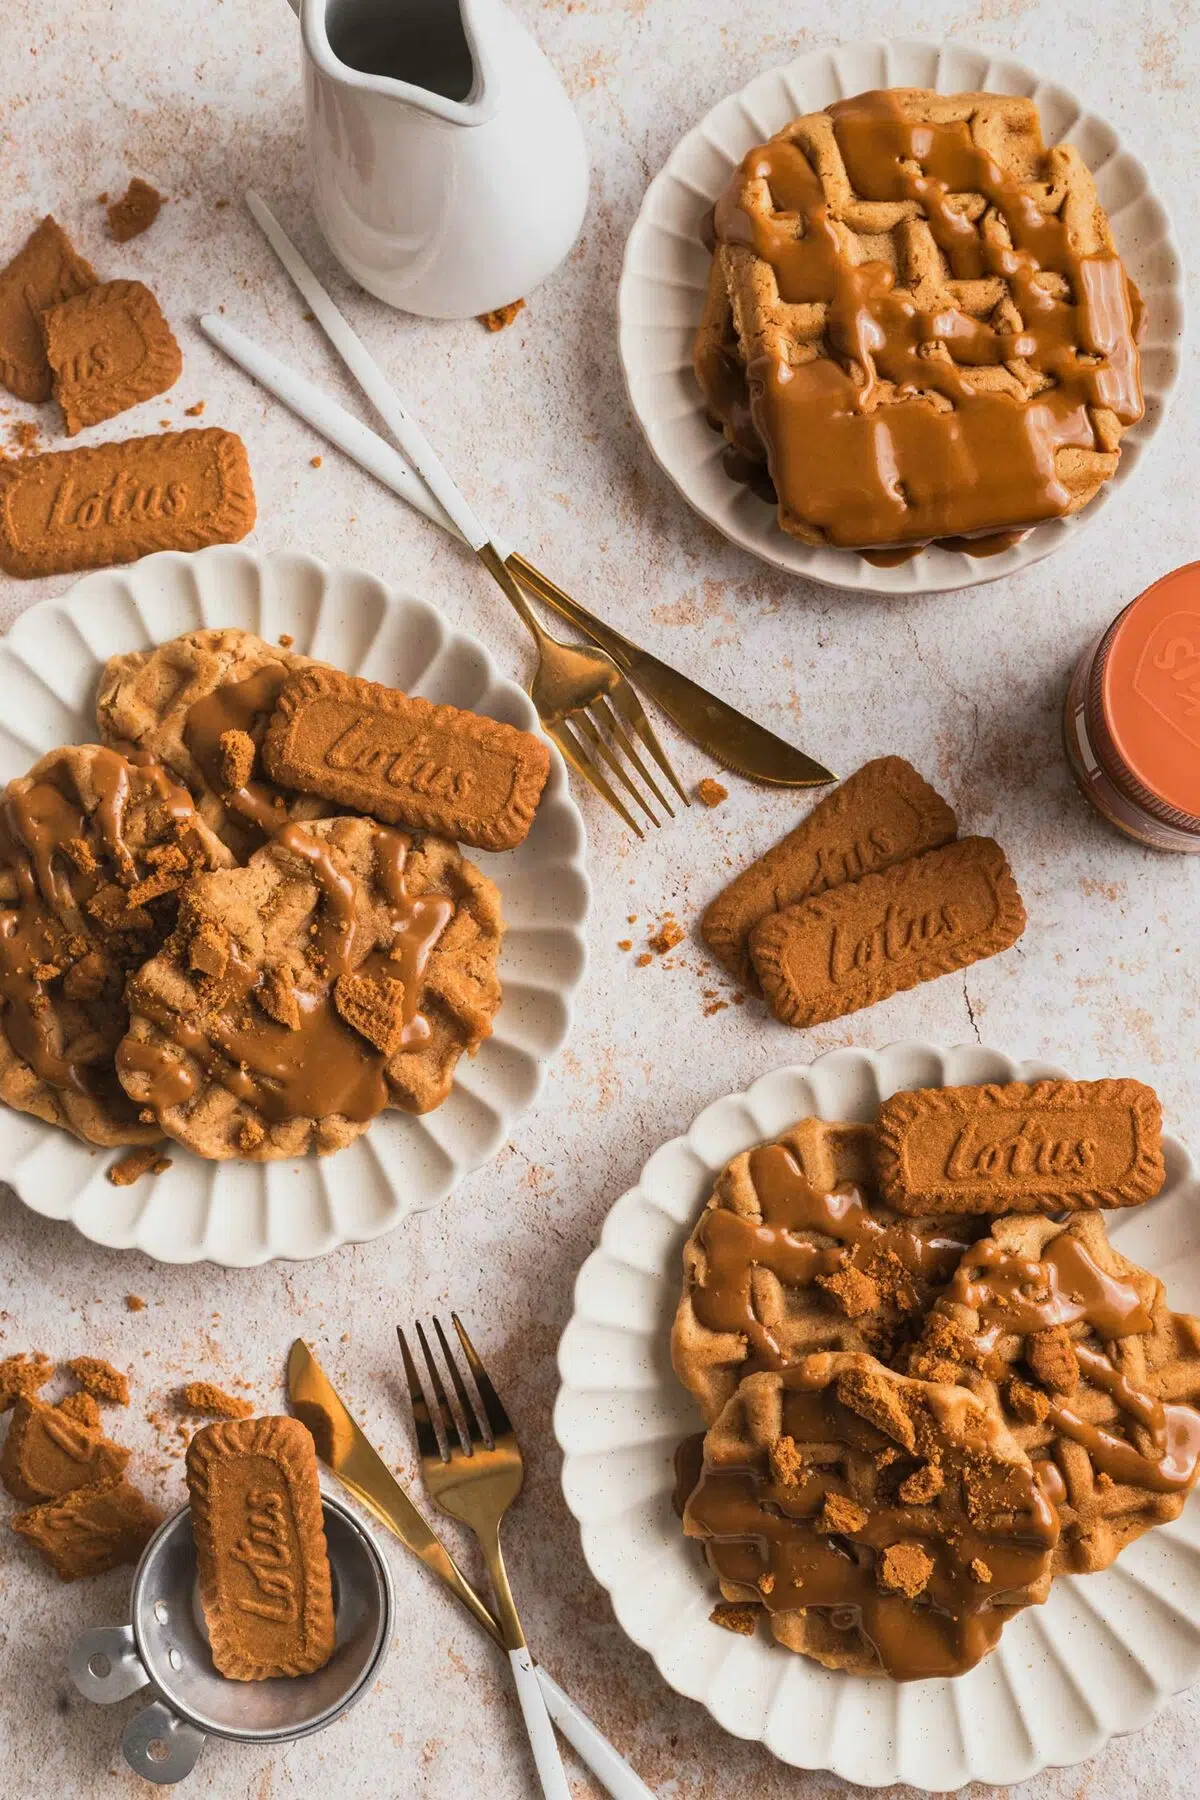
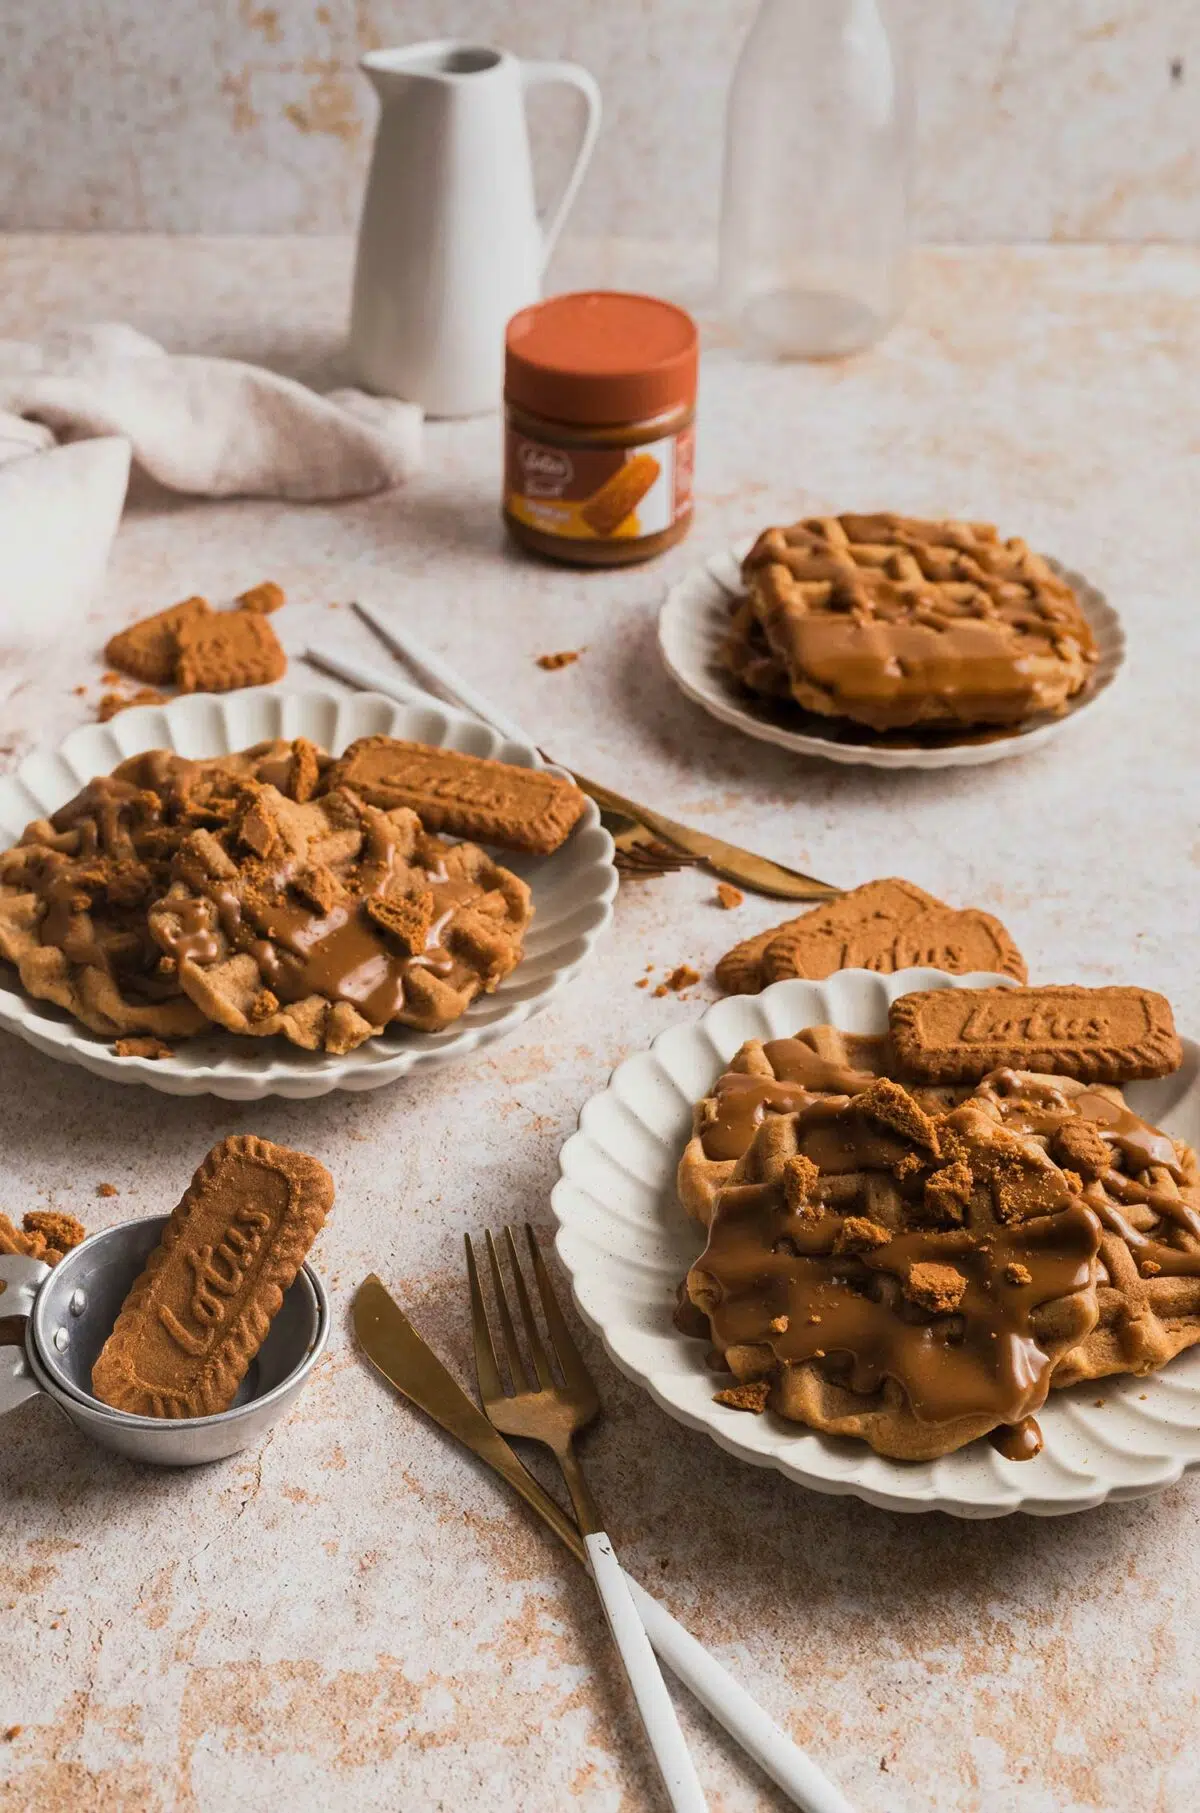
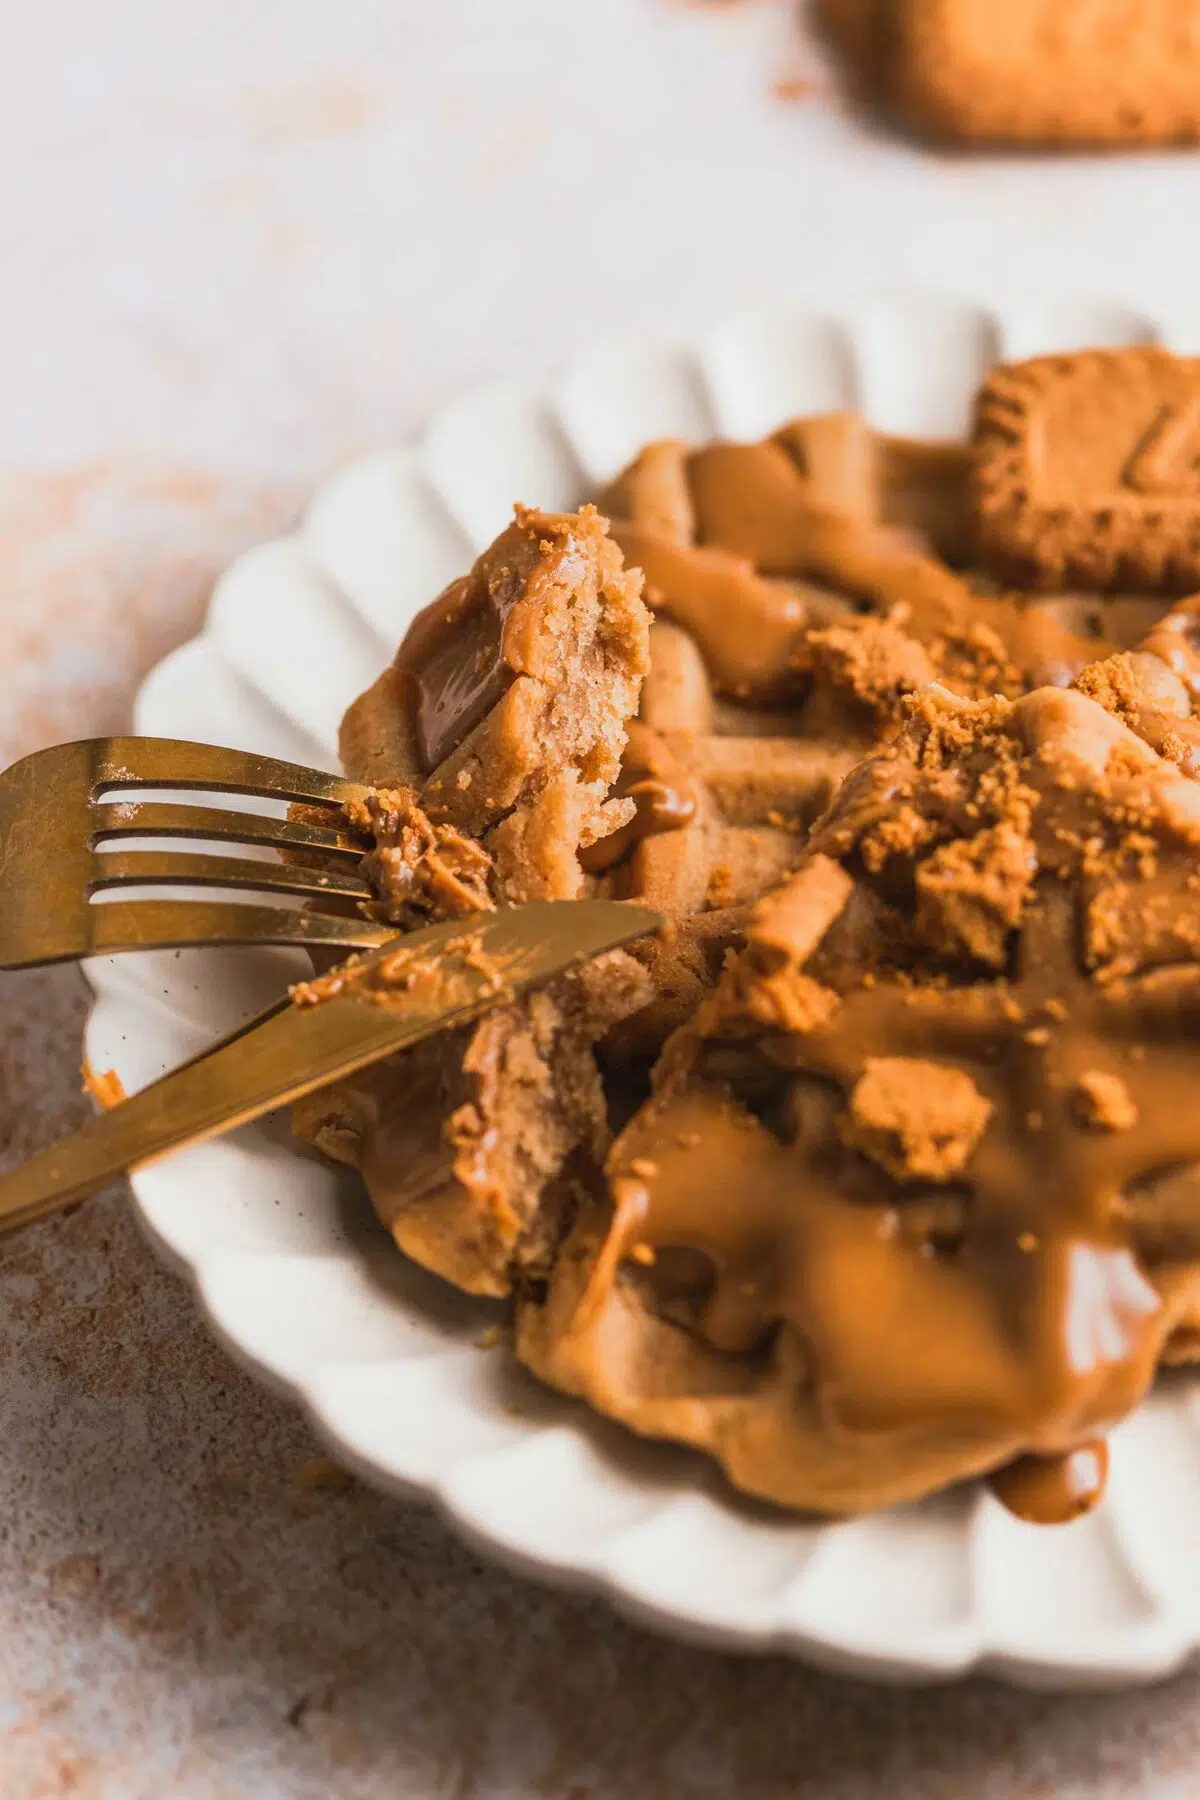
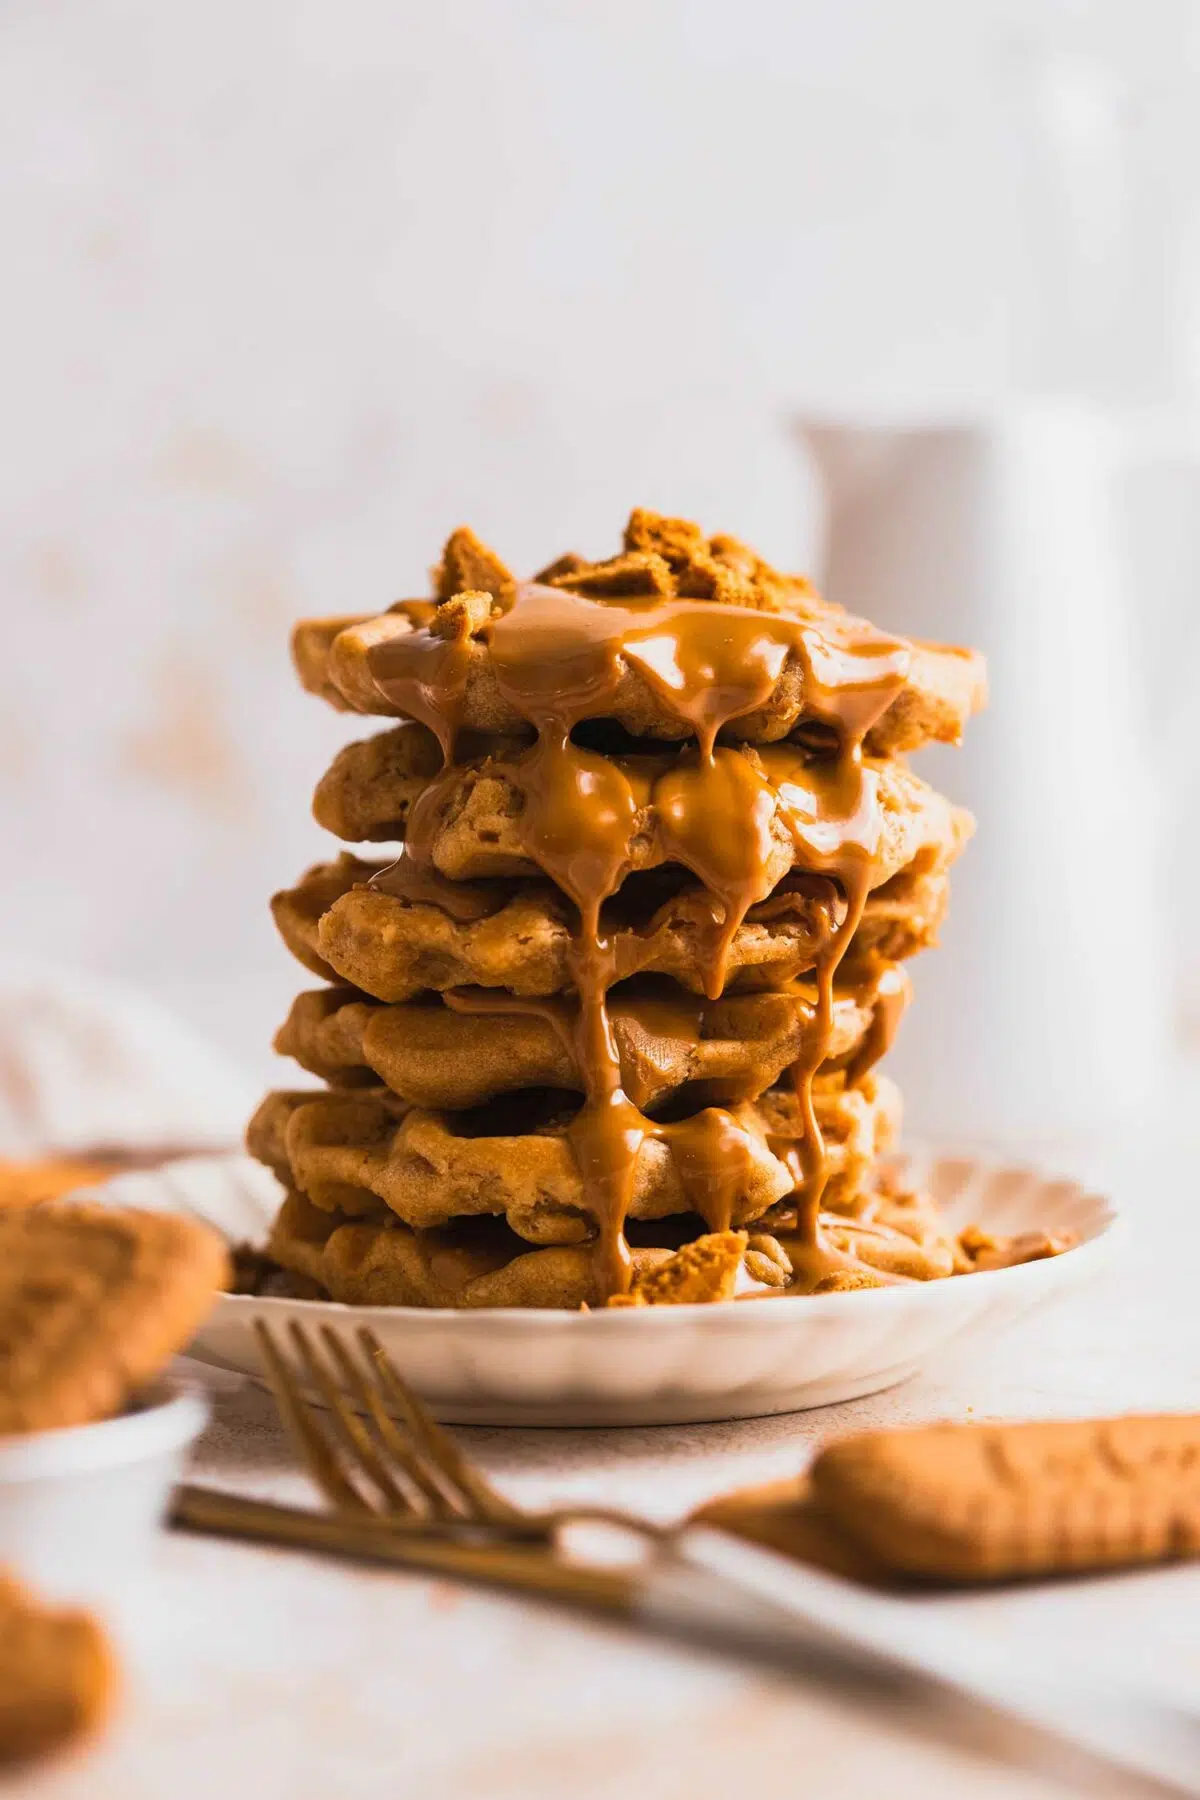
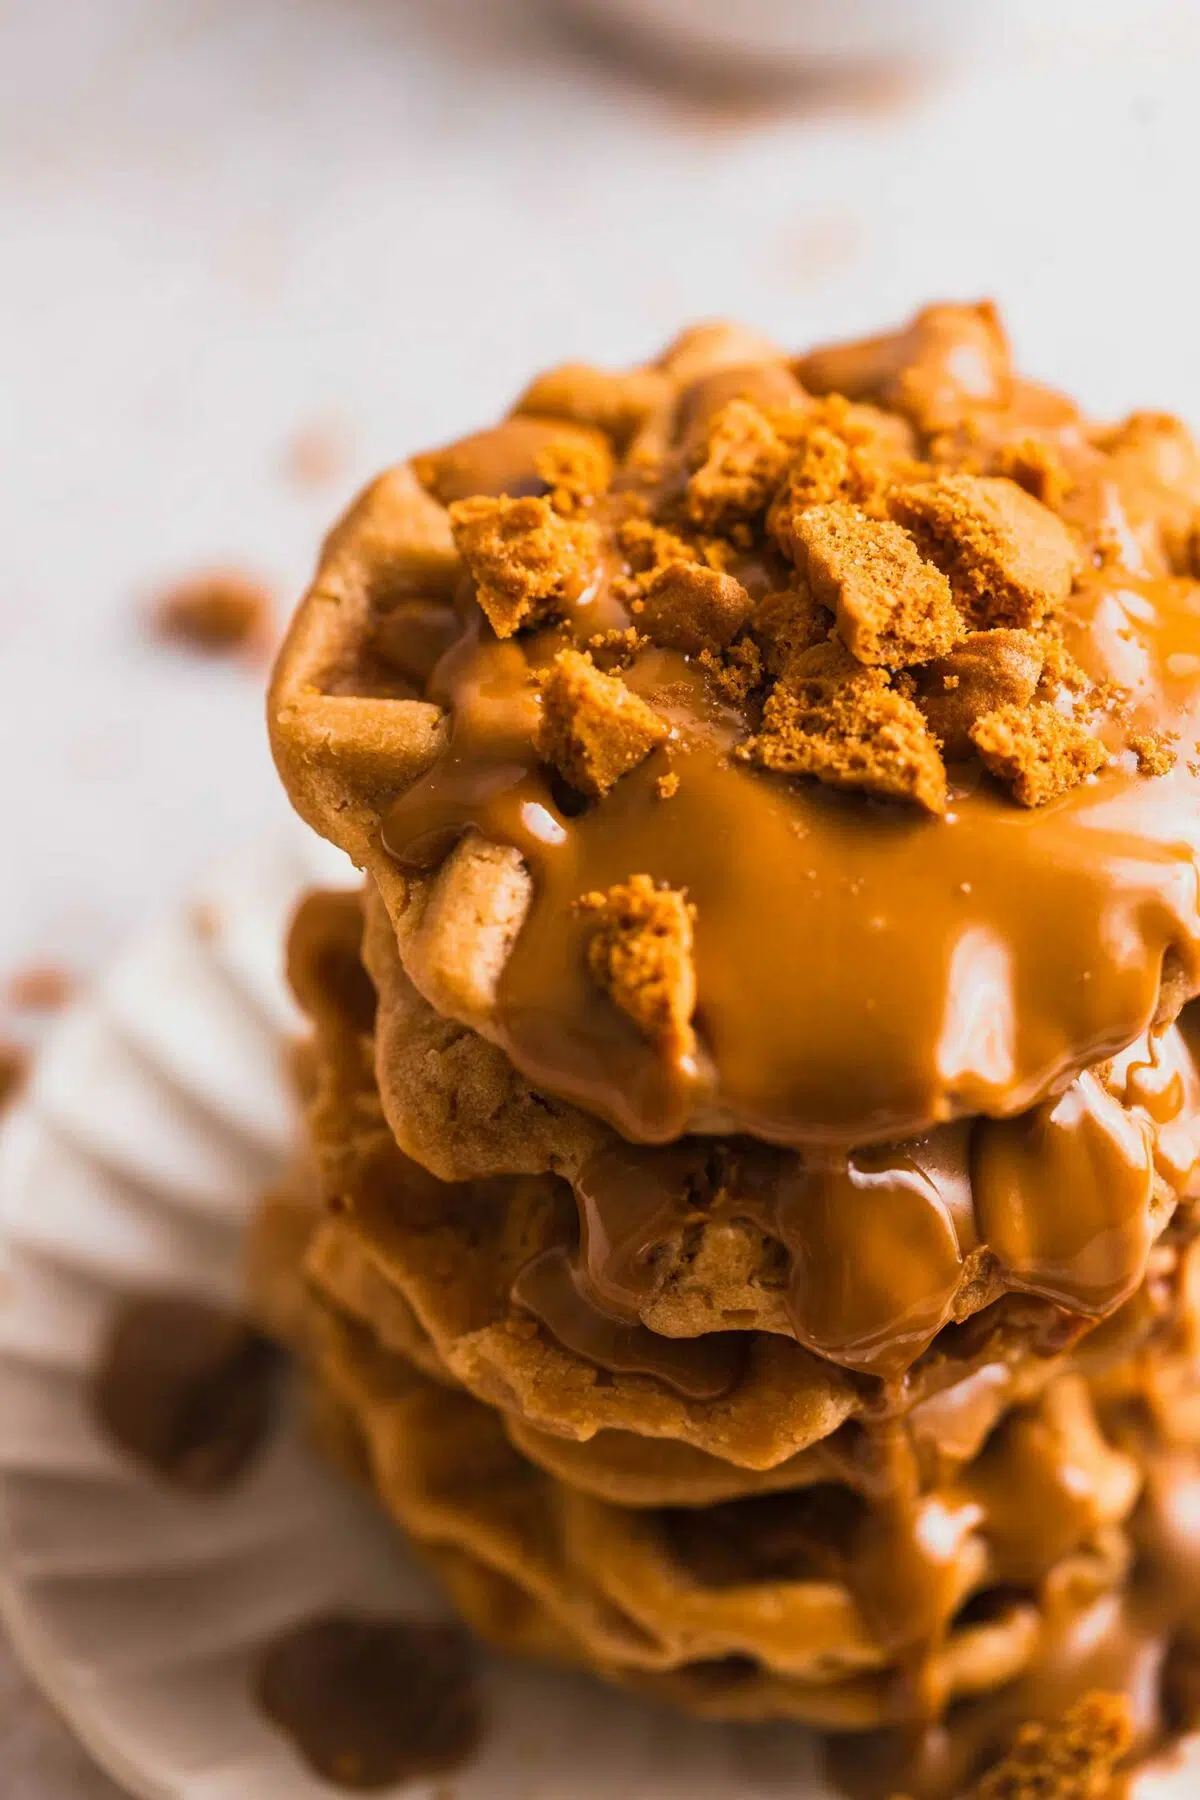
Once cooked, remove the waffles carefully and serve immediately. Top with more biscoff spread, crumbled biscoff cookies, fruits and nuts, whipped cream, ice cream, etc., anything you desire and enjoy!
Serving tips and ideas
- Simply pour more Biscoff spread on the waffles or drizzle with some maple syrup.
- A medley of fresh berries with a sprinkle of icing sugar can bring a lovely contrast to your waffles! Fruit jams like raspberry, strawberry, blueberry, etc. would be great on the waffles too.
- Spread some nut butter with crushed almonds or pecans to add a nice nutty twist and crunch.
- Layer pieces of waffle with vegan yoghurt, ice cream, whipped cream, chocolates, and fruit for a breakfast waffle parfait.
Expert tips and tricks
Don’t pour too much batter into waffle maker
You want to dollop waffle batter just in the centre of the waffle grid. Don’t pour or spread too much as the batter can leak outside the waffle maker when you close it. Closing it does the spreading job.
Look out for the batter consistency
Depending on the brand of flour or almond milk you use, you may find your batter too thick or too thin. The batter should be pourable but never runny, it can leak outside the waffle maker! If your batter seems too runny, add 1-2 tablespoons of flour and mix to thicken the batter.
Use a non-stick waffle maker
My waffle maker is non-stick but if you don’t have a non-stick waffle iron, don’t forget to grease the iron with oil or vegan butter generously to prevent the waffles from sticking to the iron. Even if you do have a non-stick iron, a little grease helps make the waffles crispier on the edge. I used some coconut oil to grease and it works perfectly!
Rest the batter for a fluffy texture
Did you know resting batter makes fluffier baked goods? Letting the batter sit for 5-10 minutes before cooking allows the baking powder and vinegar to activate, making fluffier waffles!
Estimate the cooking time with the first waffle
The first waffle is usually a test run for cooking time. See how long it takes for the first waffles to cook and cook the rest for the same time from the second batch. Usually it’d be between 5-10 mins.
Use a digital scale to weigh ingredients
Always use a digital scale rather than measuring cups when you are baking. It’s so much more accurate and measuring correctly is very important to achieve the best result.
Recipe variations
- Add half a teaspoon of cinnamon or a spice blend like pumpkin spice to the batter to enhance the cinnamony flavour in the biscoff spread.
- Chop some vegan milk chocolate and throw the chunks into the batter for vegan chocolate chip biscoff waffles! Drizzle some chocolate sauce to make it even more chocolatey.
- Add some chopped nuts like almonds, walnuts, or pecans for added crunch and nutty flavour. Drizzle some maple syrup to accompany the nuttiness!
How to store
- Room Temperature: If you have extra waffles left from breakfast and intend to eat them later, store in an airtight container lined with paper towels to absorb excess moisture. Toast or bake to warm up and eat within 24 hours.
- Fridge: You can also store the waffles in the fridge as well. Place them in an airtight container with layers of parchment paper between each waffle to prevent them from sticking. They will last for up to 2-3 days. Reheat in a toaster when serving.
- Freezer: Freezing is actually my favourite way to store as they can be a great on-the-go breakfast when you don’t have time in the morning! First, let the waffles cool down to room temperature. Place them in a freezer-friendly airtight container separated by parchment paper. They can be stored for up to 2-3 months. To serve, thaw and then reheat in a toaster or oven for a nice freshly baked-like texture. You can even skip the thawing part and pop one in a pop-up toaster for a quick breakfast!
*Although you can store this recipe in the fridge or freezer, it’s always best to consume it fresh and as soon as possible.
Q and A
What’s the best way to reheat leftover waffles?
The best way to reheat your Vegan Biscoff Waffles is to pop them in the toaster for a few minutes. You can also reheat them in an oven preheated to 180°C (350°F) too! Reheating in a microwave is not recommended as it makes the waffles soggy but if you don’t mind it microwave can be an option to reheat too.
Can I use this batter to make pancakes instead?
I haven’t tried but sure, why not! The batter is relatively thick so it would make a thick fluffy pancake rather than thin pancakes.
How do I know when the waffle is perfectly cooked?
A perfectly cooked waffle will be golden brown and slightly crispy on the edge, about 5-10 mins depending on your waffle maker. Overcooking the waffle can make the waffles way too hard to bite after they cool down so don’t cook more than 10 mins.
Why are my waffles not crispy?
If your waffles are soggy and not crispy on the edge, make sure your waffle maker is adequately preheated and follow the recipe measurements precisely. You can add 1 more tablespoon of granulated sugar if you want them to be even more crispy.
Want to master the basics of vegan baking?
Check out Vegan Baking 101 – the beginner’s guide to vegan baking for you to become an excellent vegan baker and familiar with the basics of vegan baking, ingredients, and techniques with useful tips!
You will LOVE these biscoff waffles because they are:
- easy to make
- full of lovely biscoff flavour
- soft yet slightly crispy
- sweet dessert like breakfast
Want more recipes like this?
Try my other delicious sweet and breakfast recipes you might enjoy!
- Biscoff Baked Oats
- Biscoff Butter Cookies
- Biscoff Cheesecake
- Biscoff Brownies
- Baked Biscoff Doughnuts
Visit the breakfast page and recipe page for more delicious recipes!
Please leave a comment and rate this recipe with 5 stars in the comment section below if you like the recipe! Let me know and tag me @thechestnutbakery on Instagram too. Thank you for making my recipe, friends!
Recipe Card
Print
Biscoff Waffles – Vegan & Easy
- Total Time: 15 minutes
- Yield: 6–7 waffles 1x
- Diet: Vegan
Description
These biscoff waffles are simple and easy to make yet never compromise on taste! You only need less than 10 ingredients, can make it in one bowl, and ready in 15 mins. And as always, vegan. A perfect balance of a soft fluffy inside with a slightly crispy outside and edge, these biscoff waffles make a great dessert-like breakfast or snack with tea and coffee.
Ingredients
- 2 cups (220g) plain flour
- 3/4 cup (180ml) soy milk
- 1/2 cup (130g) biscoff spread
- 1/4 cup (60ml) vegan butter
- 1/2 tsp baking powder
- 1 tsp vanilla
- 1 tbsp tapioca flour
- 3 tbsp granulated sugar
Instructions
- Preheat your waffle maker.
- In a medium-sized bowl, mix the almond milk and apple cider vinegar to make vegan buttermilk. Set aside.
- In a large mixing bowl, pour the almond milk, melted vegan butter, Biscoff spread, vegan buttermilk, and vanilla extract and mix with a whisk until they form a smooth mixture.
- Add the plain flour, baking powder, tapioca flour, and granulated sugar to the wet mixture and mix with a large wooden spoon or a silicon spatula until just combined.
- Using a pastry brush, lightly grease the hot waffle maker with some oil of your choice.
- Pour the batter into the waffle maker to just cover the waffle grid, and close the lid. Cook for approximately 5-7 minutes, until the waffles are golden brown.
- Once cooked, remove the waffles carefully and serve immediately. Drizzle more biscoff spread and top with your favourite toppings. Enjoy!


Notes
Mixing until just combined is key as mixing too much forms too much gluten in the batter.
Every waffle maker is different, so the first waffle is often a test of your waffle maker‘s cooking time.
Don’t pour or spread too much as the batter can leak outside the waffle maker when you close it.
- Prep Time: 10 mins
- Cook Time: 5 mins
- Category: Waffle
- Method: Cooking


Leave a Reply