
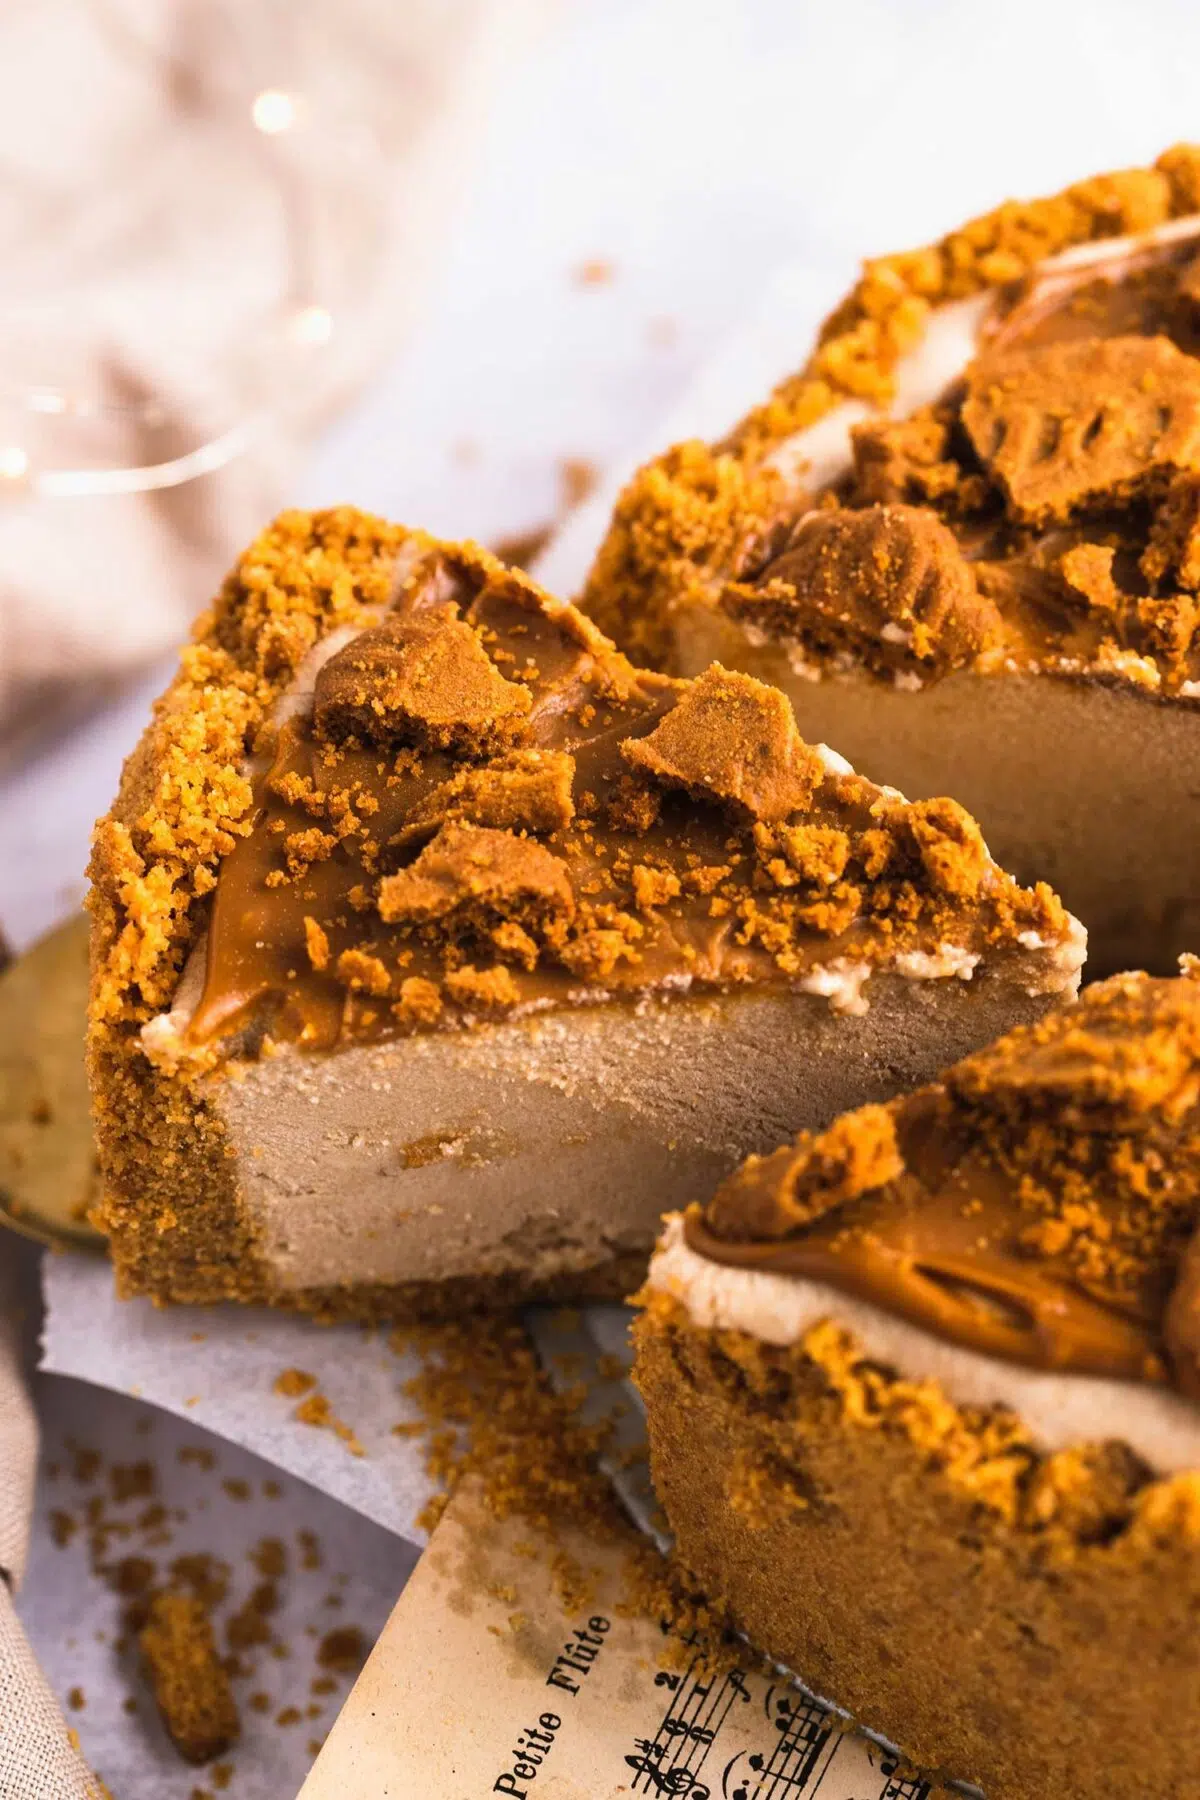
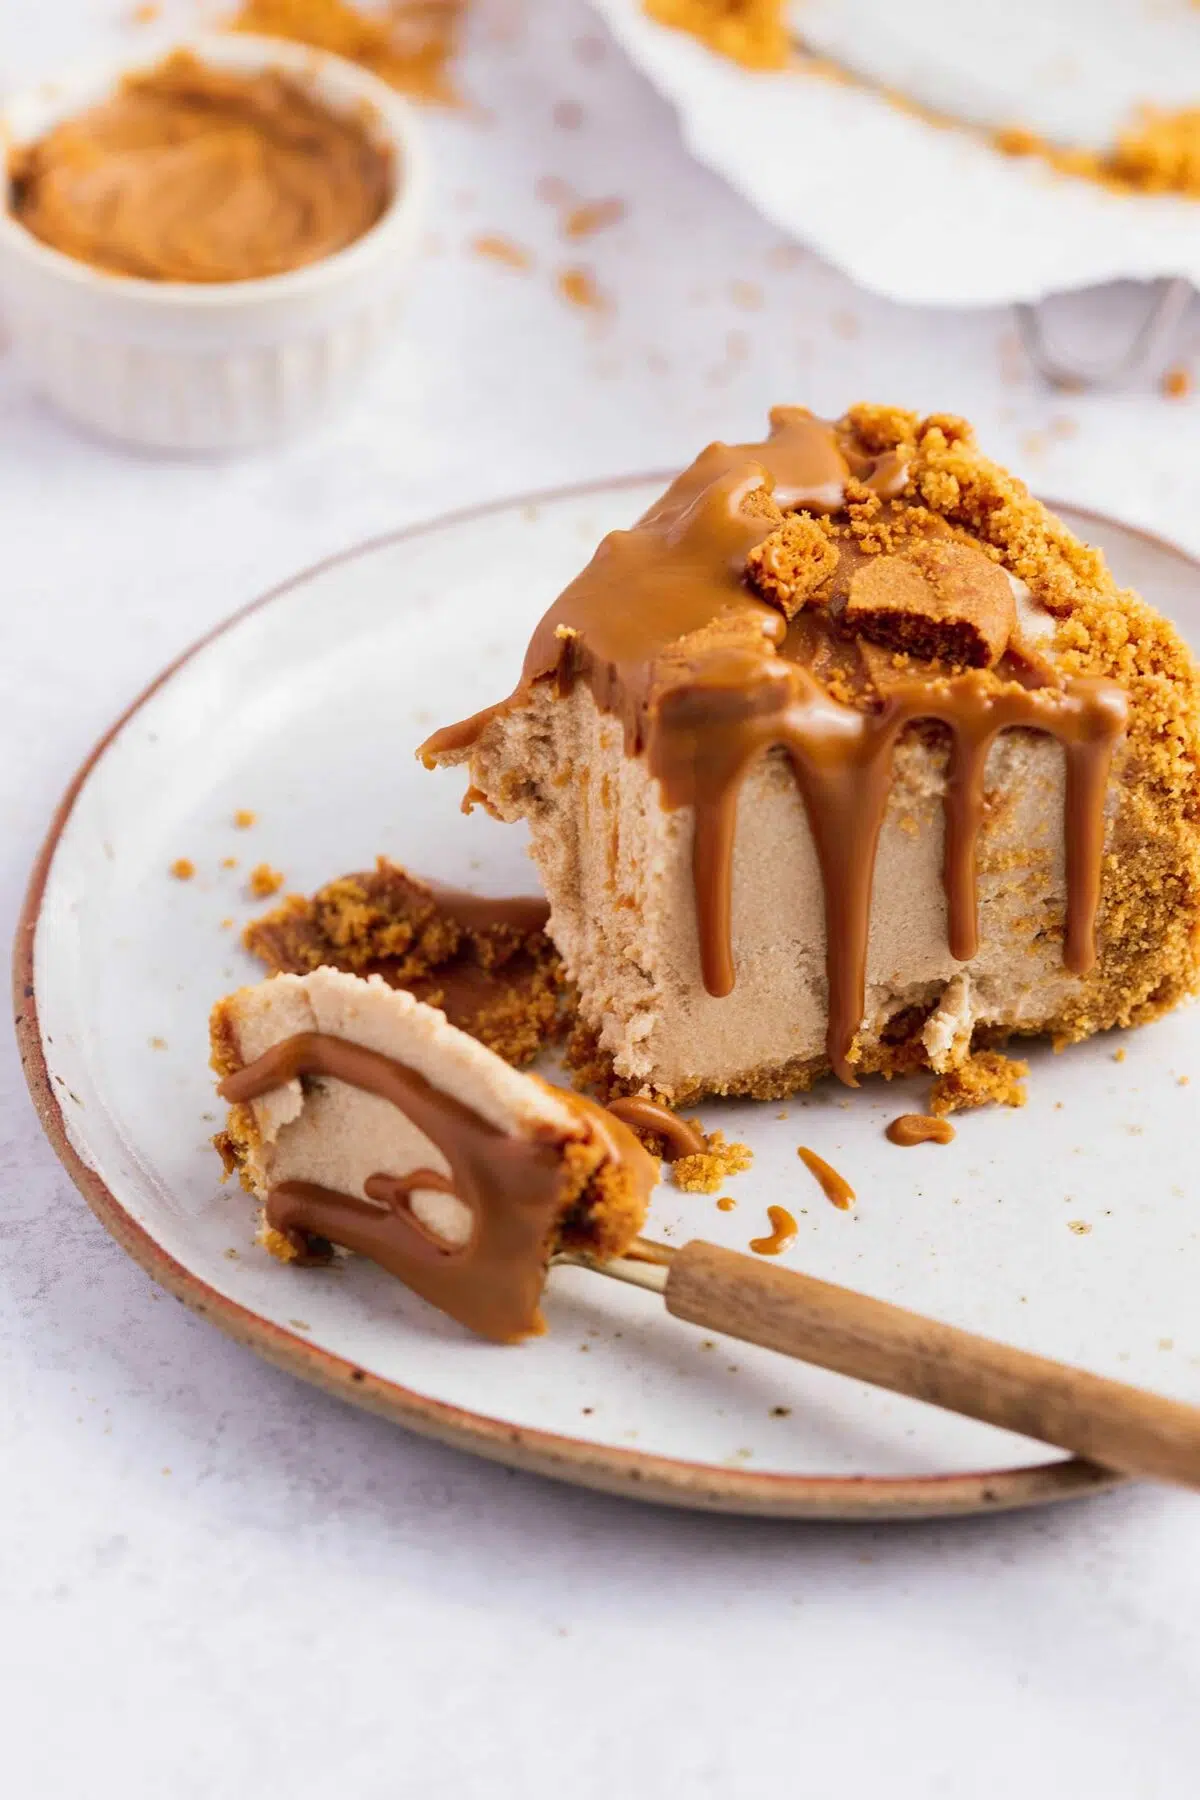
This decadent and indulgent no-bake vegan biscoff cheesecake is super easy to make with only 9 ingredients required! The biscoff-flavoured rich and creamy cheesecake and the butter biscuit base create a perfect balance in texture and flavour. It’s topped with more biscoff spread and biscuits to maximise the flavour of melty biscoff in every bite! This cheesecake recipe is perfect for bringing to parties and enjoying with friends.
*This post may contain affiliate links. For full disclosure visit our Affiliate Disclosure page.
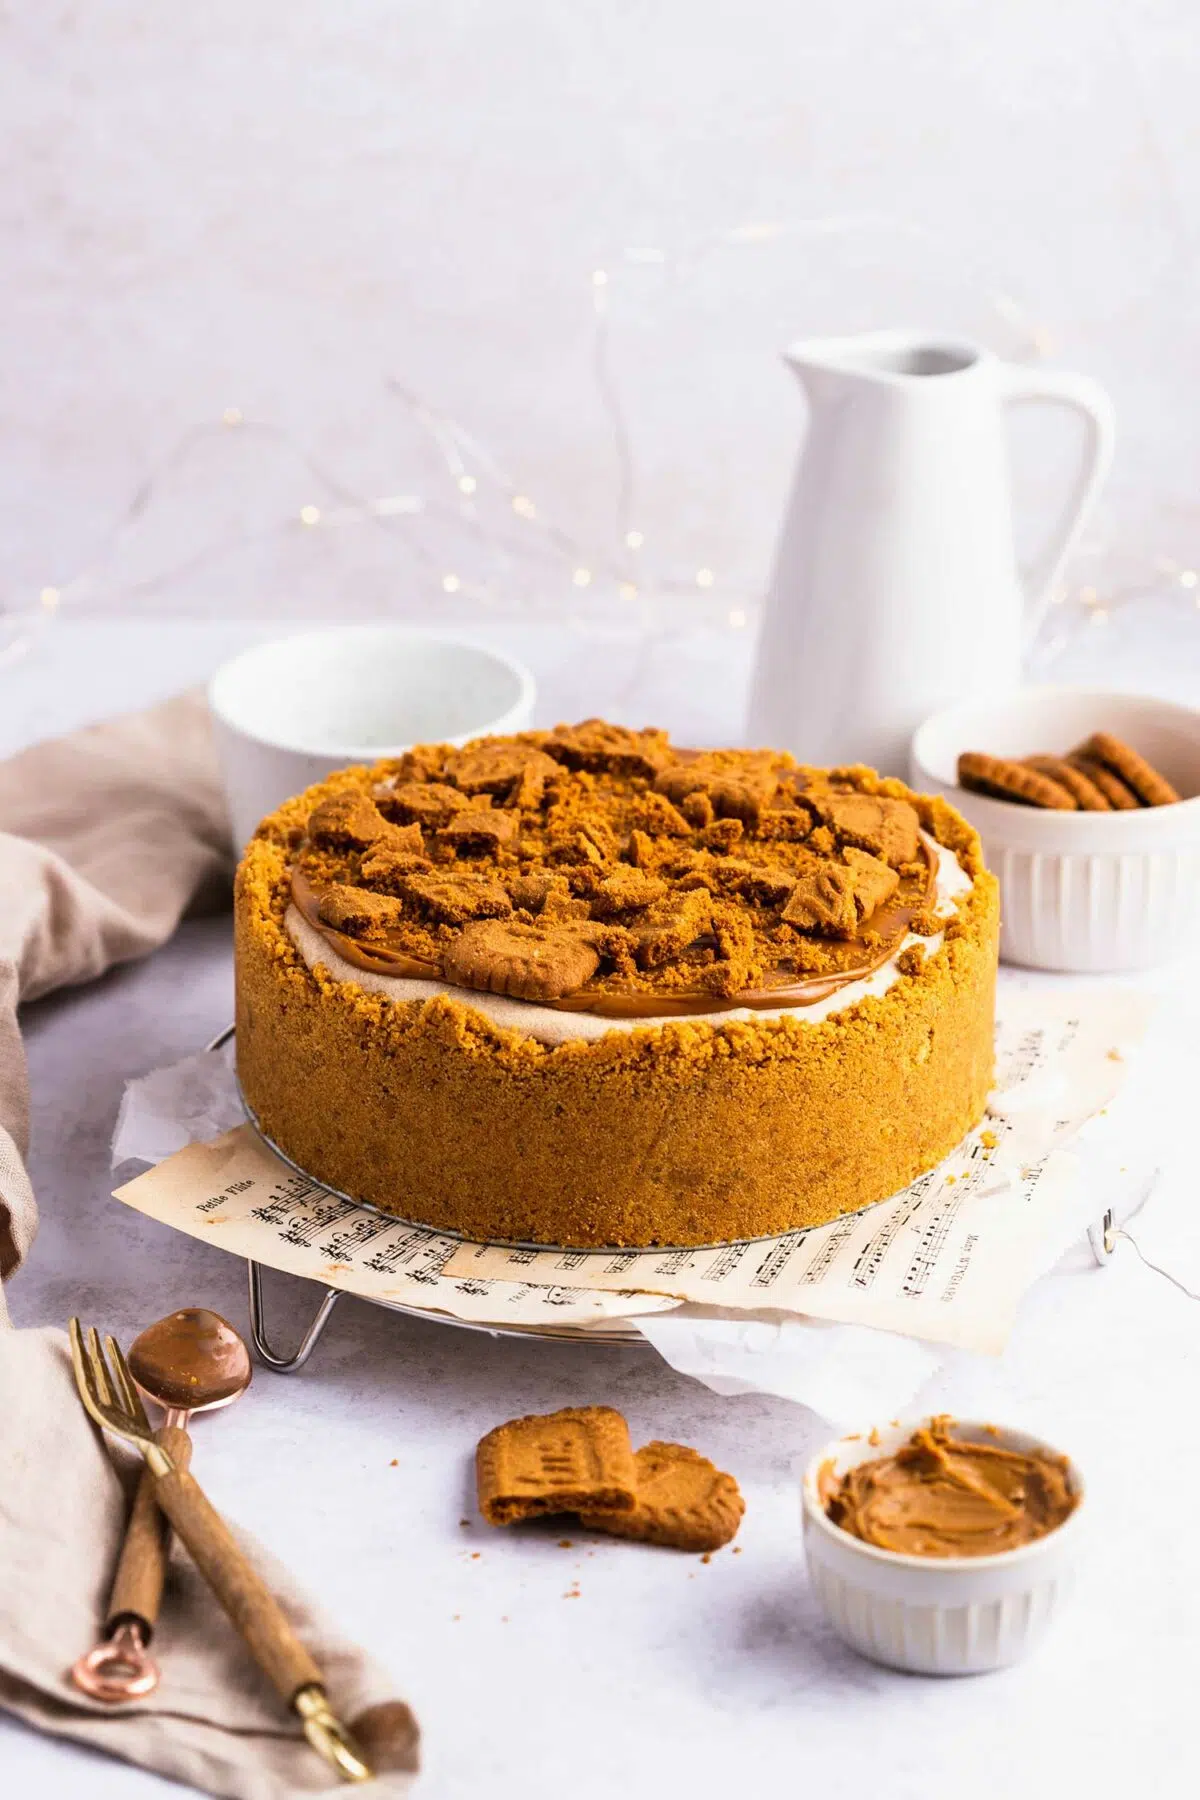
Table of Contents
If you love biscoff and cheesecake, this vegan biscoff cheesecake is your dream come true! Ever since I discovered biscoff biscuit spread, I’ve been loving it on my toasts and porridge and started baking with it too. In fact, I have a bunch of biscoff recipes on The Chestnut Bakery! When I tell you this recipe is a whole lot better than traditional cheesecake, you can give me your full trust because this is the best biscoff cheesecake ever!
On top of that, it’s so easy to make with simple ingredients you can get in your local supermarket! There’s no need for baking, all you need to do is mix, pour, and chill, easy! The sweetener I used for this recipe is maple syrup which worked out perfectly with the caramel and cinnamon flavours coming from biscoff, and it’s a little bit healthier than using lots of icing sugar combined with coconut base cream cheese!
Recipe overview – why you’ll love this vegan biscoff cheesecake recipe
- Level: Easy
- Taste: Caramelly biscoff with cosy spices
- Texture: Rich and creamy
- Diet: Plant-based, dairy-free, eggless, nut-free, and can be gluten-free
- Time: 4 hours 20 mins
- Occasion: Christmas, Thanksgiving, holiday events, birthdays, and more

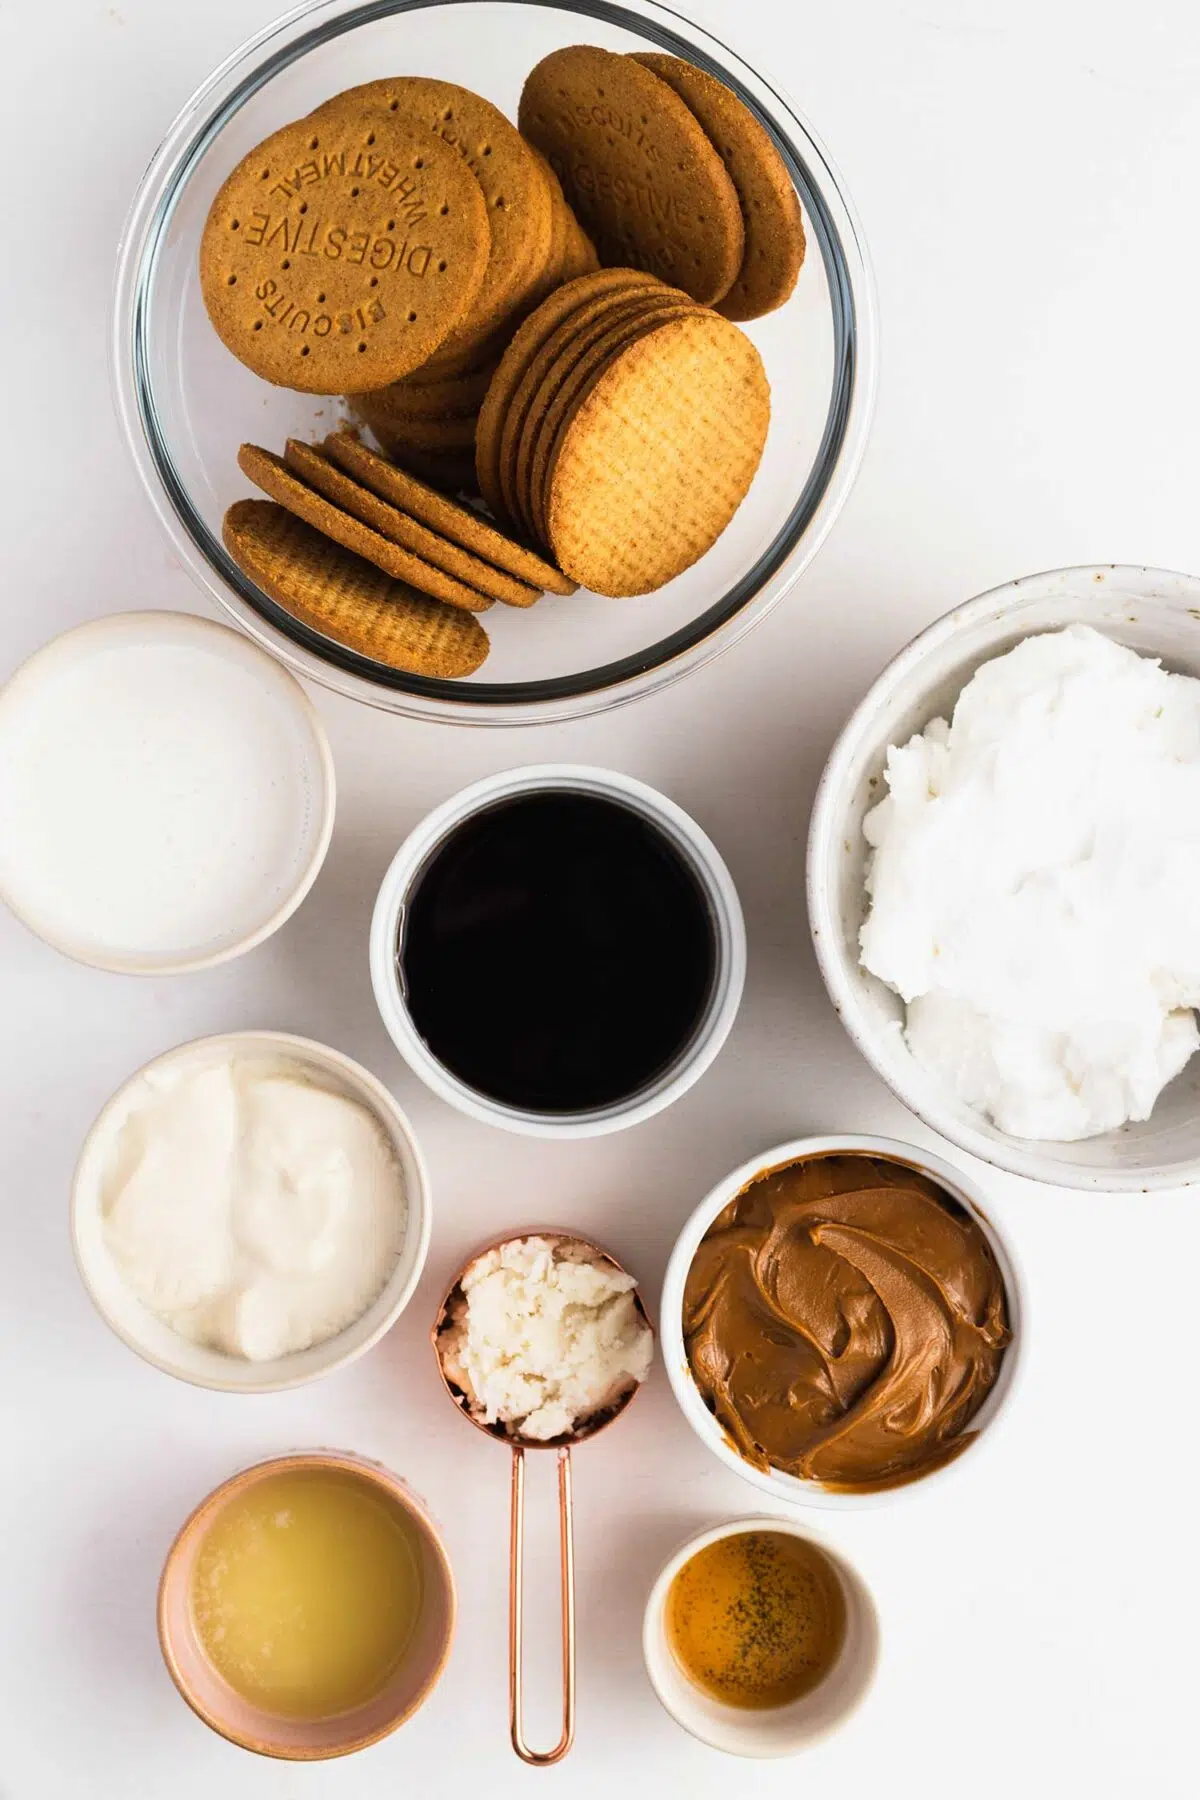
Main ingredients and substitutions
Biscoff spread: What is biscoff spread? If you don’t know, biscoff biscuits are caramel biscuits made by the brand Lotus Biscoff. The spread is made from these cookies so basically it’s cookie butter! How yummy does that sound? It’s honestly so delicious. This cheesecake is full of biscoff flavour in the crust and cheesecake, but the flavour is not too overwhelming.
Digestive biscuits: I used digestive biscuits for the base of the crust layer and added the perfect amount of biscoff spread to create the perfect balance of biscoff flavour! Using all biscoff biscuits alone can make the taste of the cheesecake too intense and overwhelming, so mixing digestive biscuits and biscoff spread is the way to go here! You can use your favourite digestive biscuits, I used Gullon’s one.
Vegan butter: I used Naturli’s vegan butter for the crust! You can also use other brands’ vegan butter too. I also like Earth Balance.
Vegan cream cheese: For this recipe, I used vegan cream cheese from Violife! This one is the only vegan cream cheese I can get from my local supermarket so I use it a lot in my recipe but you can also use any other vegan cream cheese too! I think Sheese would work here.
Soy single cream: I love using single cream made with soy. It’s creamy, rich, yet light in texture and it’s great for vegan baking so I used it in this recipe too! You can also use other plant-based creams too such as oat single cream etc.
Soy yoghurt: Soy yoghurt is for adding a bit of cheesecake tanginess! Coconut, almond, or any other plant-based yoghurt would work in place of soy too.
Coconut butter: Coconut butter is creamed coconut flesh which works like butter in baking. I used it to make the cheesecake creamy and rich as well as to help make it firm in the fridge.
Maple syrup: The cheesecake is sweetened with maple syrup, it tastes so much better than powdered sugar and also makes it a little healthier than other cheesecakes! You can also use agave syrup or date syrup if you prefer.
Other ingredients: vanilla extract.
*I use bone char-free sugars for all of my recipes. I cover the topic in my article Vegan Baking 101. Go to the “Is sugar vegan?” section to learn more!
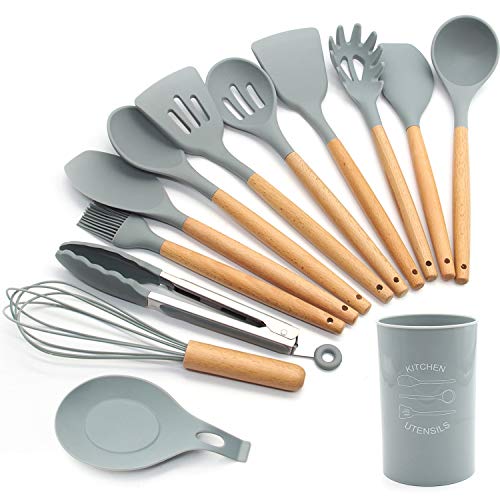
Recommended equipment for this recipe
Cake tin: I used an 18cm (7in) cake tin for this recipe! You can use a bigger tin too. Just spread the crust only on the bottom.
Electric mixer: You need an electric hand mixer or stand mixer to whip soy cream and mix it with other ingredients.
Food processor: I love my food processor from KitchenAid! It blitzes the digestive biscuits perfectly.
*The ingredient list and measurement for this recipe can be found in the recipe card at the bottom.
How to make this easy biscoff cheesecake
Step 1: Make the crust
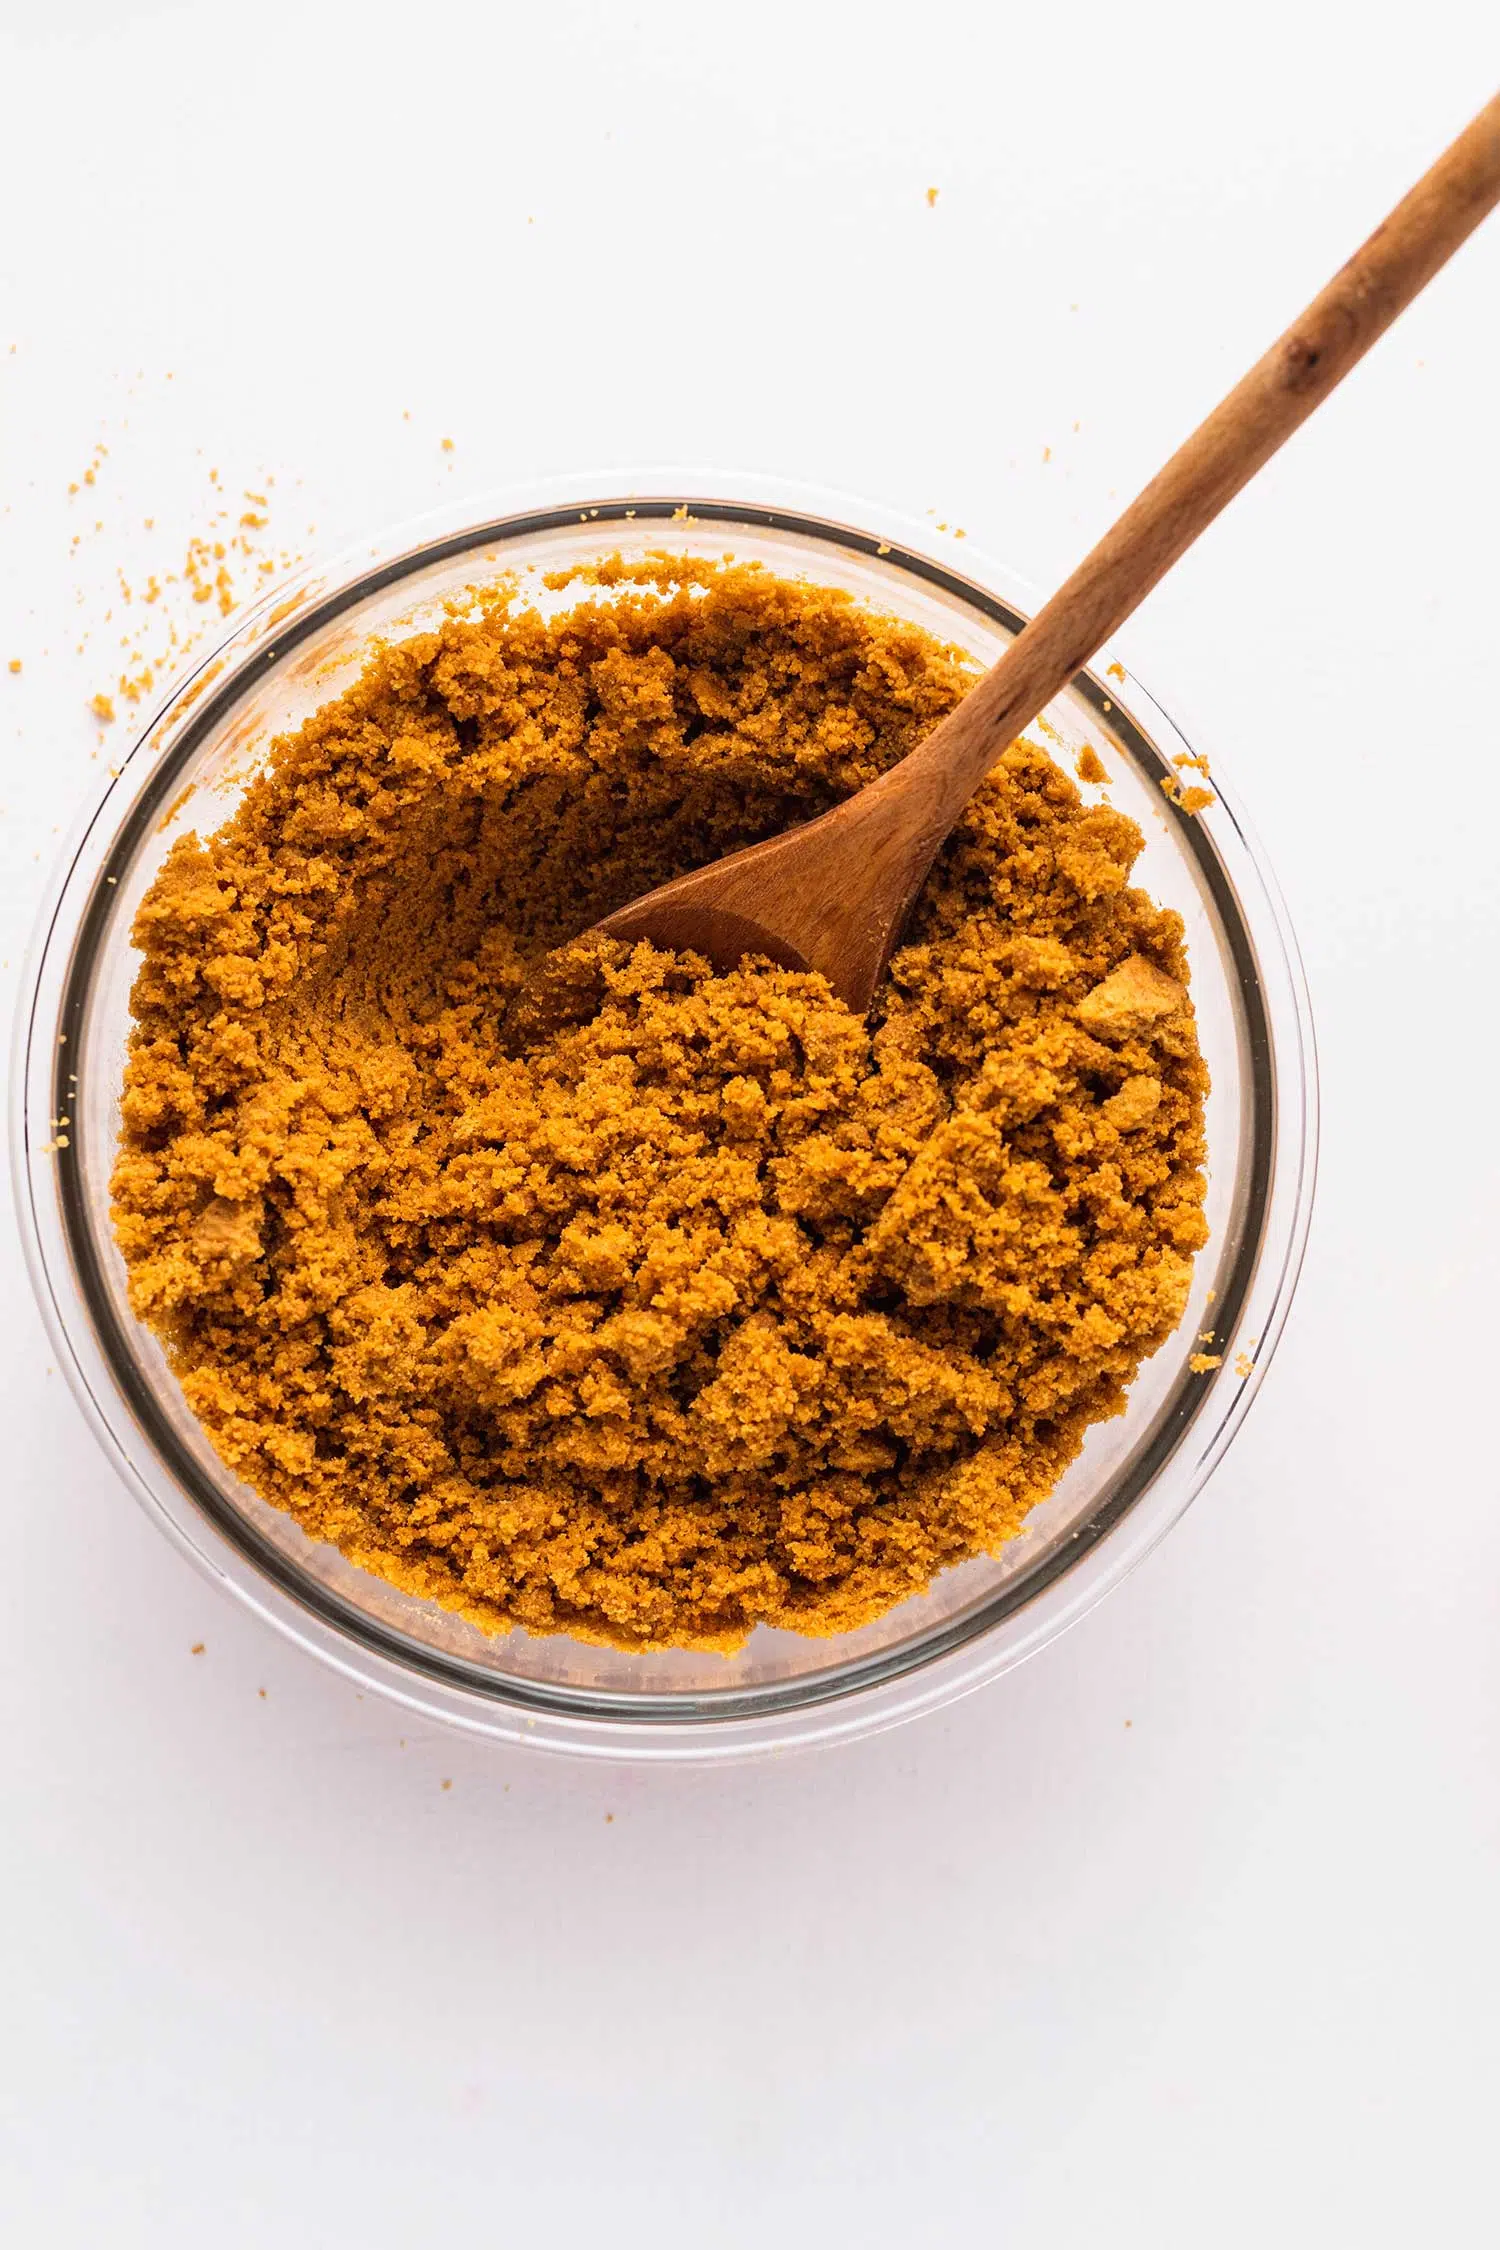
Let’s make the crust first! It’s super simple. In a food processor, blitz the digestive biscuits until very fine like flour. Until very fine is the key! The crust will not stick together in the fridge if it’s not processed well enough. It takes about 2 mins. Transfer the biscoff biscuit “flour” to a large mixing bowl, and add the melted vegan butter and melted biscoff spread. Mix with a large wooden spoon or a silicone spatula until well combined.
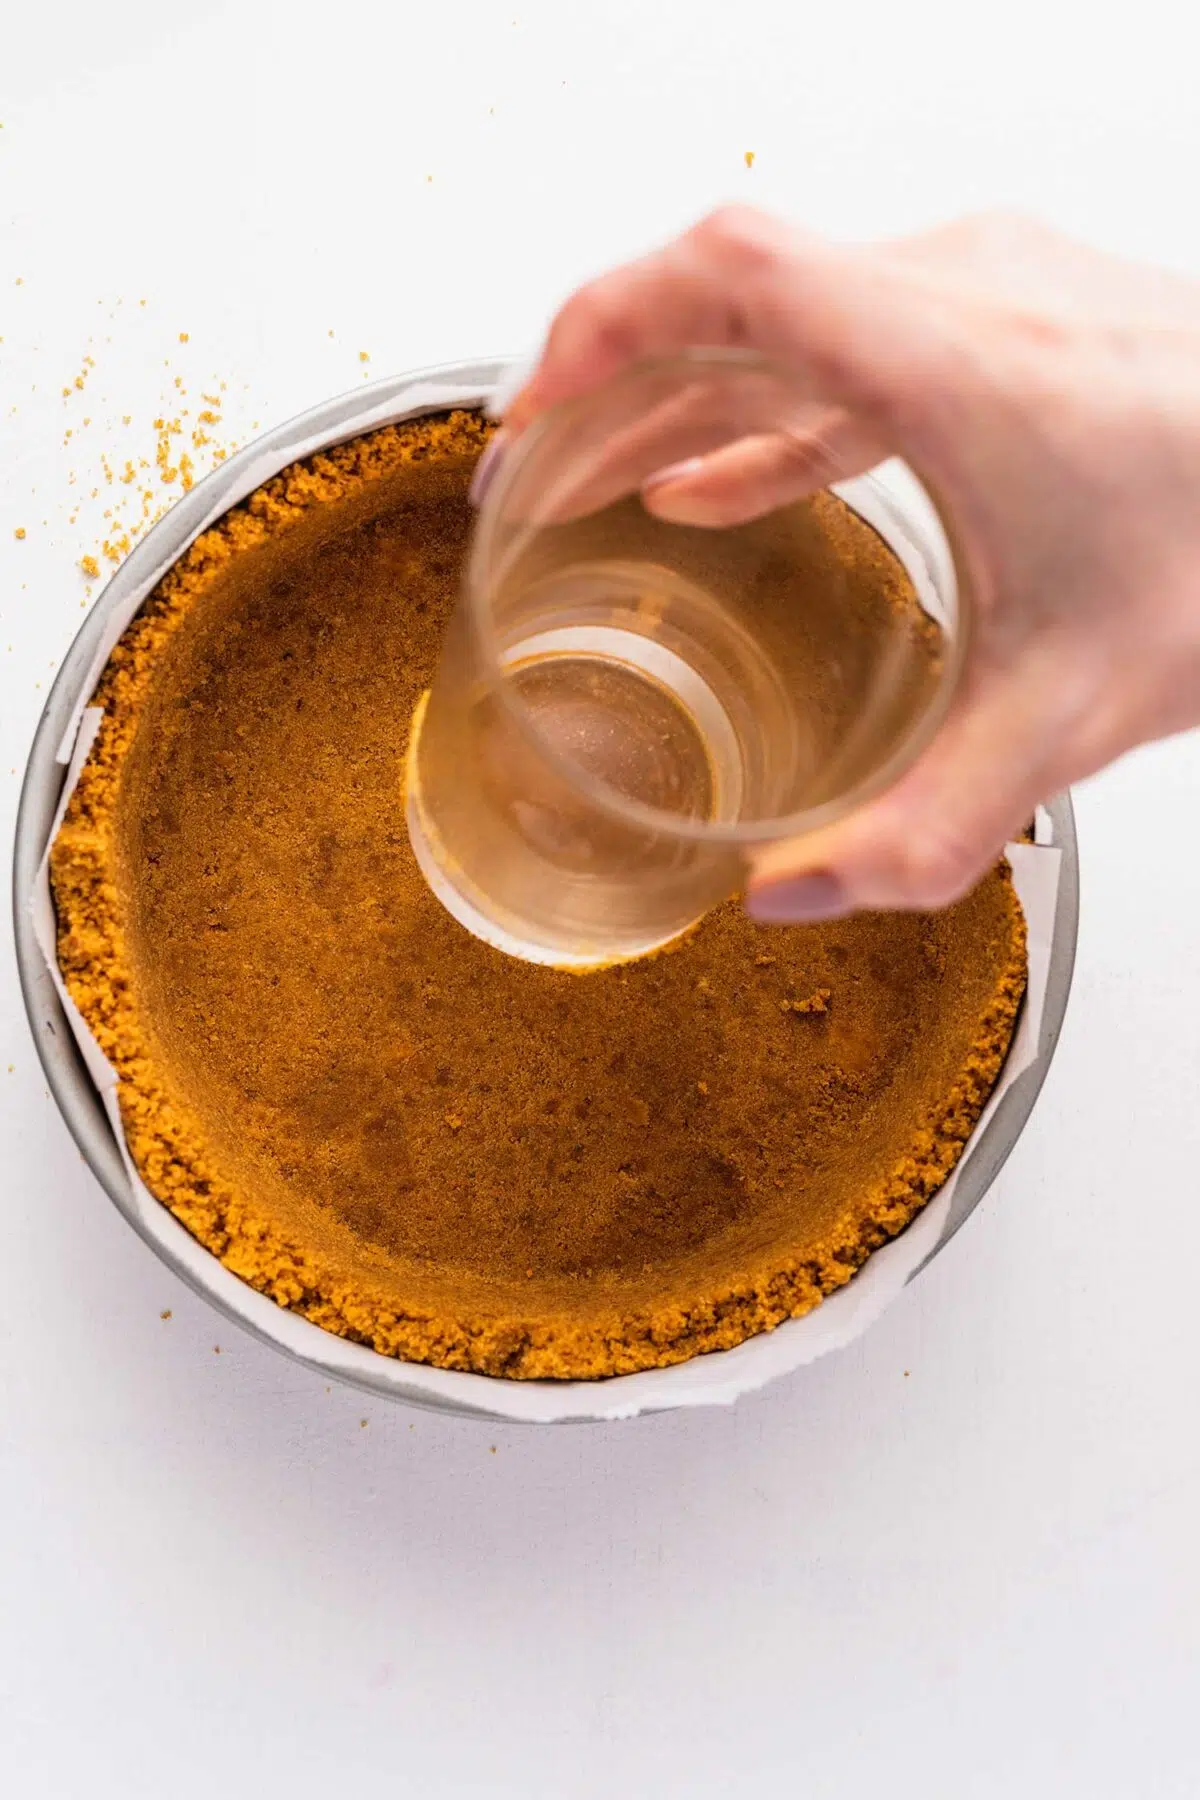
Pour the mixture into a cake tine lined with parchment paper and spread evenly. Using the bottom of a drinking glass or any clean thing with a flat surface, press down the crust to the bottom and to the side firmly. It should cover the bottom and 3/4 of the side! Set in the fridge while making the cheesecake filling.
Step 2: Make the Cheesecake filling
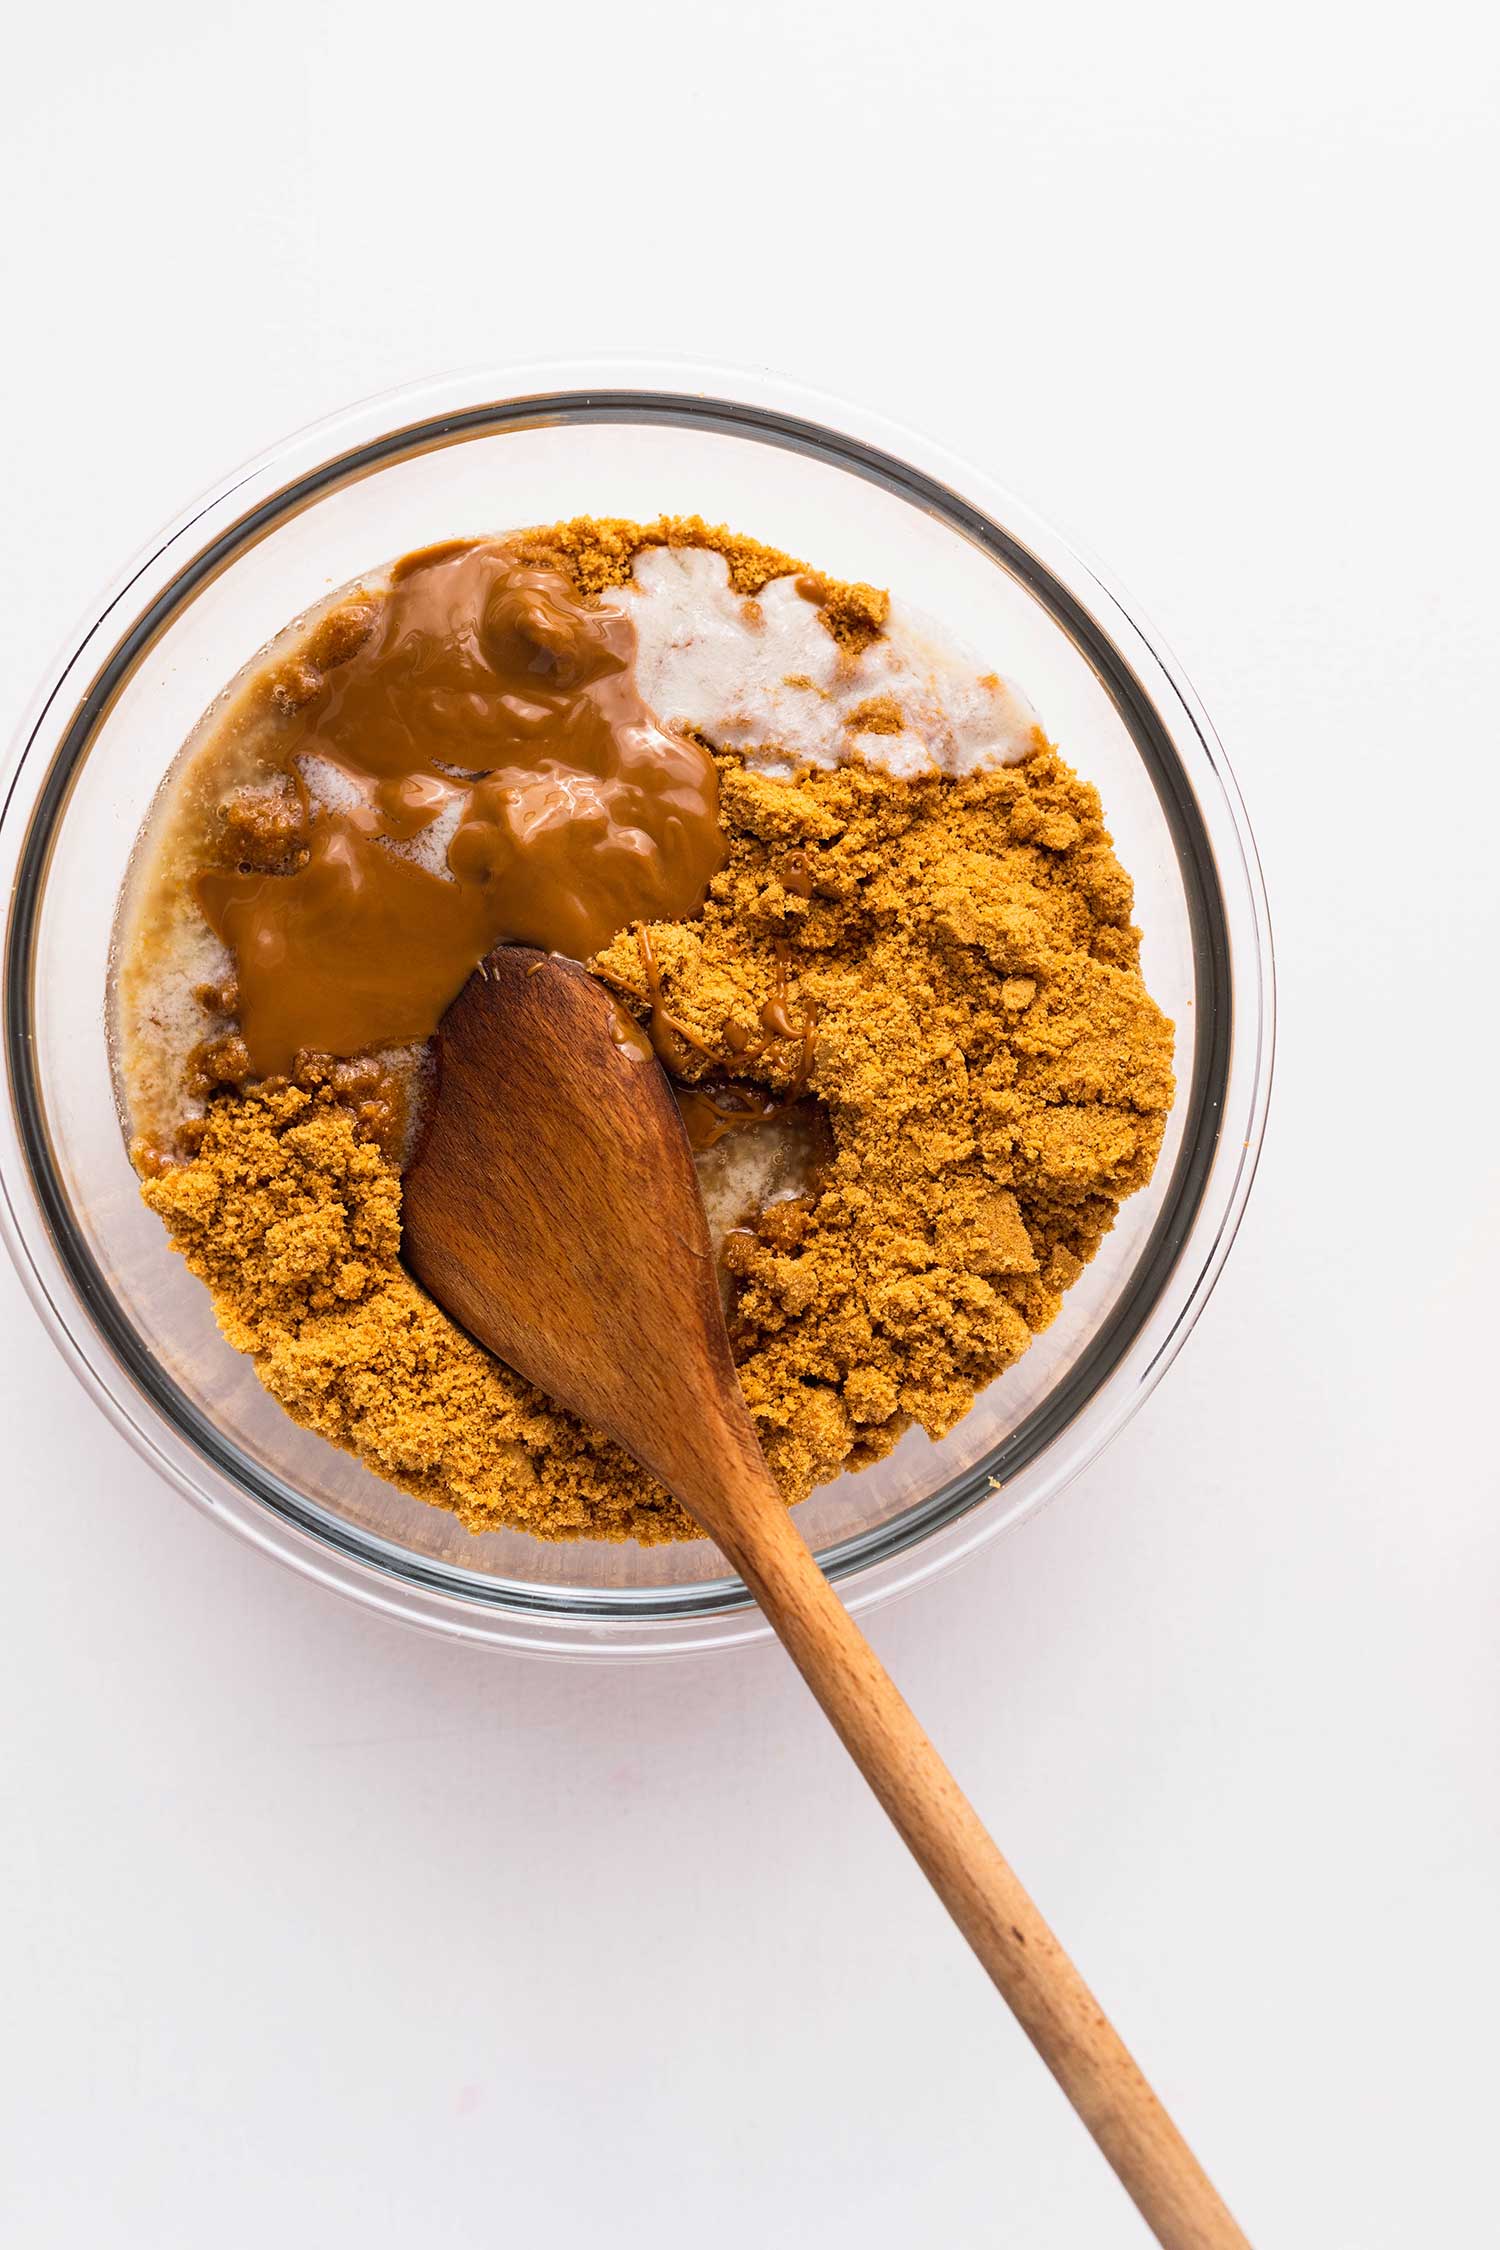
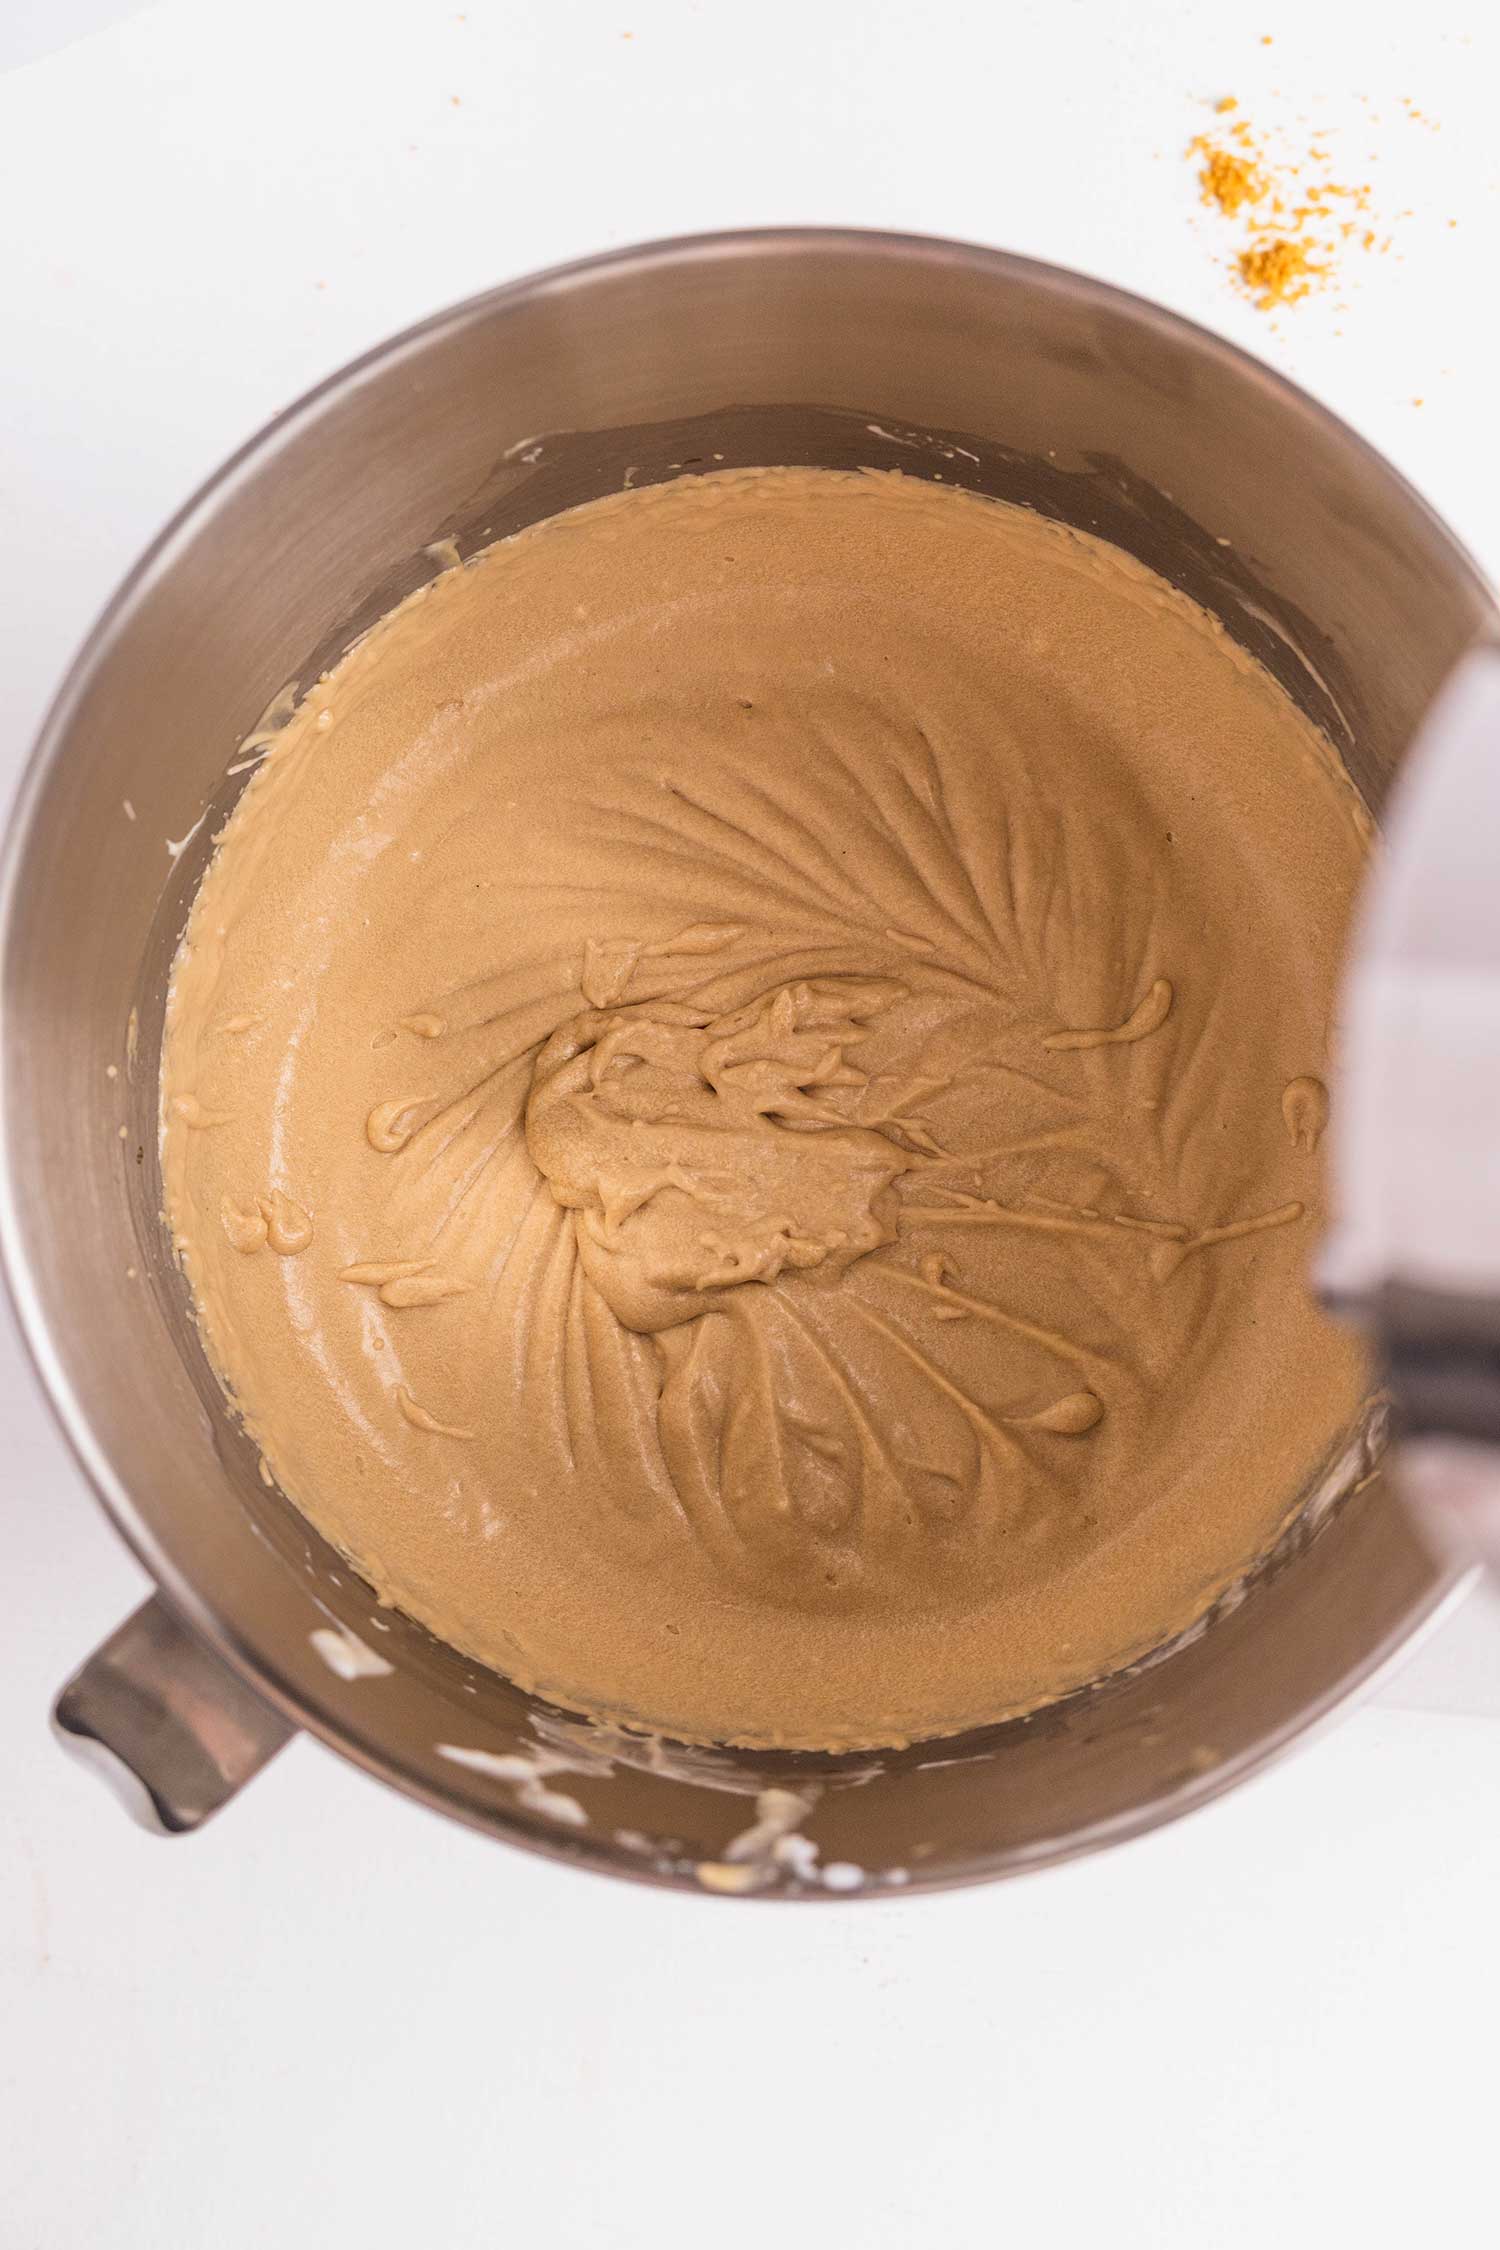
The fun part, making the cheesecake filling! To make the filling it’s super easy too. First, whip the soy single cream with a stand mixer or hand mixer until it’s fluffy and makes a firm peak. It takes about 3-5 mins. Make sure that the single cream and the tools are cold! The cream won’t whip up if the temperature is warm.
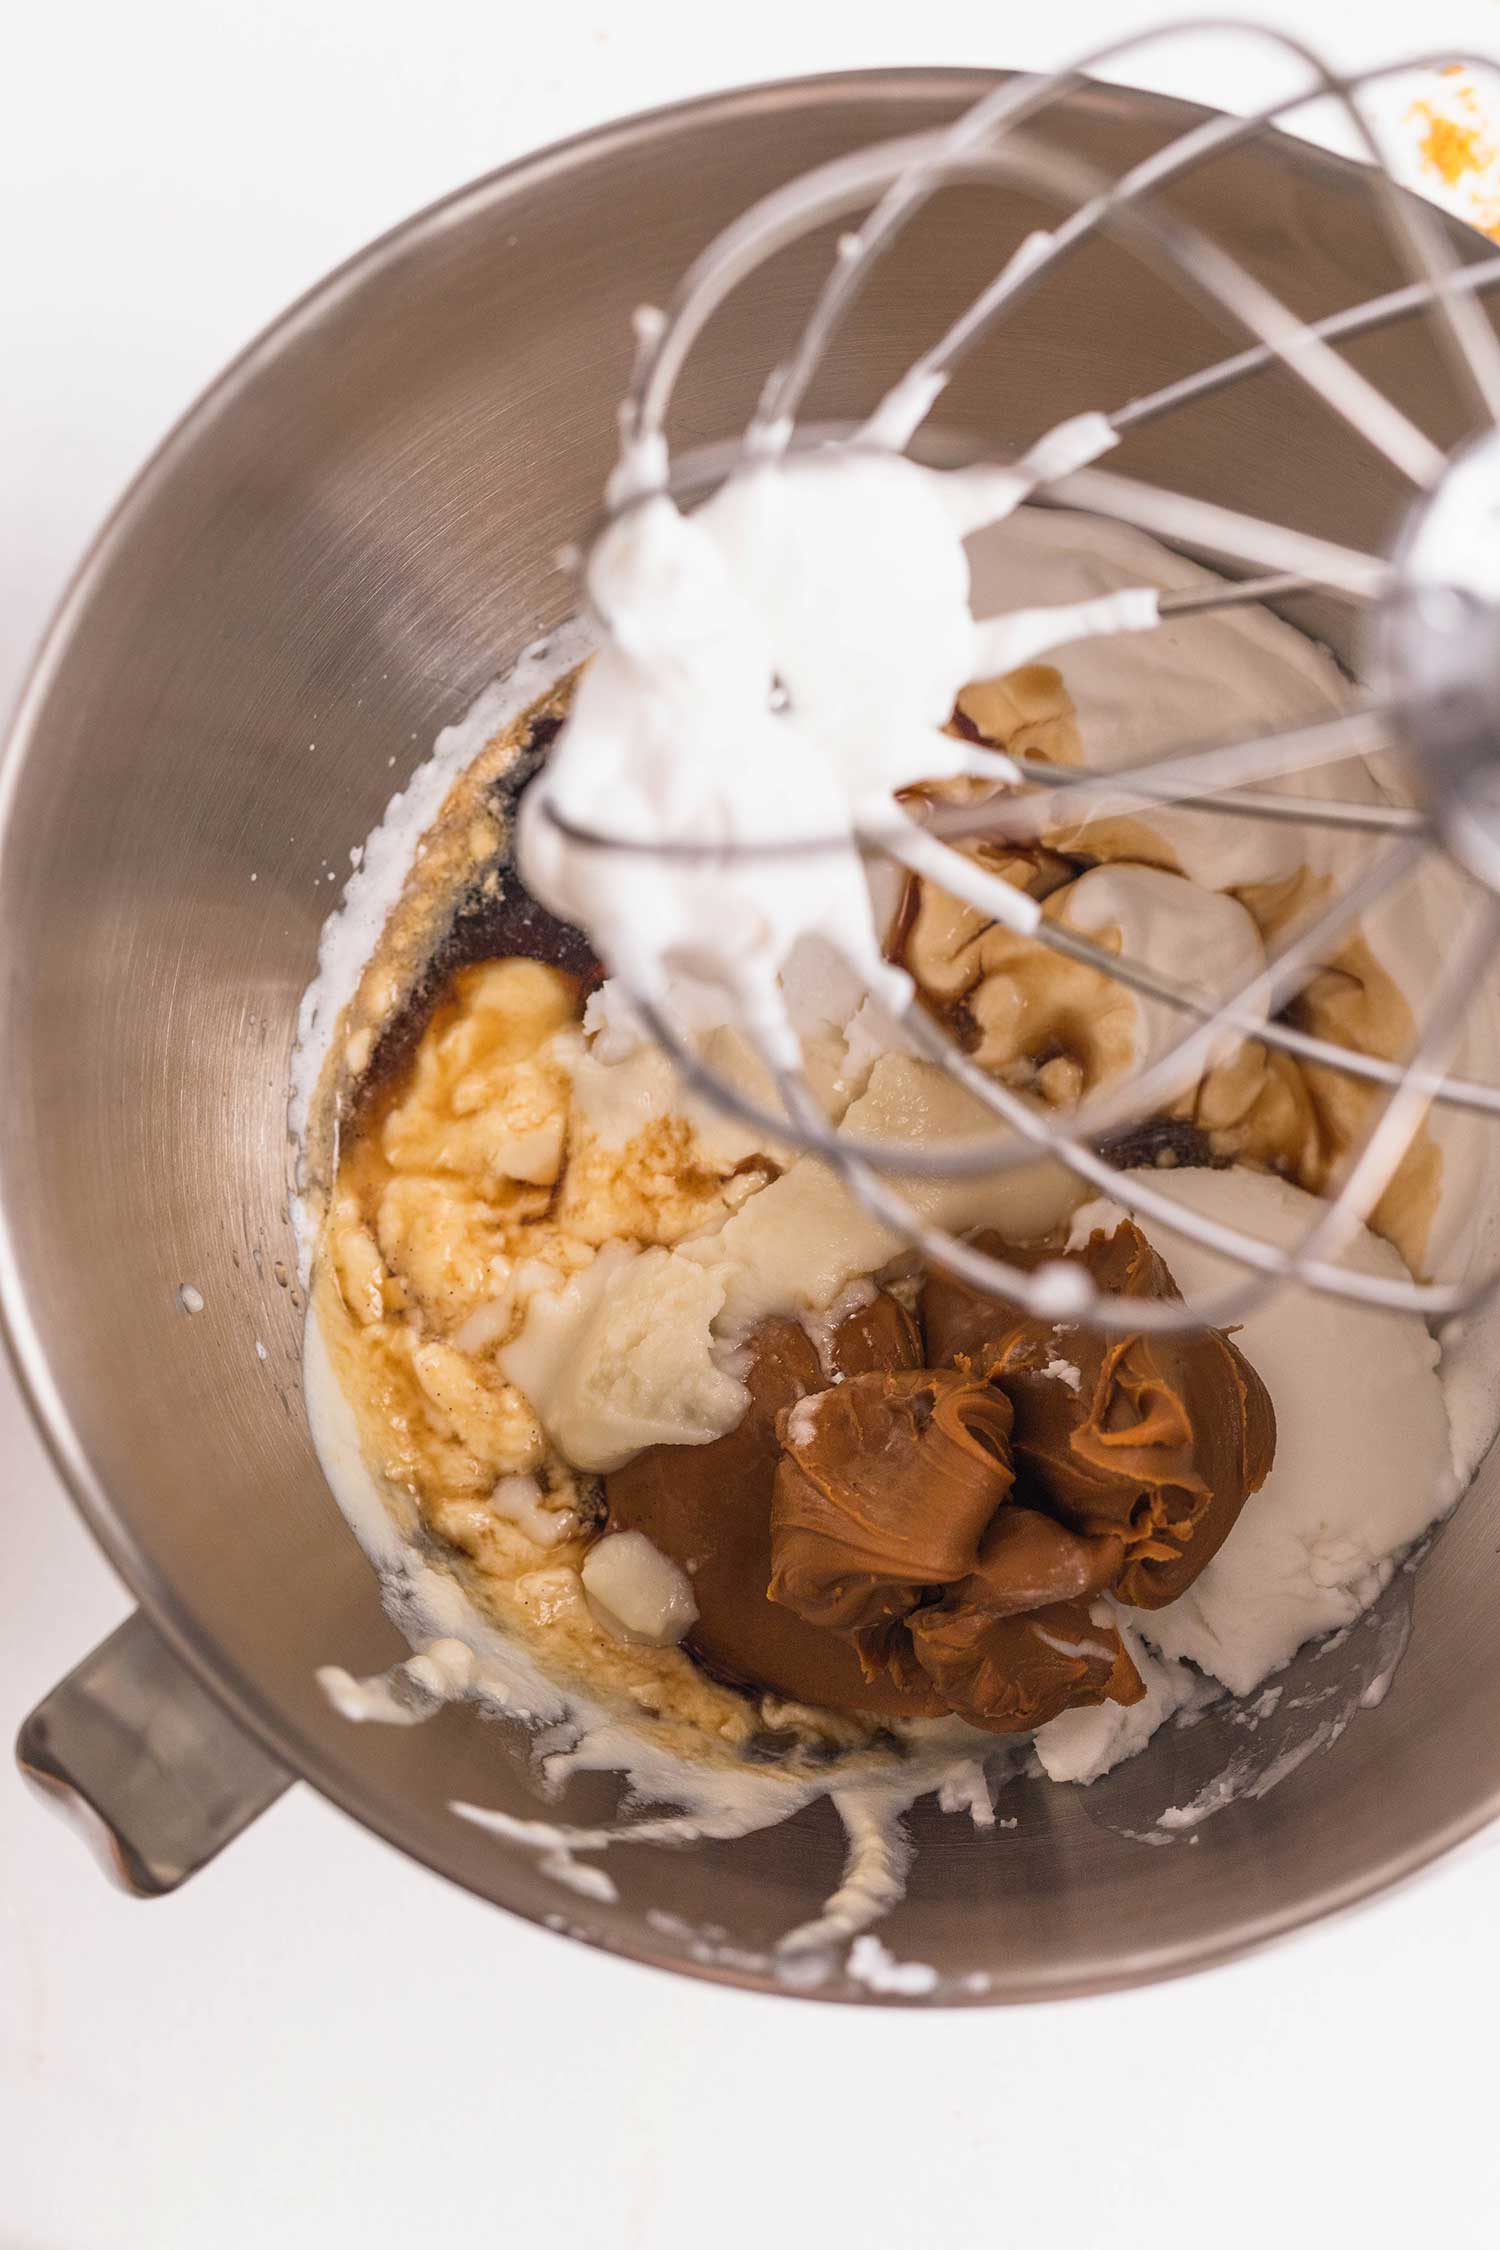
Add the rest of the ingredients to the whipped soy cream and mix at low speed until it’s just combined. Be careful not to overmix! Over mixing will deflate the whipped cream and make the texture of the cheesecake less creamy.
Step 3: Chill
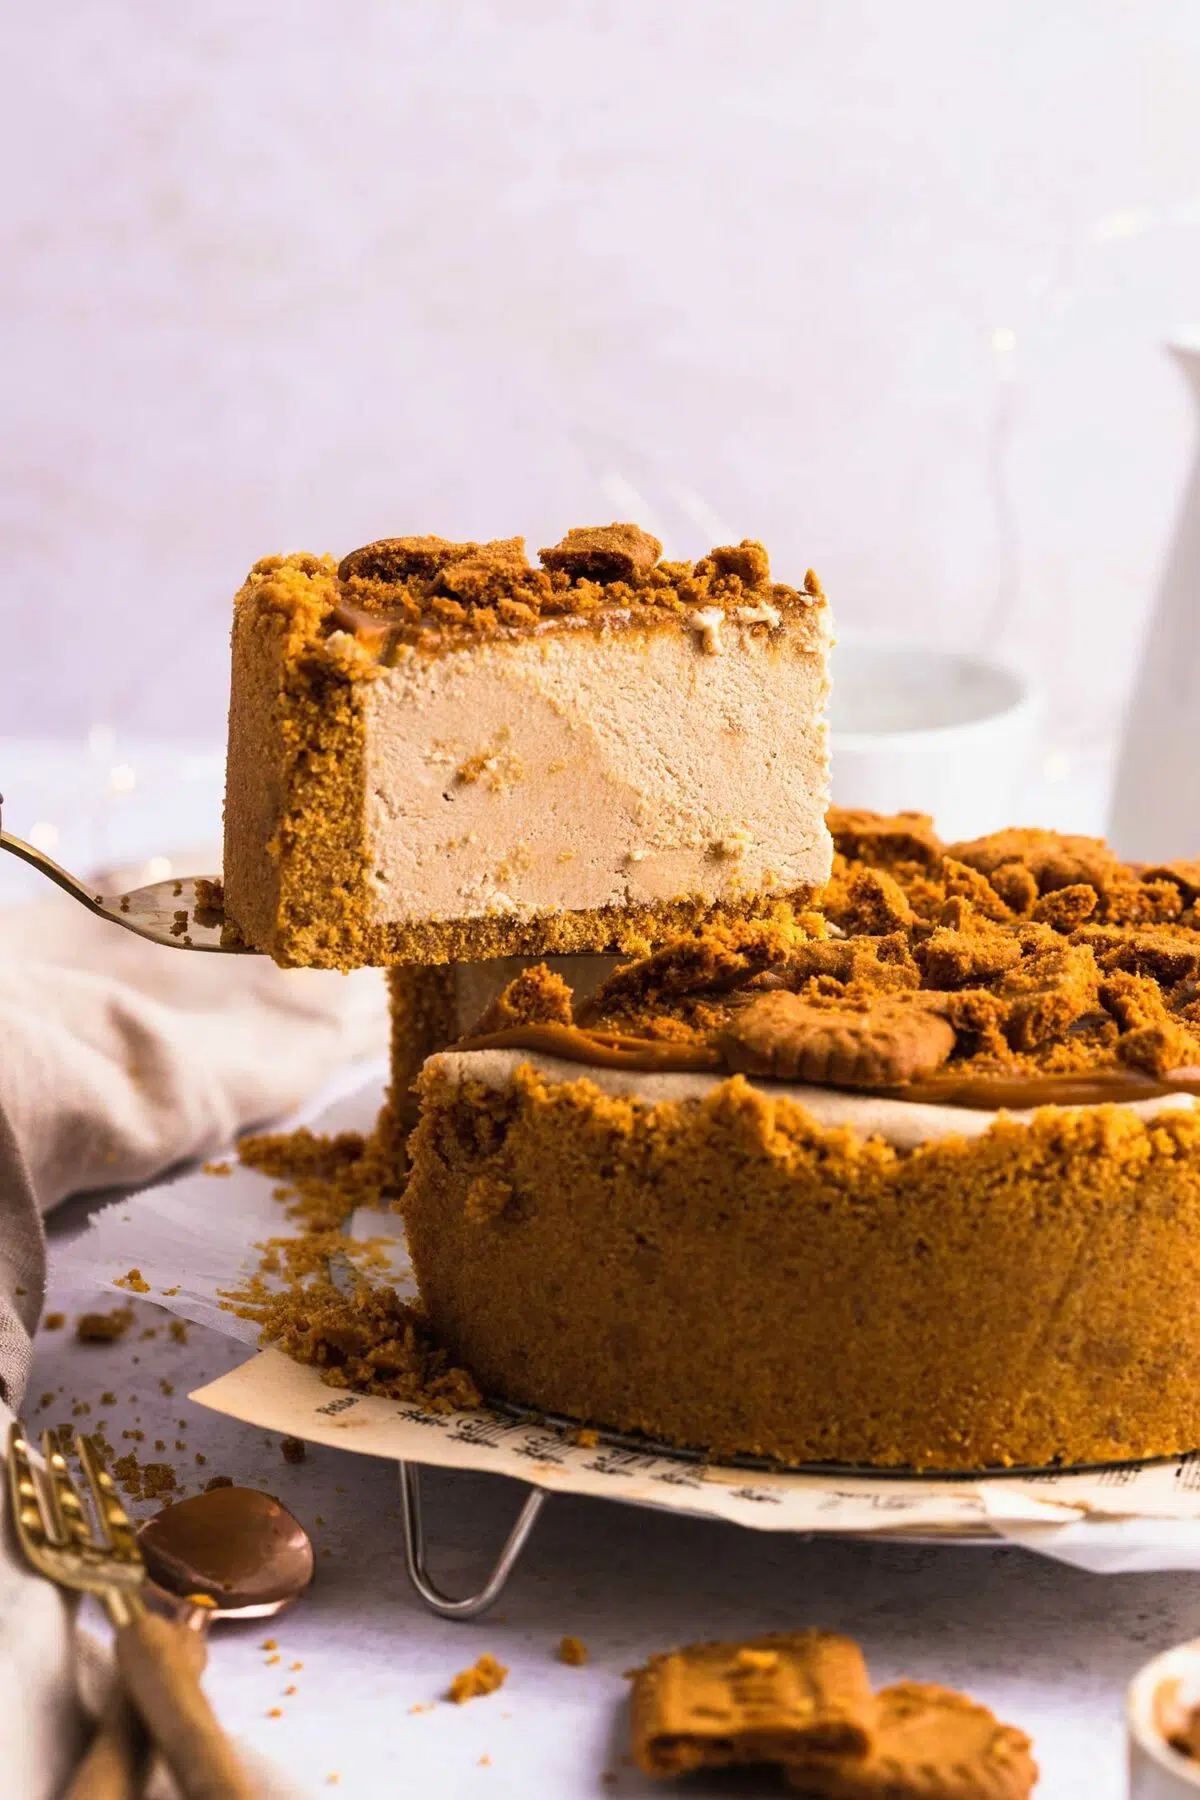
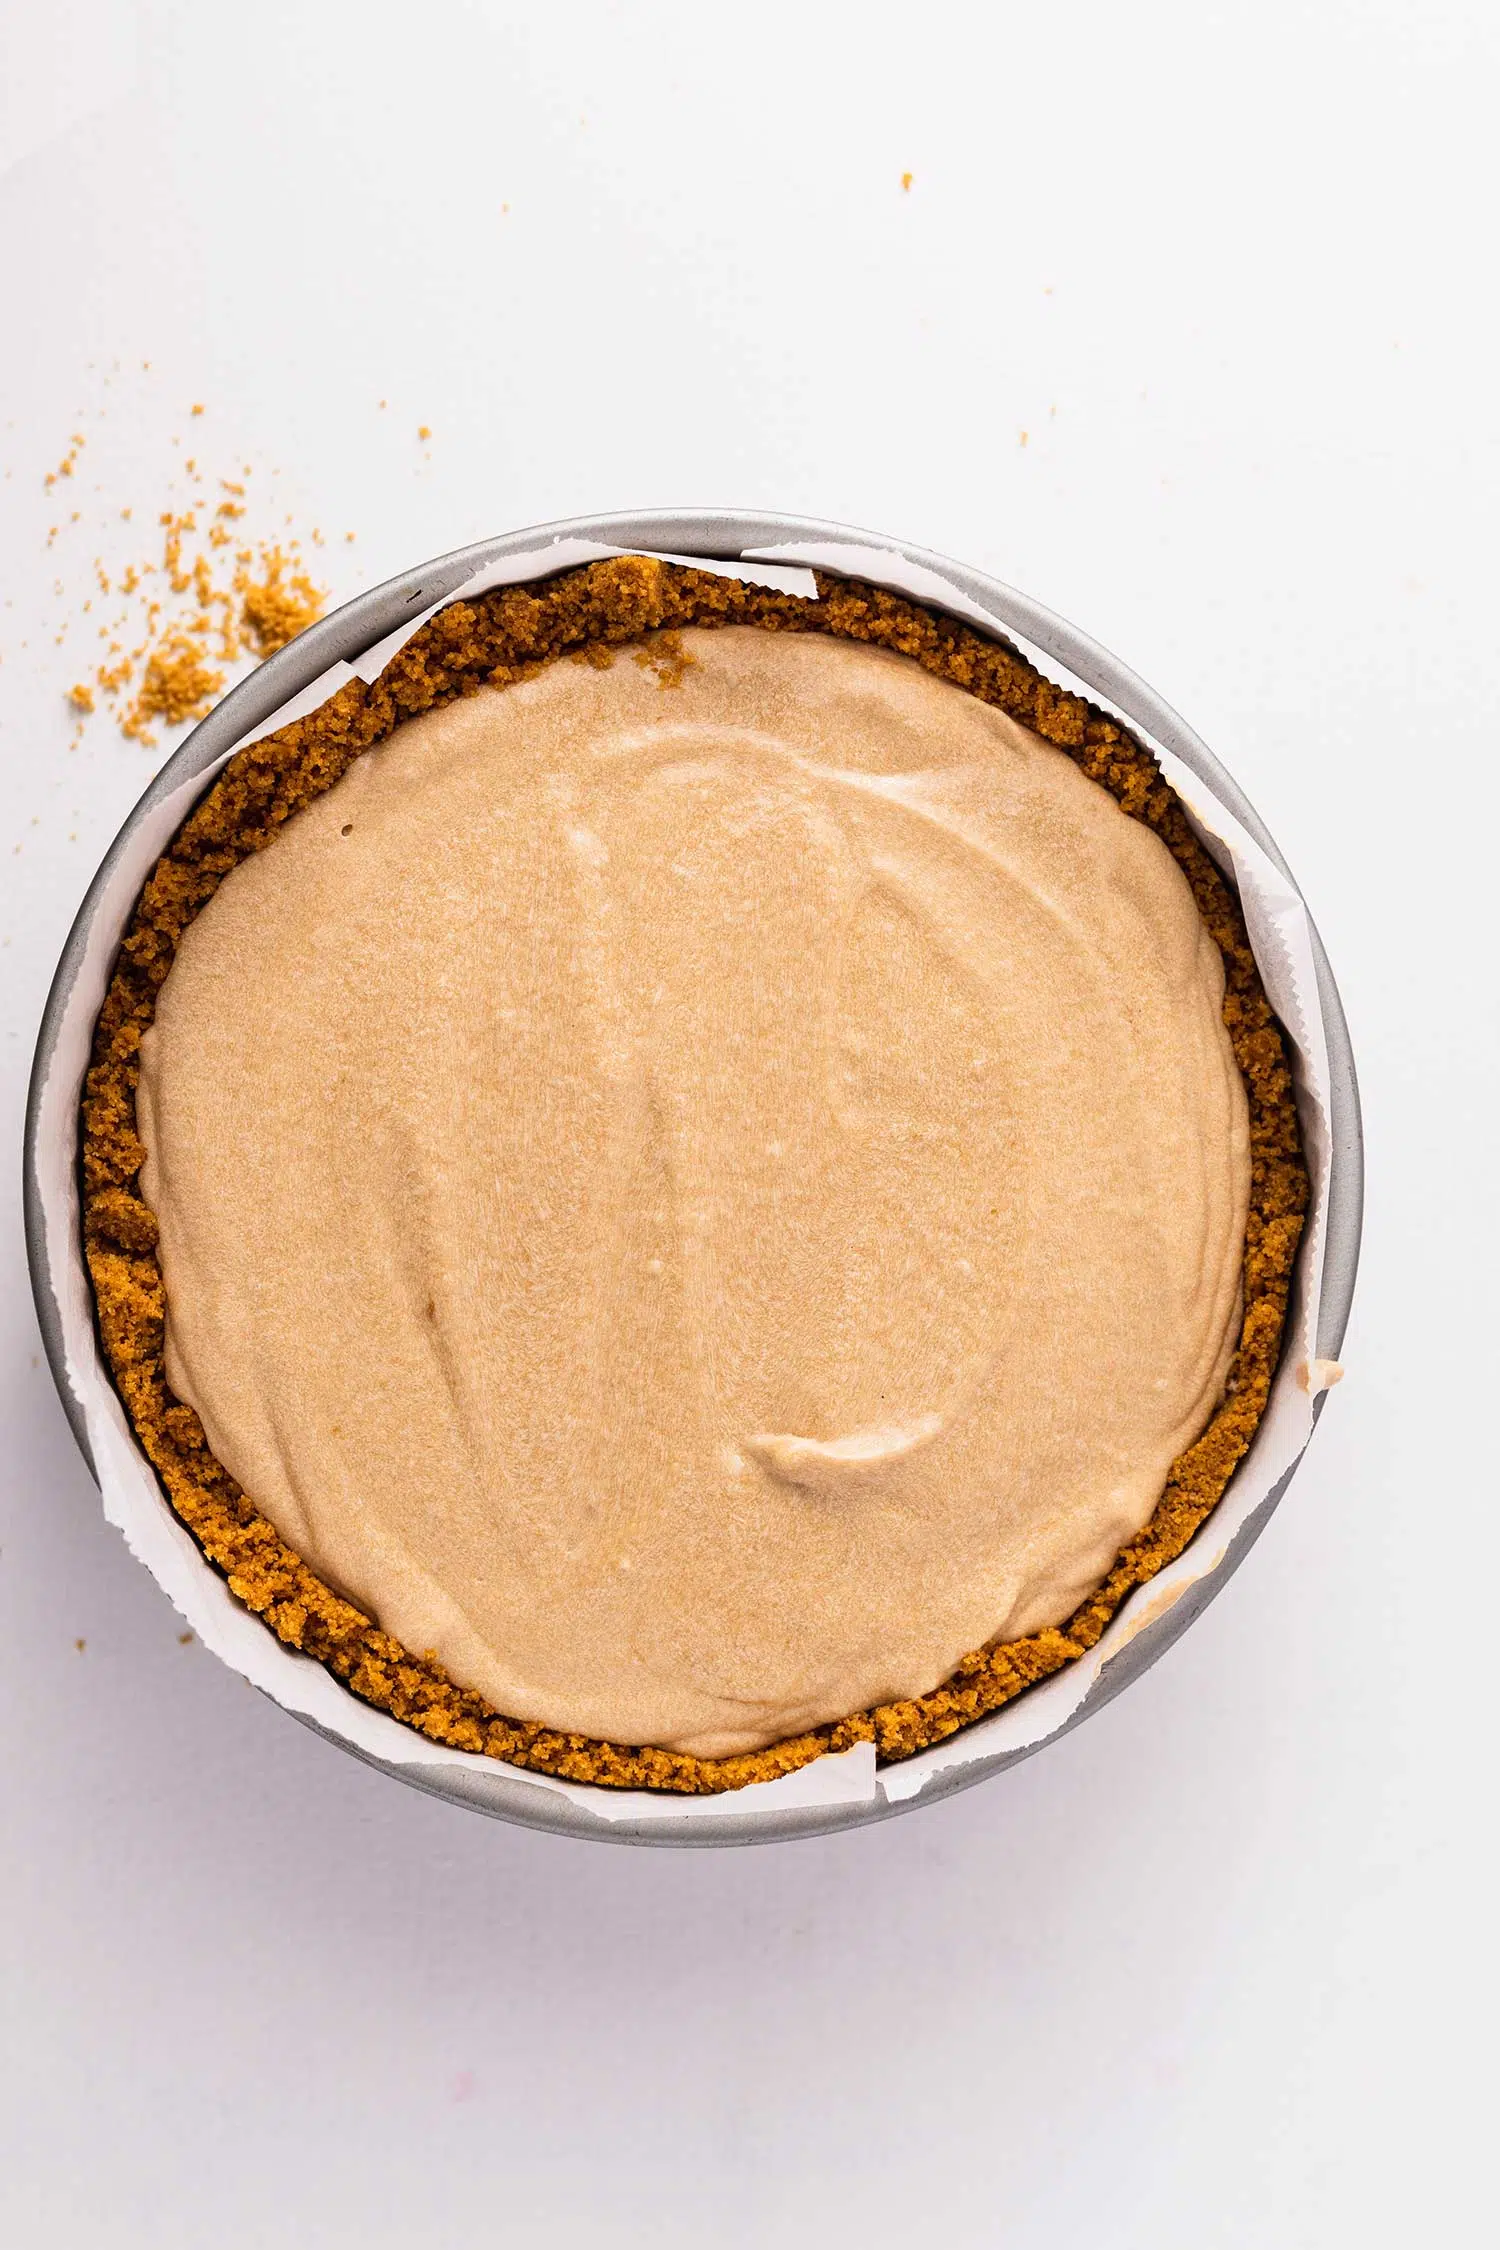
Pour the cheesecake mixture into the crust and smooth out the top evenly with a spatula. Now the hardest part of the recipe comes… Cover with a cling film and chill in the freezer for at least 4 hours or overnight. Be patient, the cheesecake is almost complete!
Step 4: Decorate
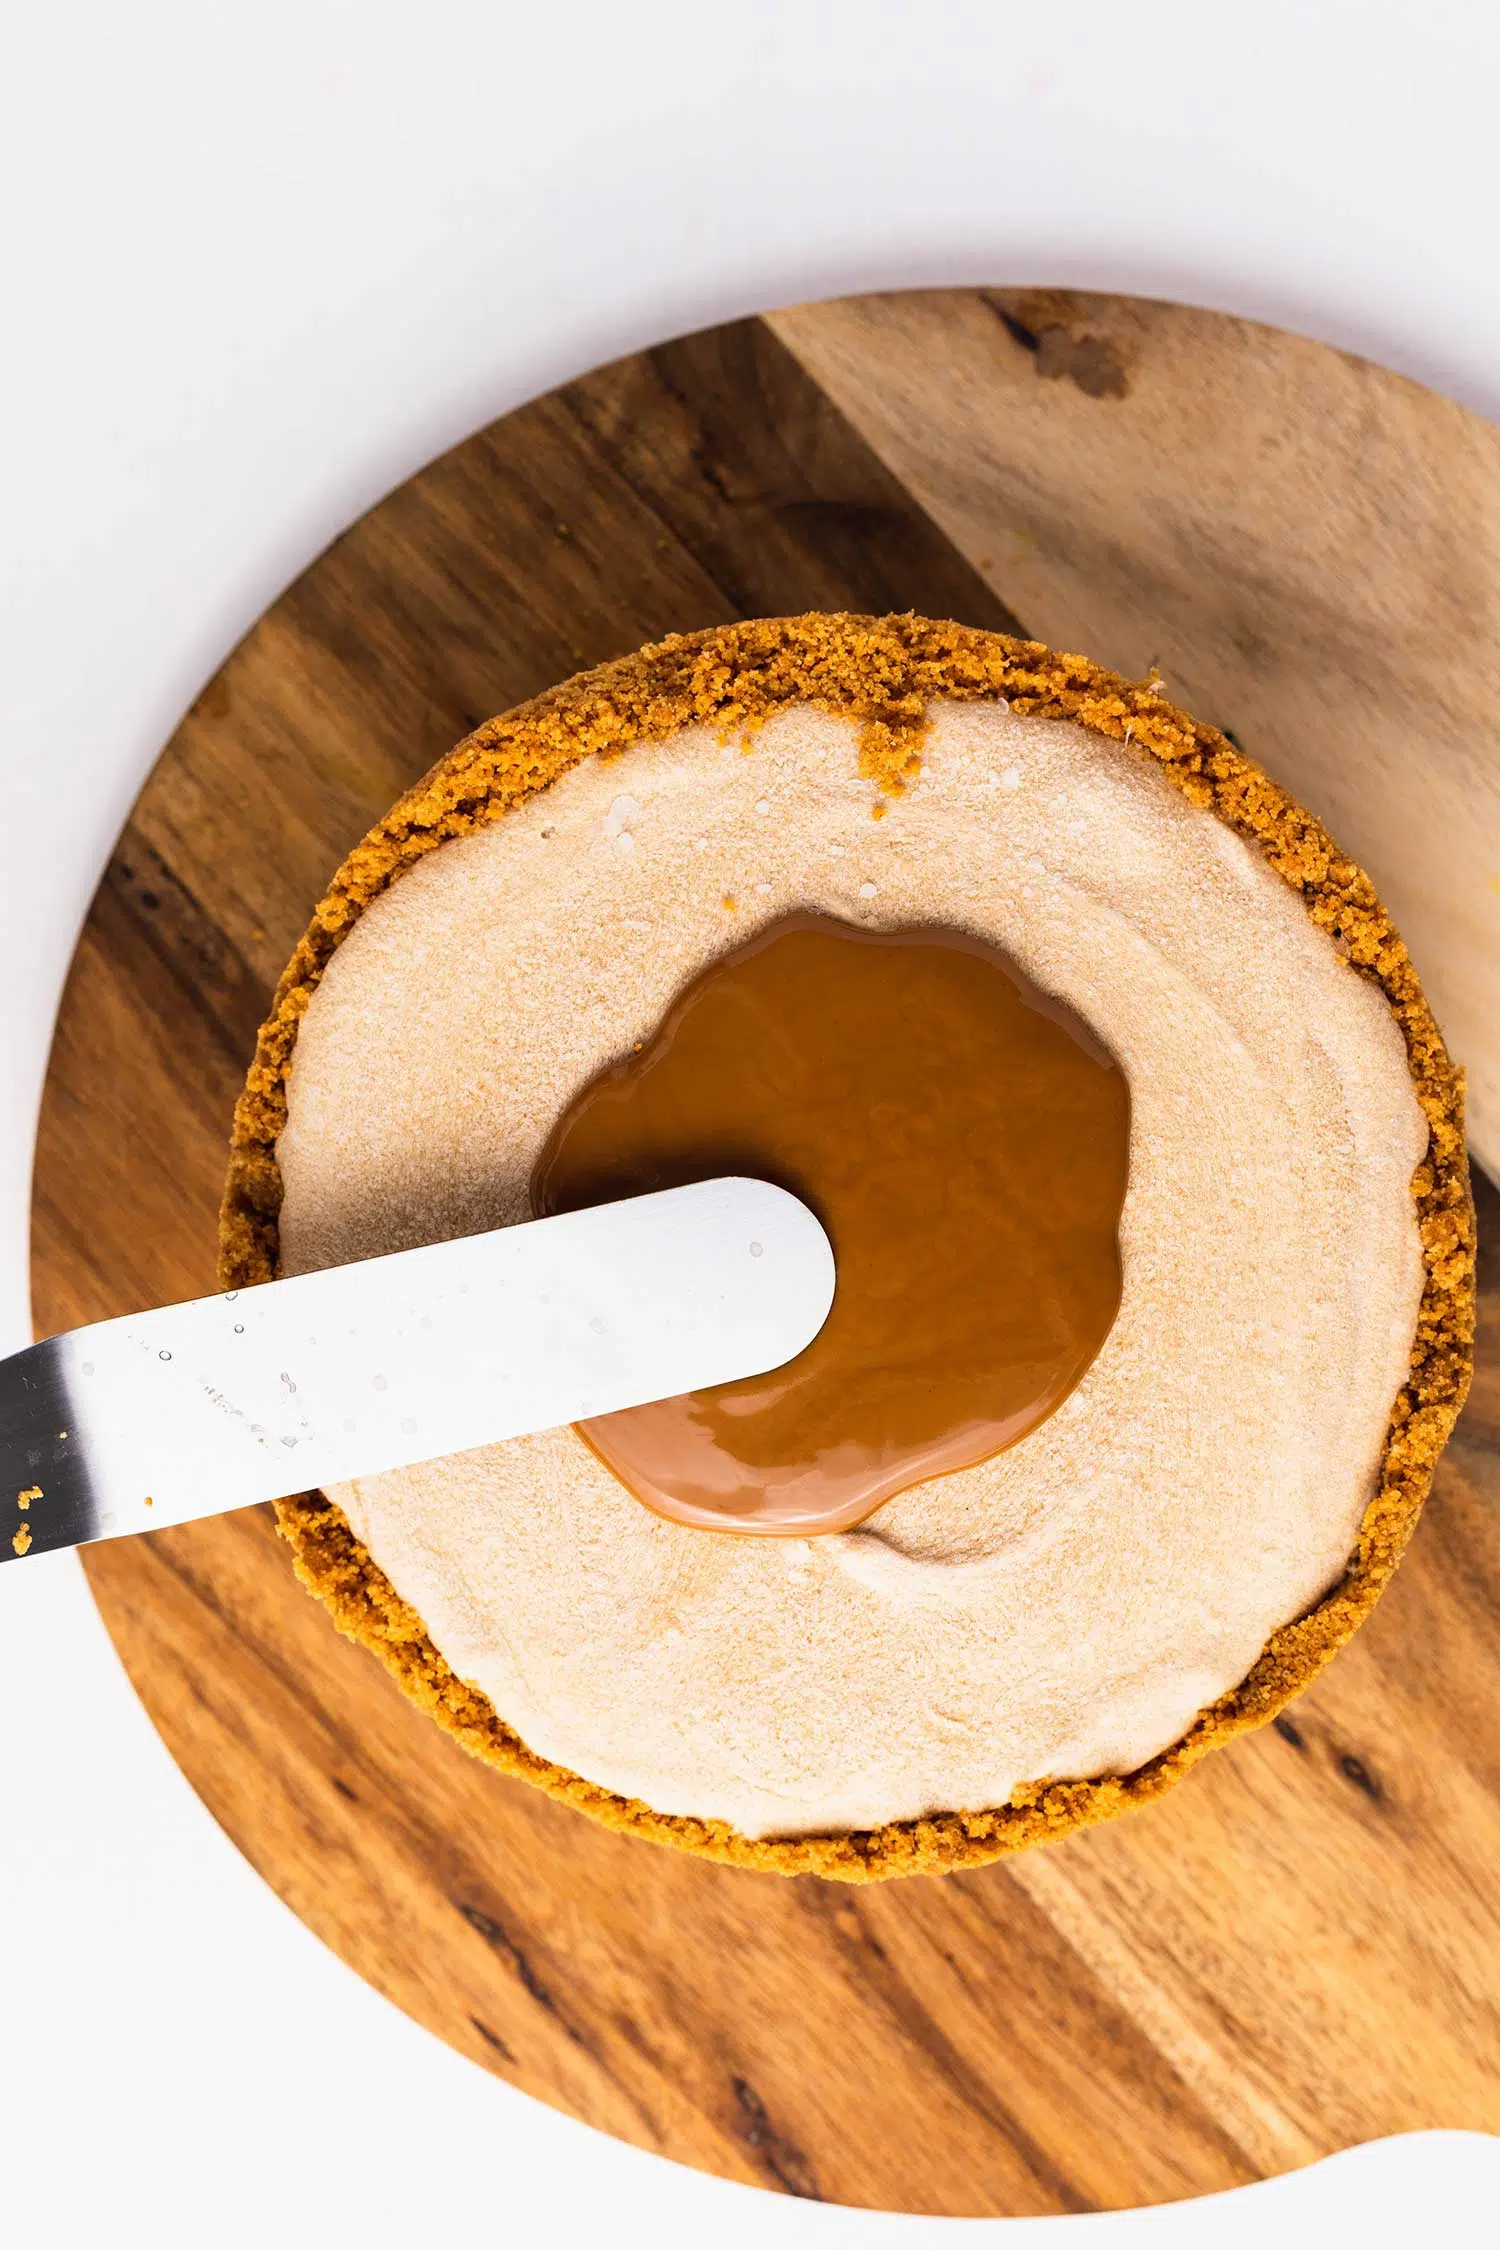
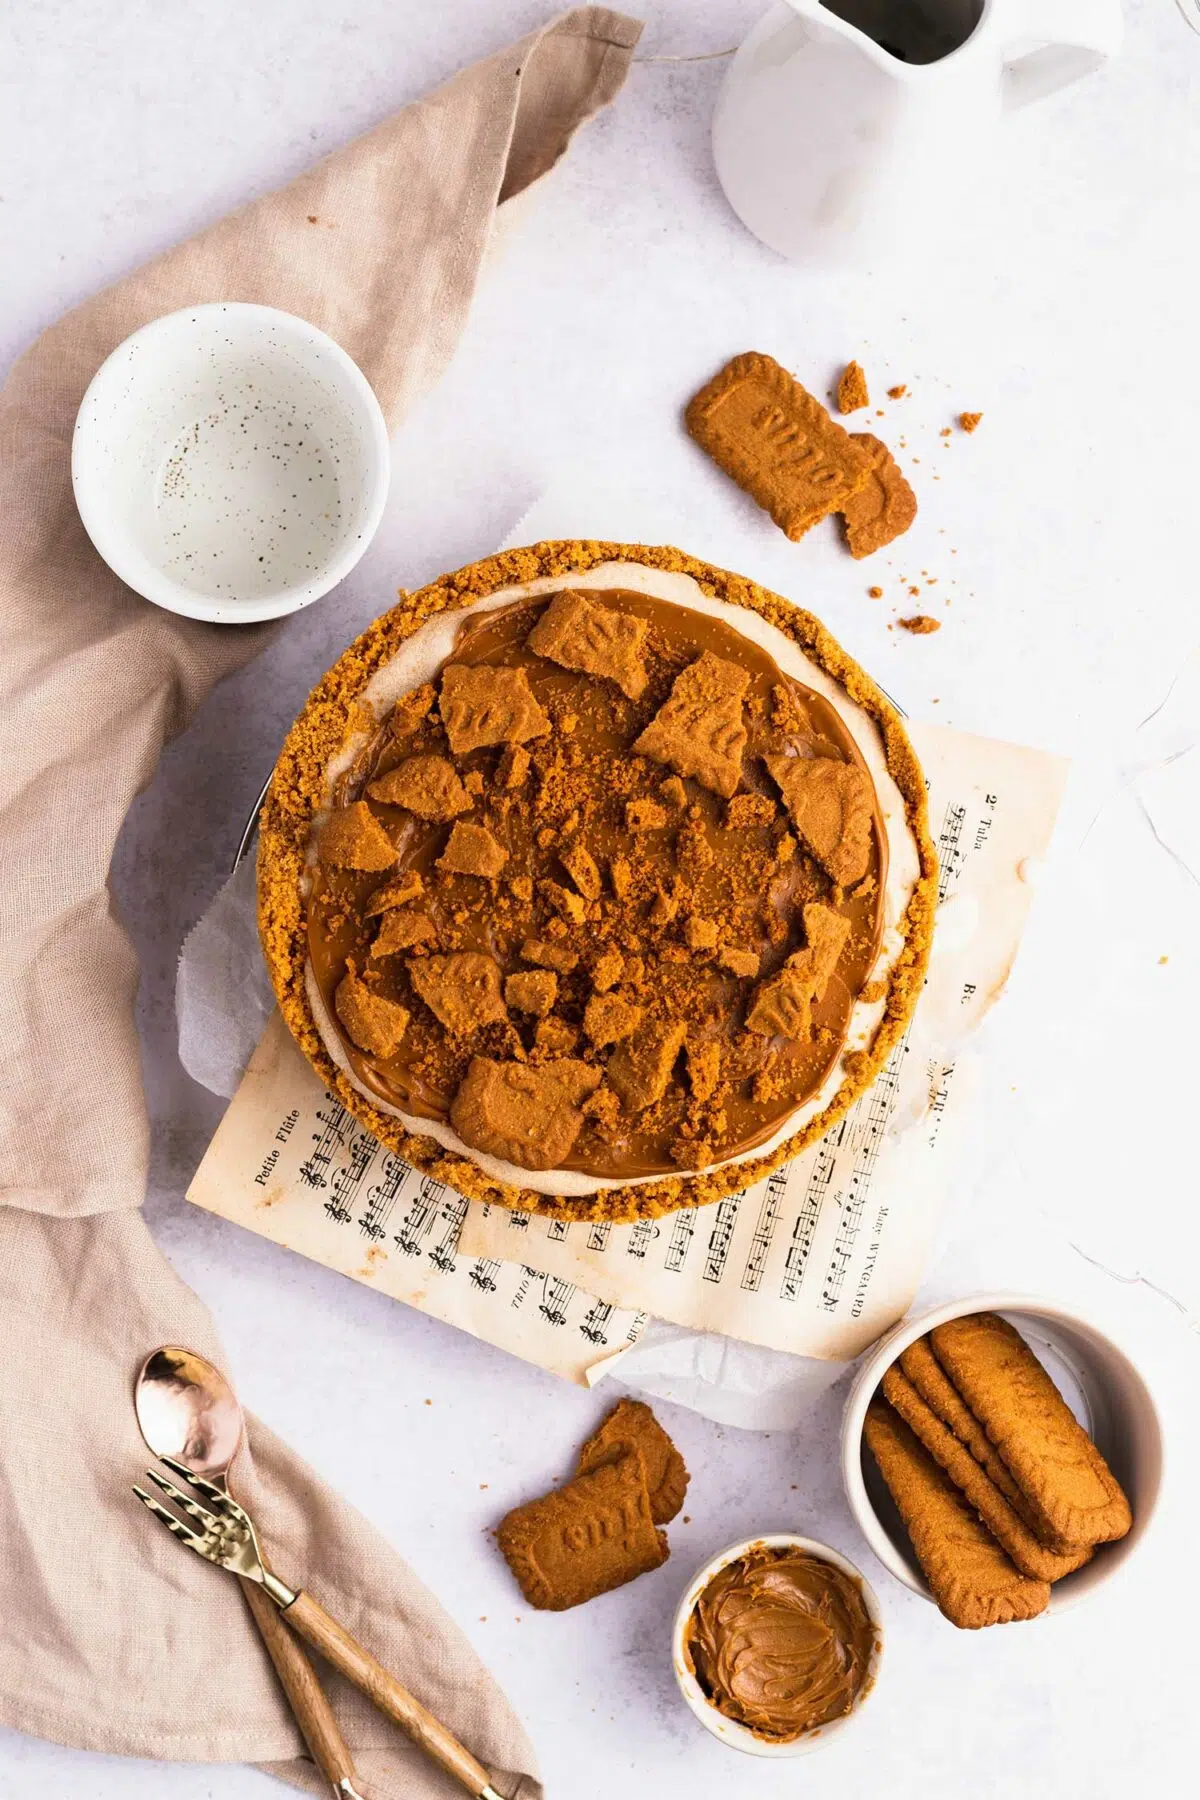
Once the cheesecake is set, top it with biscoff spread and biscoff biscuits. Thaw the cheesecake, slice and enjoy!
Expert Tips and Tricks
Whip the soy cream until firm
Whipping the soy cream is very important in this recipe because it creates air pockets which makes the cheesecake nice and creamy! Make sure that the cream is cold too. It should make a nice firm peak, that’s the perfect texture!
Process the digestive biscuits very finely
Process the digestive biscuits very well for the crust! If it’s not fine enough, mixing it with other ingredients can be difficult and the crust won’t stick together well to hold the cheesecake in. Take a good 1-2 mins to blitz the biscuits!
Press the crust firmly to the bottom and side
The crust is quite crumbly so you need to press it down to the bottom and sides firmly before pouring the cheesecake filling in. It should be firm and compact once you press it down.
How to store
You can store the biscoff cheesecake in the fridge for up to 2-3 days. Place it in a cake stand with a lid if you are storing the whole cheesecake or place slices in an airtight container then keep it in the fridge.
You can freeze it for up to 2-3 months too. If freezing as a whole cheesecake, cover it with a cling film while it’s still in the cake tin and keep it in the freezer. You can also cover each piece of cheesecake with cling film and freeze it too!
Q and A
Can I make it ahead of time and freeze?
Sure you can! If you want to make it ahead of time simply follow the recipe instruction till the end, cover the cheesecake in a cake tin with cling film and keep it in the freezer until the day you want to serve. You can freeze as the whole cheesecake or slice and freeze pieces of cheesecake individually.
Can I make it in a 20cm(8in) cake tin?
Yes, you can! If using a bigger cake tin, the crust may not cover the sides well so either just spread the crust at the bottom only or loosely cover the bottom of the side. The cheesecake itself will be smaller in height too but tastes as delicious!
Want to master the basics of vegan baking?
Check out Vegan Baking 101 – the beginner’s guide to vegan baking for you to become an excellent vegan baker and familiar with the basics of vegan baking, ingredients, and techniques with useful tips!
You will LOVE this lotus biscuit cheesecake because it is:
- rich and creamy
- super easy to make
- utterly delicious
- biscoff lover’s favourite
- perfect for bringing to parties
Want more recipes like this?
Try my other delicious cake and dessert recipes you might enjoy!
- biscoff cupcakes
- biscoff porridge
- biscoff brownies
- Ginger cake
- biscoff butter cookies
- chocolate mousse cake
- Banoffee cupcakes
- Biscoff baked oats
- Biscoff Waffles
Visit the cake page and recipe page for more delicious recipes!
Please leave a comment and rate this recipe in the comment section below if you like this recipe! Let me know and tag me @thechestnutbakery on Instagram too. Thank you for making my recipe, friends!
Recipe Card
Print
Easy Biscoff Cheesecake – Vegan!
- Total Time: 4 hours 20 minutes
- Yield: 8 slices 1x
- Diet: Vegan
Description
This decadent no-bake vegan biscoff cheesecake is super easy to make with only 9 ingredients required! The biscoff-flavoured rich and creamy cheesecake and the butter biscuit base create a perfect balance in texture and flavour. It’s topped with more biscoff spread and biscuits to maximise the flavour of melty biscoff in every bite! This cheesecake recipe is perfect for making for parties and enjoying with friends.
Ingredients
For the crust
- 295g vegan digestive biscuits
- 1/4 cup (60ml) melted vegan butter
- 2 tbsp melted biscoff spread
For the cheesecake filling
- 2 & 1/2 cups (300g) Violife cream cheese
- 2/3 cup (185g) biscoff spread
- 1/2 cup (125ml) soy single cream/whipping cream, cold
- 1/2 cup (120g) soy yoghurt
- 1/2 cup (125ml) maple syrup
- 1/4 cup (35g) coconut butter
- 1 tsp vanilla extract
Instructions
- To make the crust, blitz the digestive biscuits until very fine like flour with a food processor about 2 mins.
- Transfer the biscoff biscuit “flour” to a large mixing bowl, and add the melted vegan butter and melted biscoff spread. Mix with a large wooden spoon or a silicone spatula until well combined.
- Pour the mixture into a cake tine and spread evenly. Using the bottom of a drinking glass or any clean thing with a flat surface, press down the crust to the bottom and to the side firmly.
- Set in the fridge.
- To make the cheesecake filling, whip the soy single cream with a stand mixer or hand mixer until it’s fluffy and makes a firm peak. It takes about 3-5 mins.
- Add the rest of the ingredients to the whipped soy cream and mix at low speed until it’s just combined. Be careful not to overmix!
- Pour the cheesecake mixture into the crust and smooth out the top evenly with a spatula. Cover with a cling film and chill in the freezer for at least 4 hours or overnight.
- Once the cheesecake is set, top it with biscoff spread and biscoff biscuits. Thaw the cheesecake, slice and enjoy!


Notes
Make sure that the single cream and the tools are cold! The cream won’t whip up if the temperature is warm.
- Prep Time: 20 mins
- Chill time: 4 hours
- Category: Cheesecake
- Method: No-bake


I’m obsessed with biscoff so I had to make this cheesecake. It turned out amazing! Thanks for this great recipe.
This is my new favourite dessert, thank you so much for this recipe. Me and my husband love it so much!!
I’m glad you loved the recipe!
What size tin you are using for cheesecake..?
I used a 18cm (7in) cake tin!