
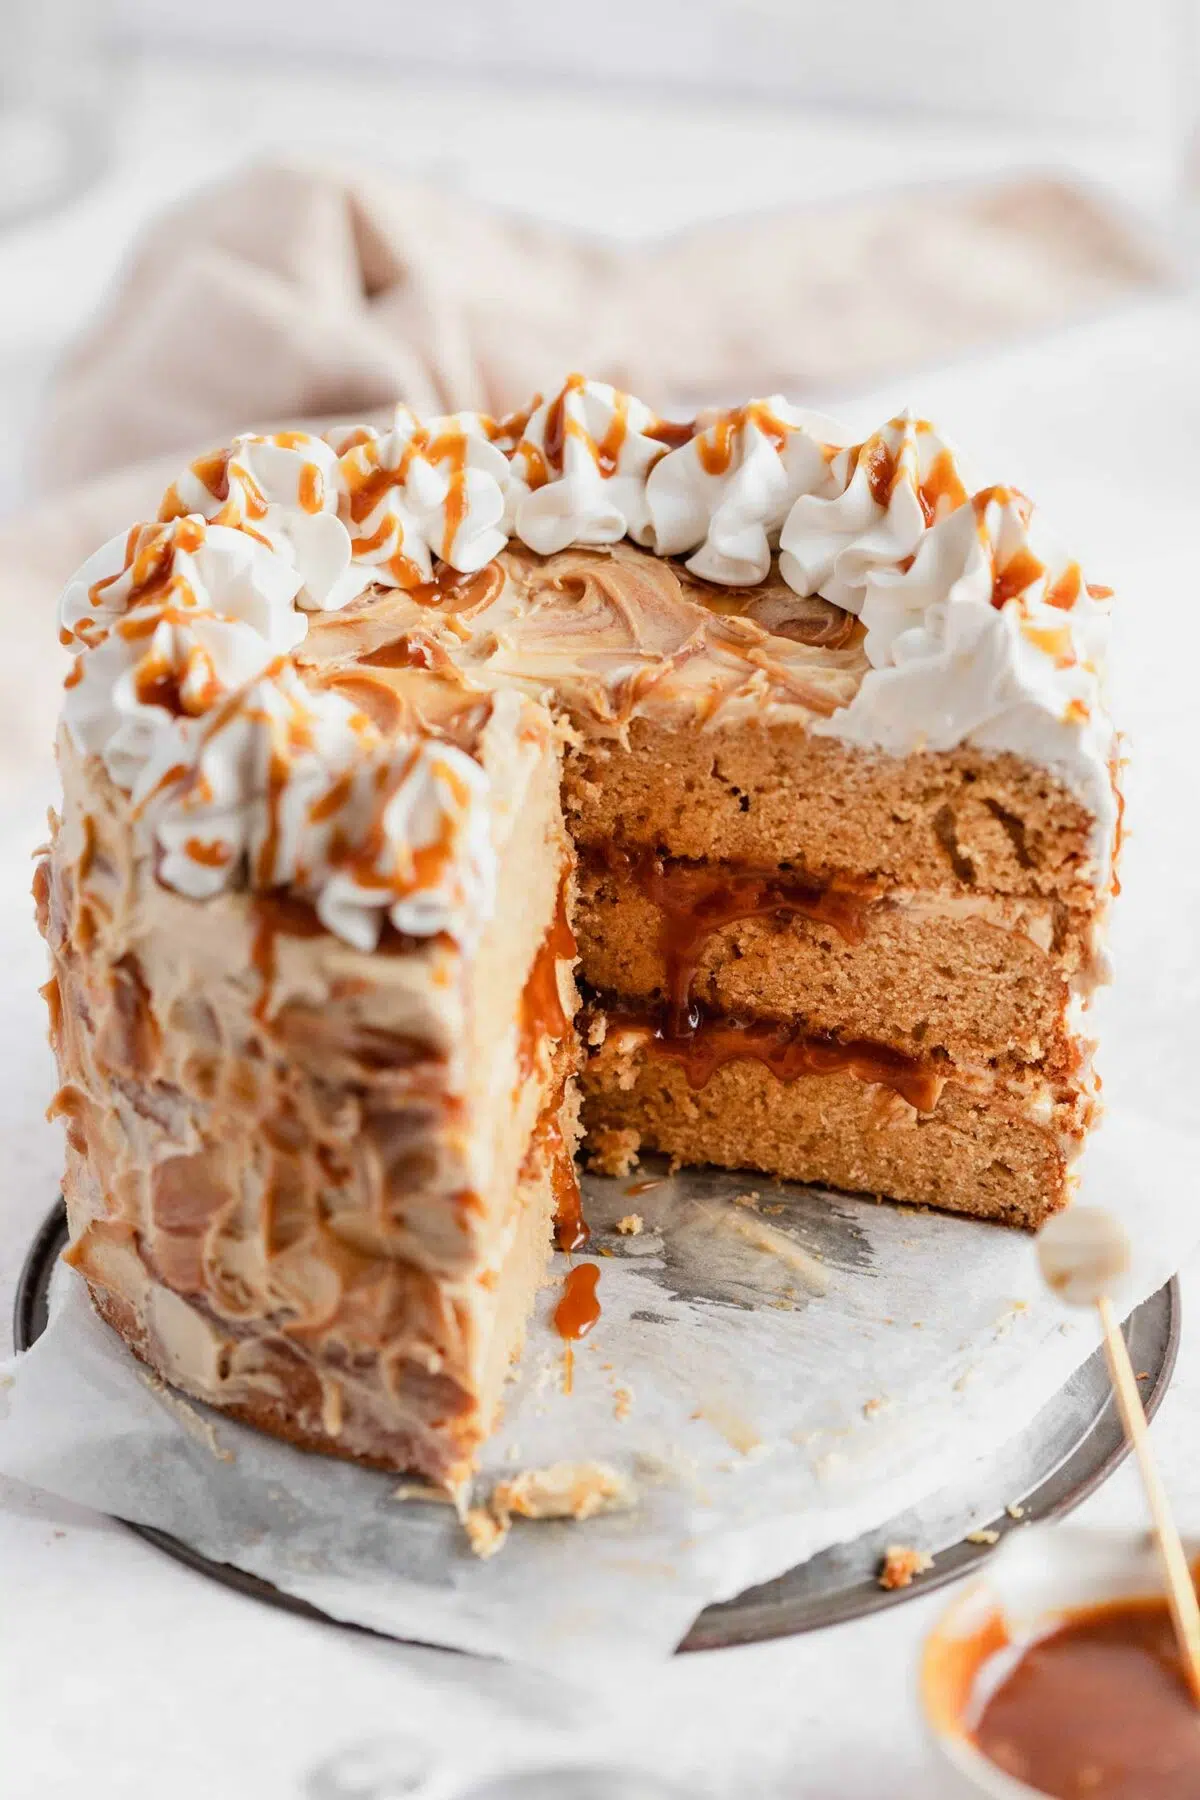
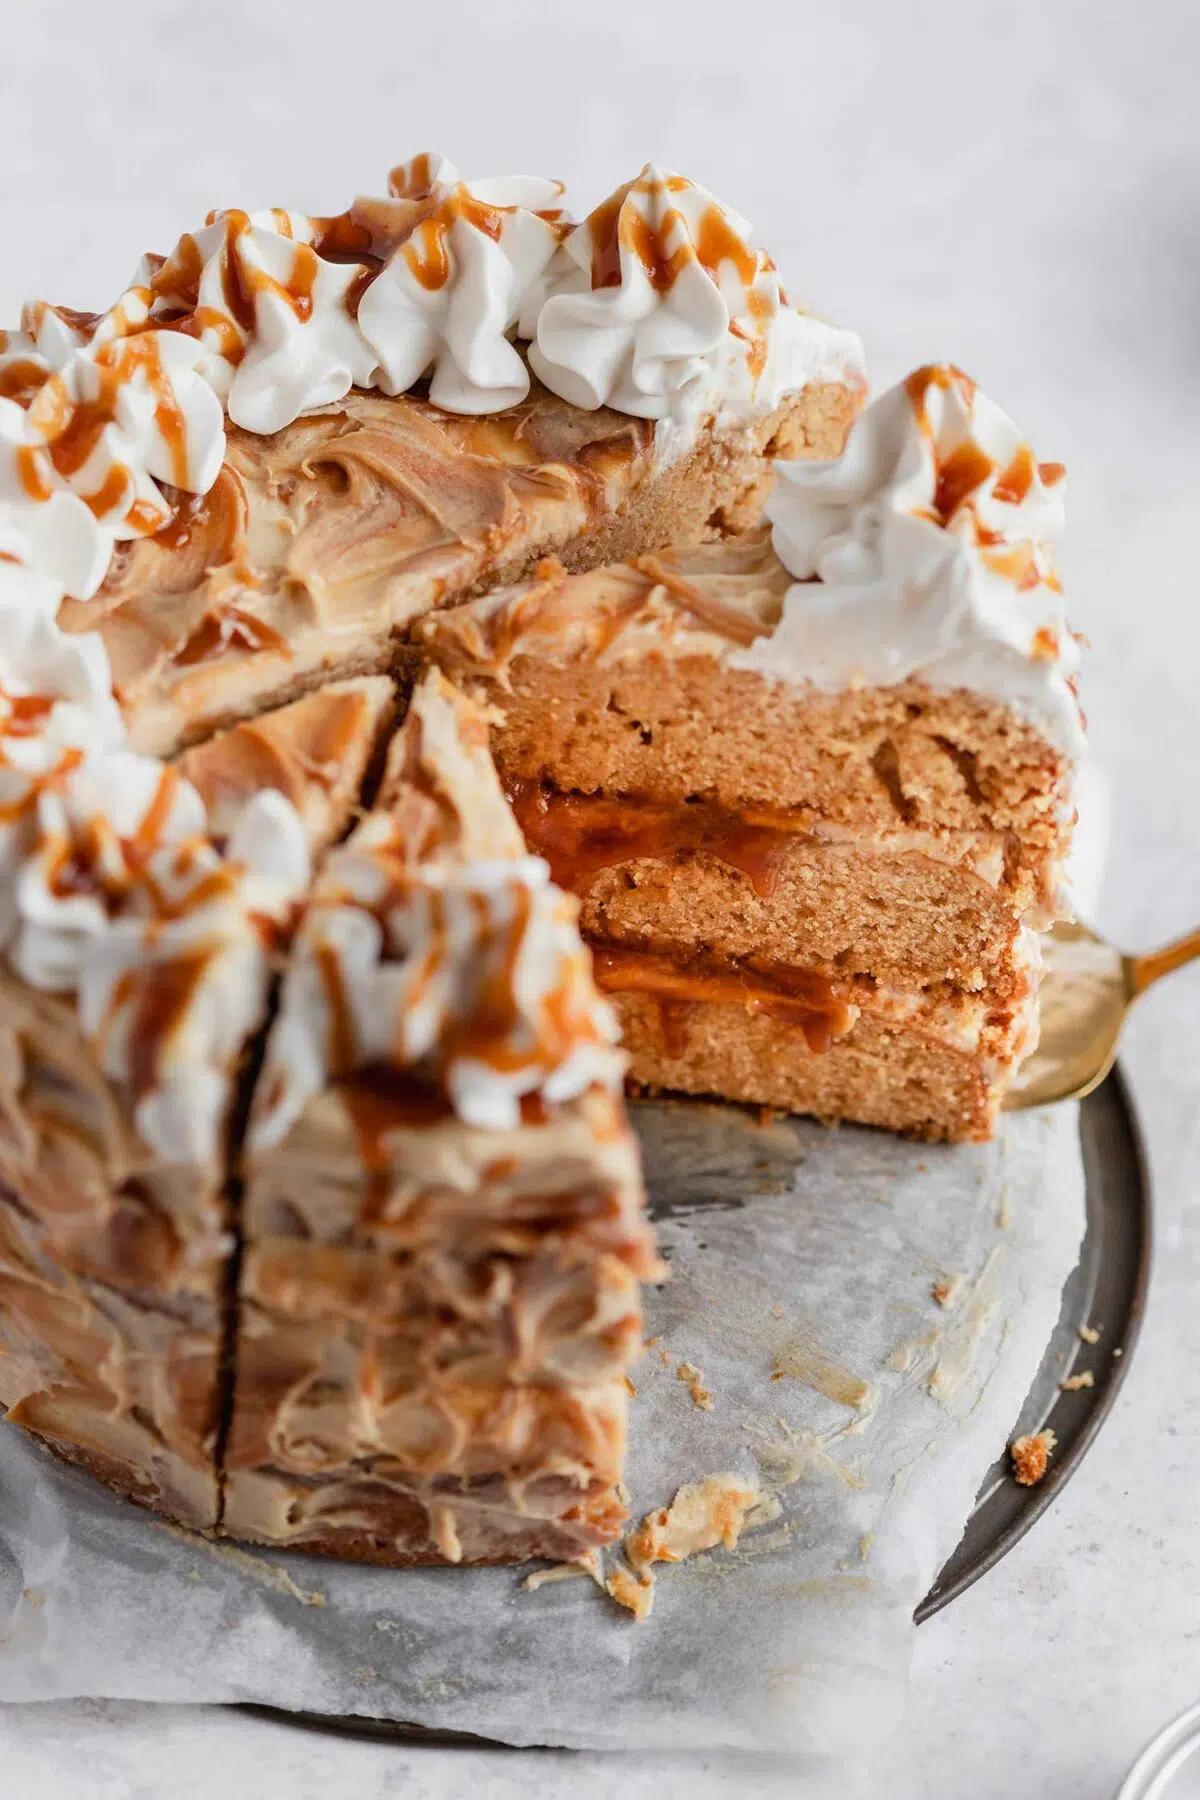
Elevate your dessert game with this divine three-layer vegan caramel cake! Packed with luscious homemade vegan caramel between each layer, this cake is a dream come true – a harmonious blend of light, fluffy, and moist texture and irresistibly rich caramel flavour. Whether it’s a birthday bash, a cosy home gathering, or festive holidays like Thanksgiving and Christmas, I promise you this cake is going to be the star of the show.
*This post may contain affiliate links. For full disclosure visit our Affiliate Disclosure page.
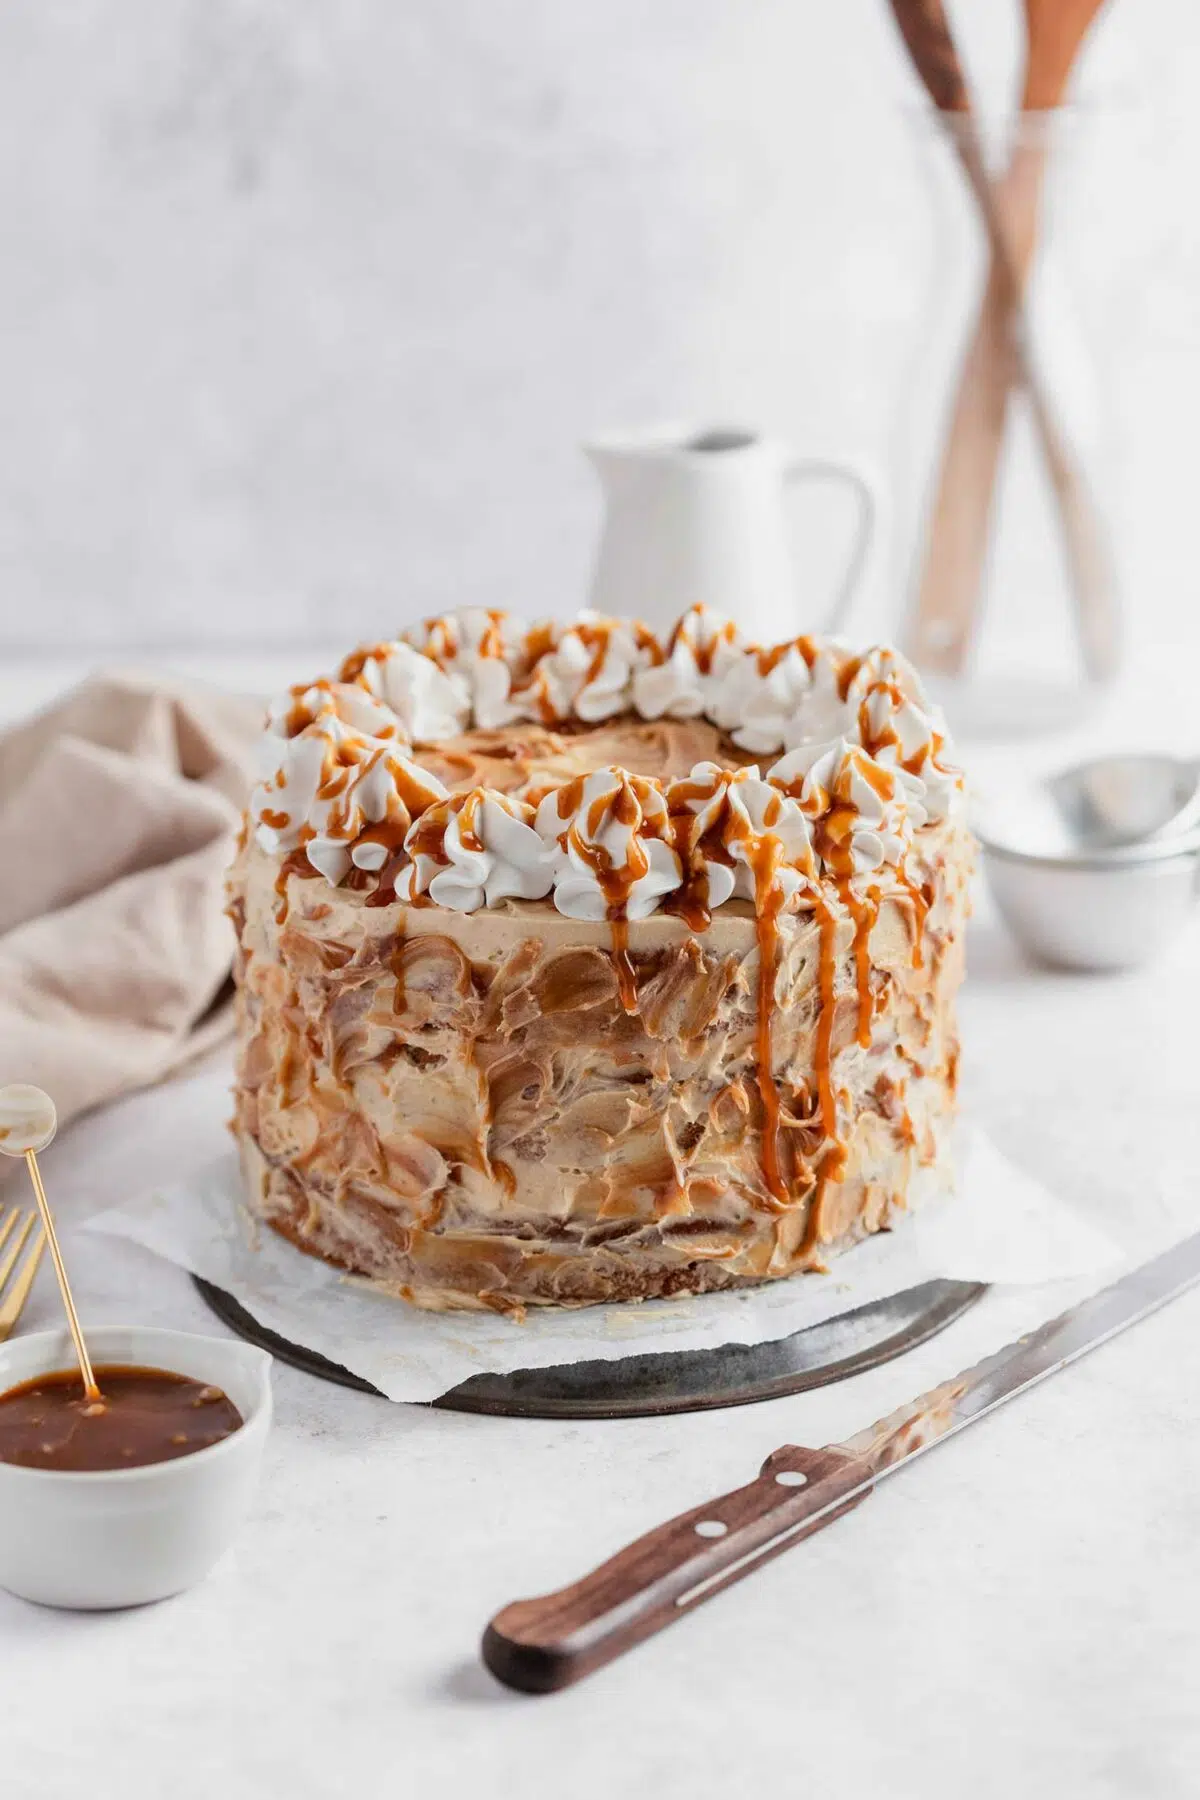
Table of Contents
Okay, everyone, I made something so amazing with my homemade caramel recently. Are you ready for a slice of pure heaven? Vegan caramel cake! This, is a triumph of flavour and texture, the perfect treat to satisfy your sweet tooth. This cake boasts layers of velvety vegan caramel buttercream and melty homemade vegan caramel. It’s a perfect balance, where the caramel flavour shines brightly without being overpowering. Whether you’re celebrating a special occasion or simply looking for a delightful way to brighten your day, this cake is a must-bake!
Recipe overview – why you’ll love this vegan caramel cake recipe
- Level: Easy
- Taste: Rich caramel
- Texture: Moist and fluffy
- Diet: Plant-based, dairy-free, egg-free, nut-free, can be gluten-free
- Time: 50 mins
- Occasion: Dessert, Christmas, Thanksgiving, Valentine’s Day
Main ingredients and substitution
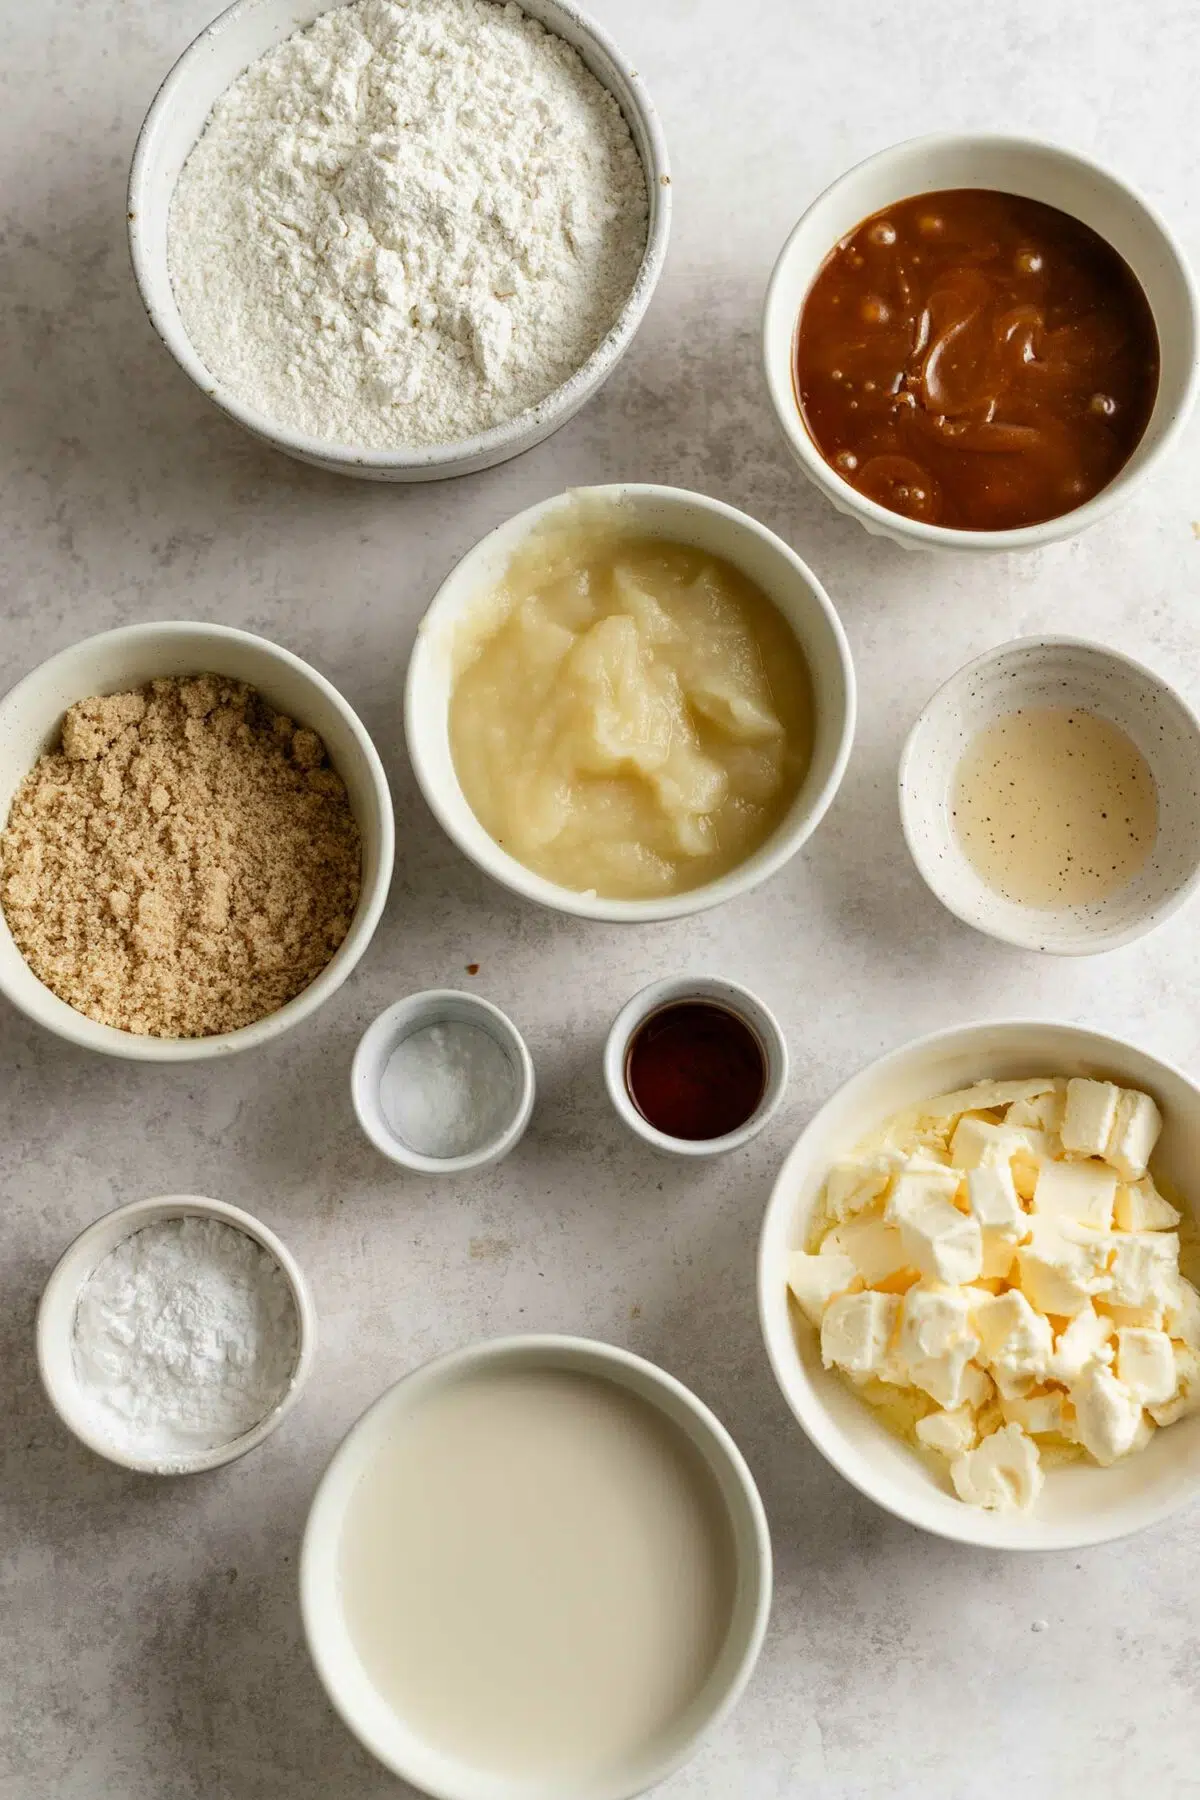
Despite the gorgeous look of the cake, you only need pretty basic ingredients to make this vegan caramel cake. If you can’t find vegan caramel or applesauce in your supermarket, I got your back! I have recipes for them so find them in the list below.
*Use room temperature ingredients unless otherwise instructed.
Plain flour: Good old trusty plain flour for this cake recipe. If you prefer a gluten-free option, a 1:1 gluten-free flour blend works as well. Use quality ones like King Arthur or Bob’s Red Mill.
Brown sugar: I used brown sugar to enhance the rich caramelly flavour in the cake. Other sugar you could use to achieve a similar flavour would be coconut sugar, date sugar, or any other rich dark sugar. Or simply, use caster sugar or granulated sugar if you don’t have access to dark sugar! Don’t forget to weigh though, as sugar differs in consistency. The cake is made slightly less sweet because of the caramel filling between the layers so weighing is very important.
Vegan butter: Choose a high-quality, plant-based vegan butter that is suitable for baking to achieve the right texture and flavour. I used one from Naturli.
Vegan caramel: You can either make your own vegan caramel or find a store-bought one. I have a recipe for homemade vegan caramel here too!
Applesauce: This magical ingredient adds moisture and tenderness to your cake, as well as an excellent egg substitute in vegan baking. It’s super easy to make too, I have a homemade applesauce recipe here!
Soy milk: Feel free to use any other plant milk of your choice like almond, oat, rice, etc.
Other ingredients: icing sugar, soy whipping cream, vanilla extract, cornflour(sub: tapioca flour, arrowroot flour), apple cider vinegar(sub: lemon juice), baking soda, and baking powder.
Note: Substitution may change the final taste and texture of this recipe.
*I use bone char-free sugars for all of my recipes. I cover the topic in my article Vegan Baking 101. Go to the “Is sugar vegan?” section to learn more!
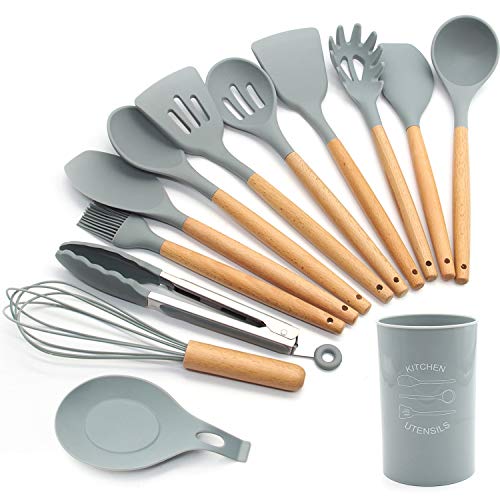
Recommended equipment for this recipe
18cm(7inch) cake tin: I used three 18cm (7inch) cake tins for this recipe. Prepare the tins with parchment paper to prevent any cake-sticking mishaps.
Electric mixer: It’ll make your life so much easier when mixing the cake batter and whipping up the caramel buttercream. I used a stand mixer, but a hand mixer will work perfectly too.
Offset spatula: This nifty tool will help you achieve a smooth and even frosting layer. I used a tapping motion to add the unique swirl pattern and texture you see in the photos.
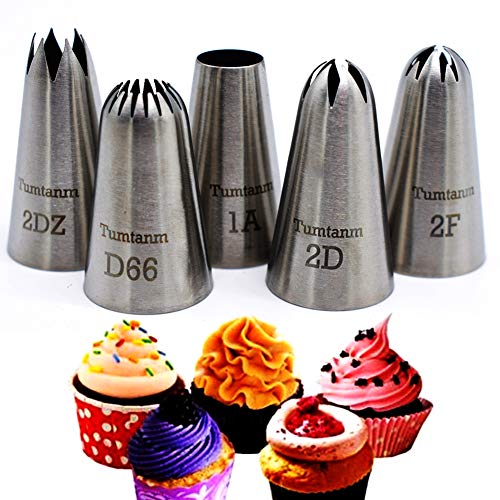
Piping bag and tips: For decorating the cake with whipped cream.
*The ingredient list and measurement for this recipe can be found in the recipe card at the bottom.
How to make vegan caramel cake with caramel buttercream
Step 1: Preheat and Prepare
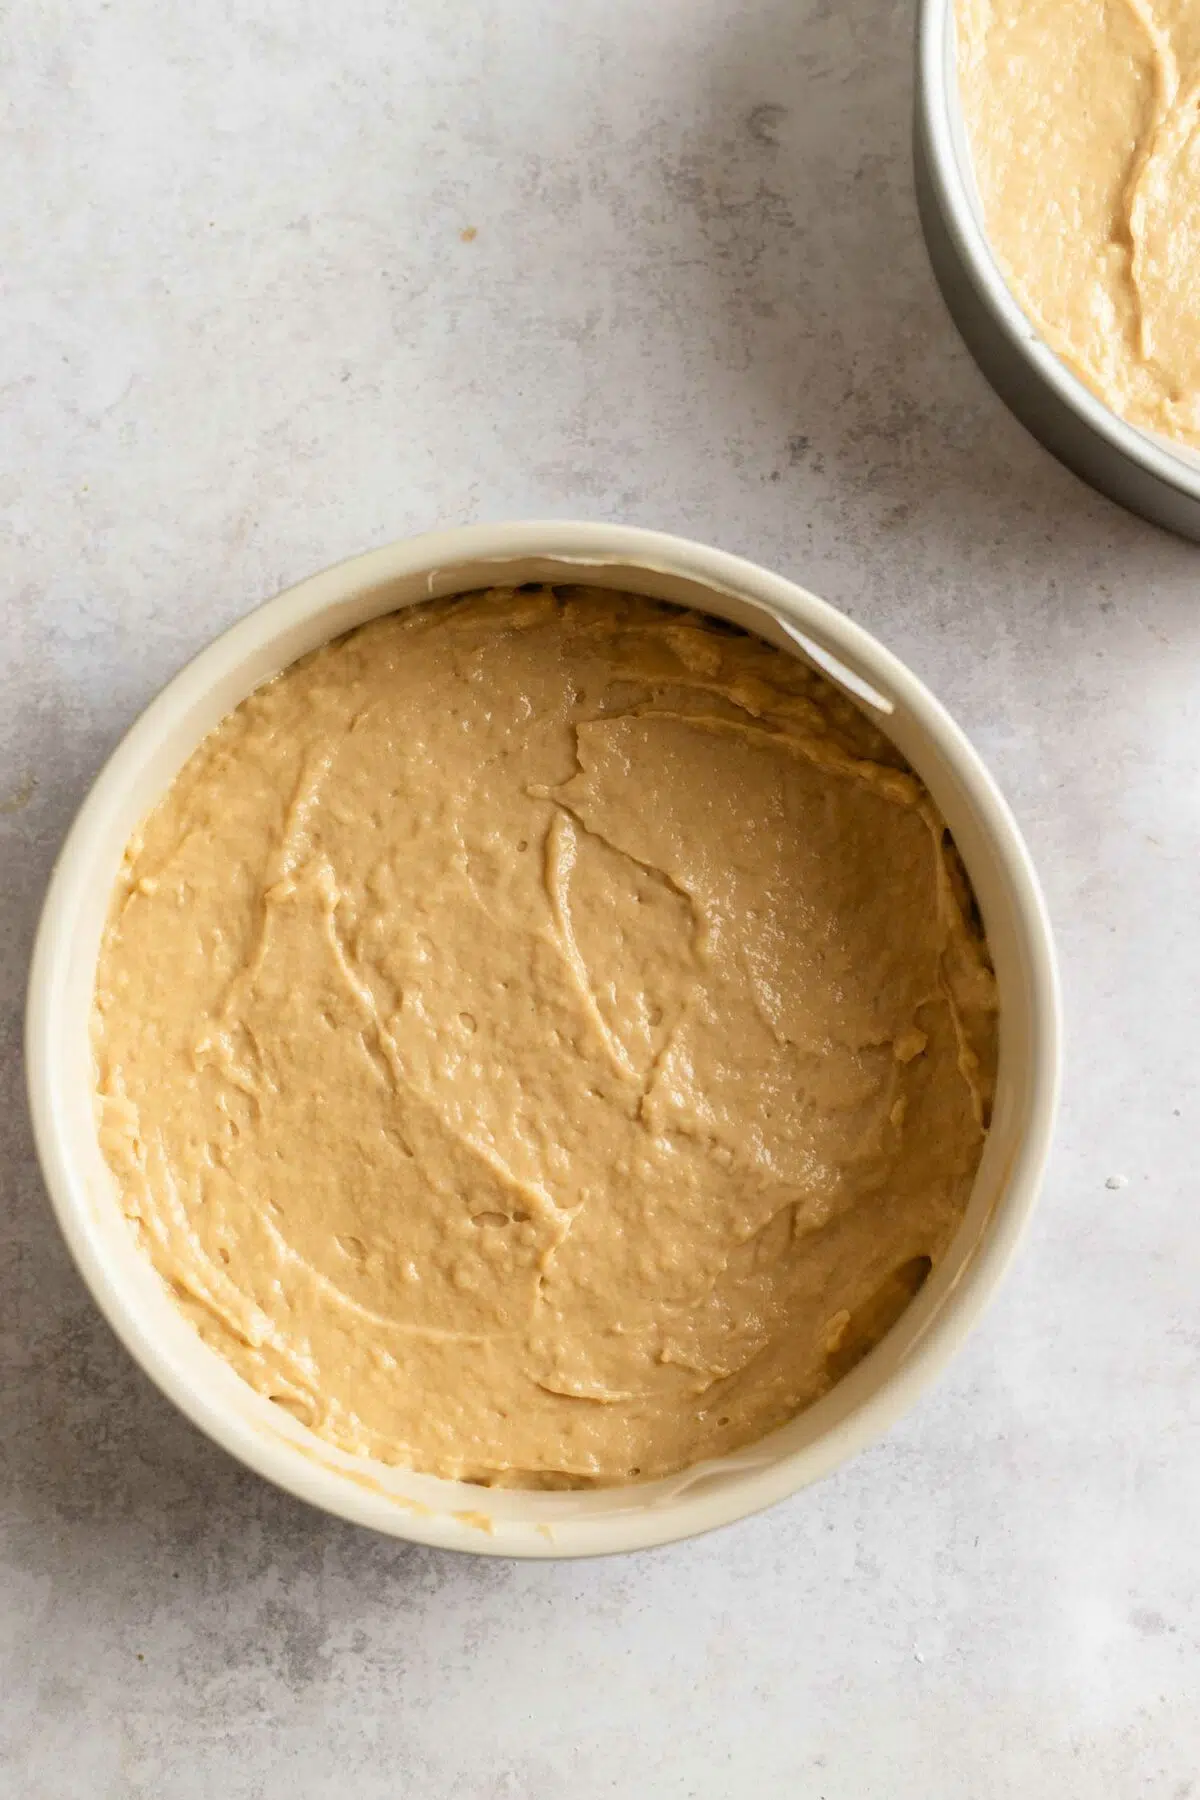
Let’s begin by preheating your oven to 180°C(350°F) and prepare three 7-inch round cake tins. Grease them thoroughly with a little vegetable oil or vegan butter, and line the bottoms and sides with parchment paper to ensure easy cake removal. I recommend you line your tins with parchment paper even if your tins are non-stick, it prevents the cake from falling apart when removing it from the tin too!
Step 2: Make the batter
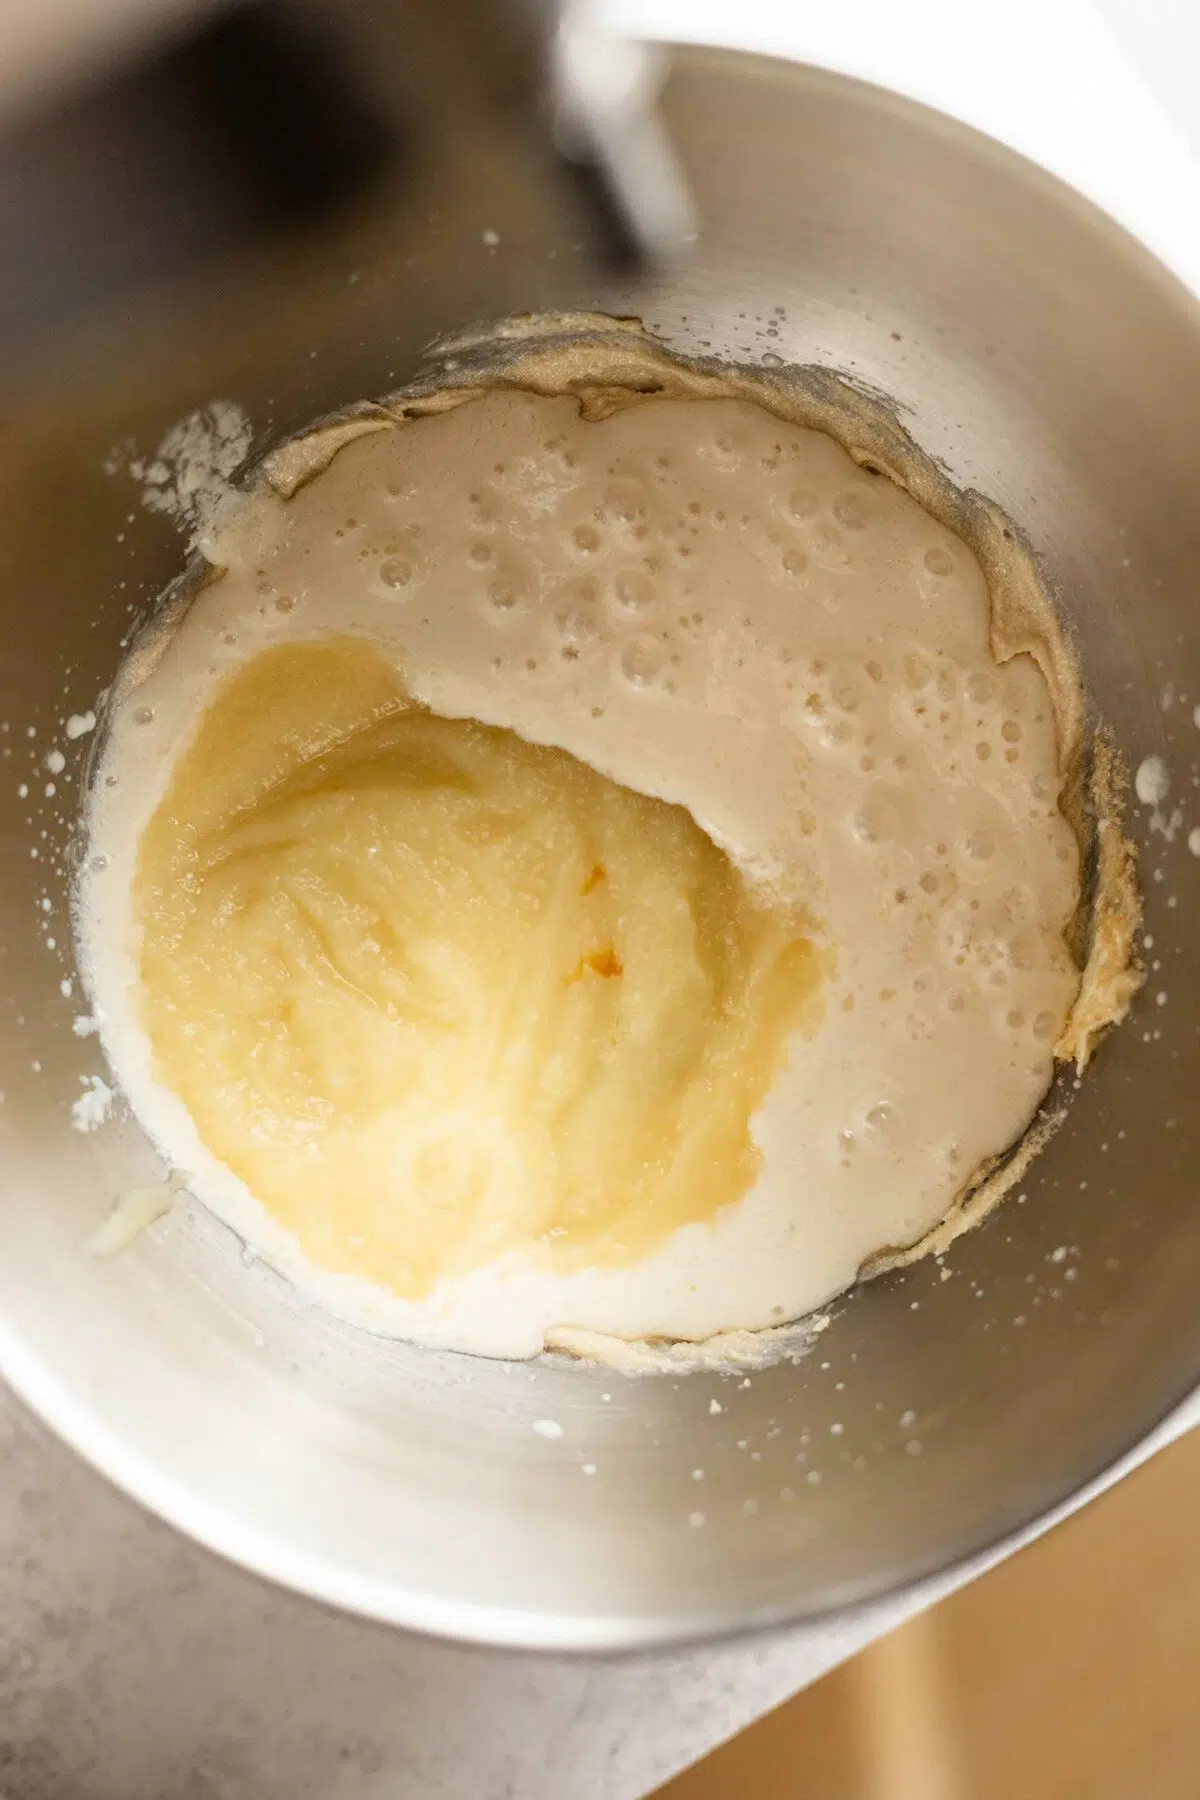
First, let’s make vegan buttermilk by mixing the soy milk and apple cider vinegar together. It curdles and becomes thick like buttermilk. Set aside.
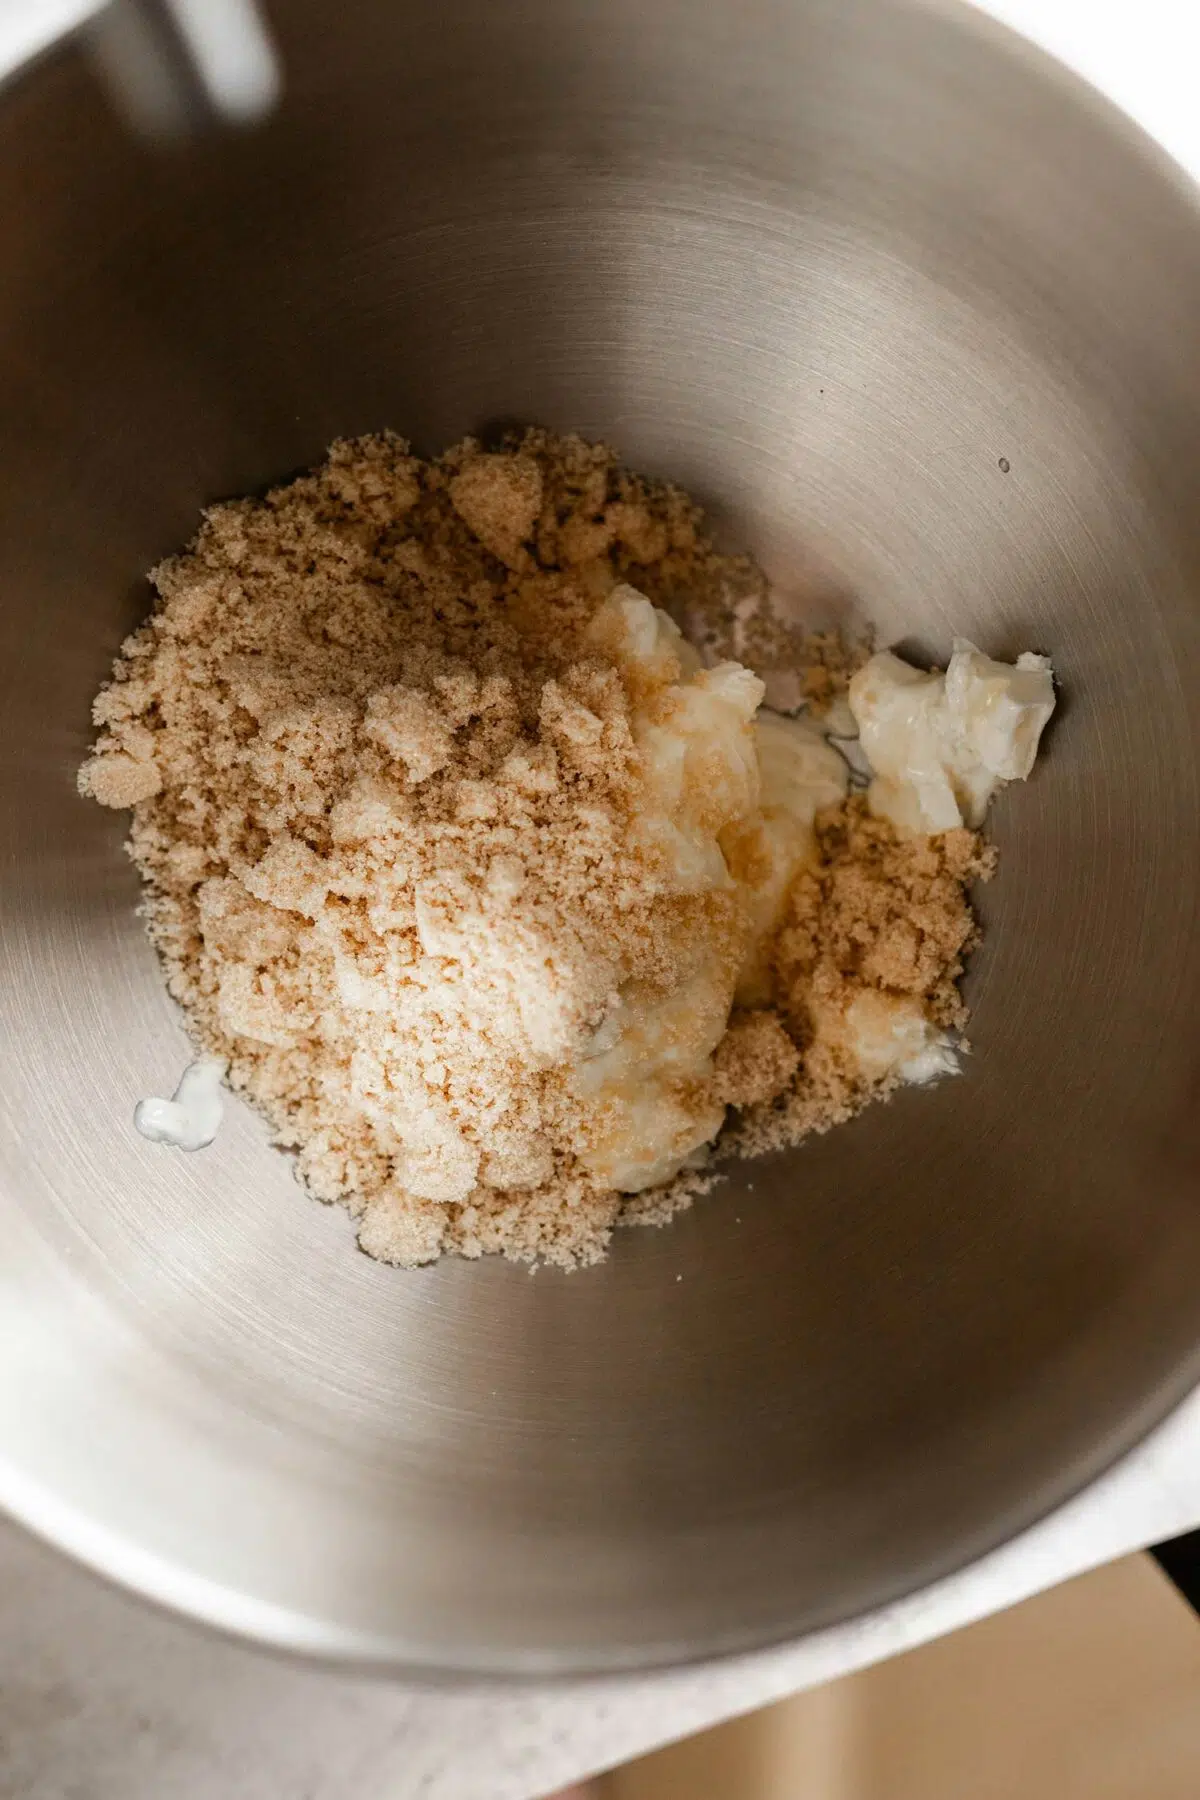
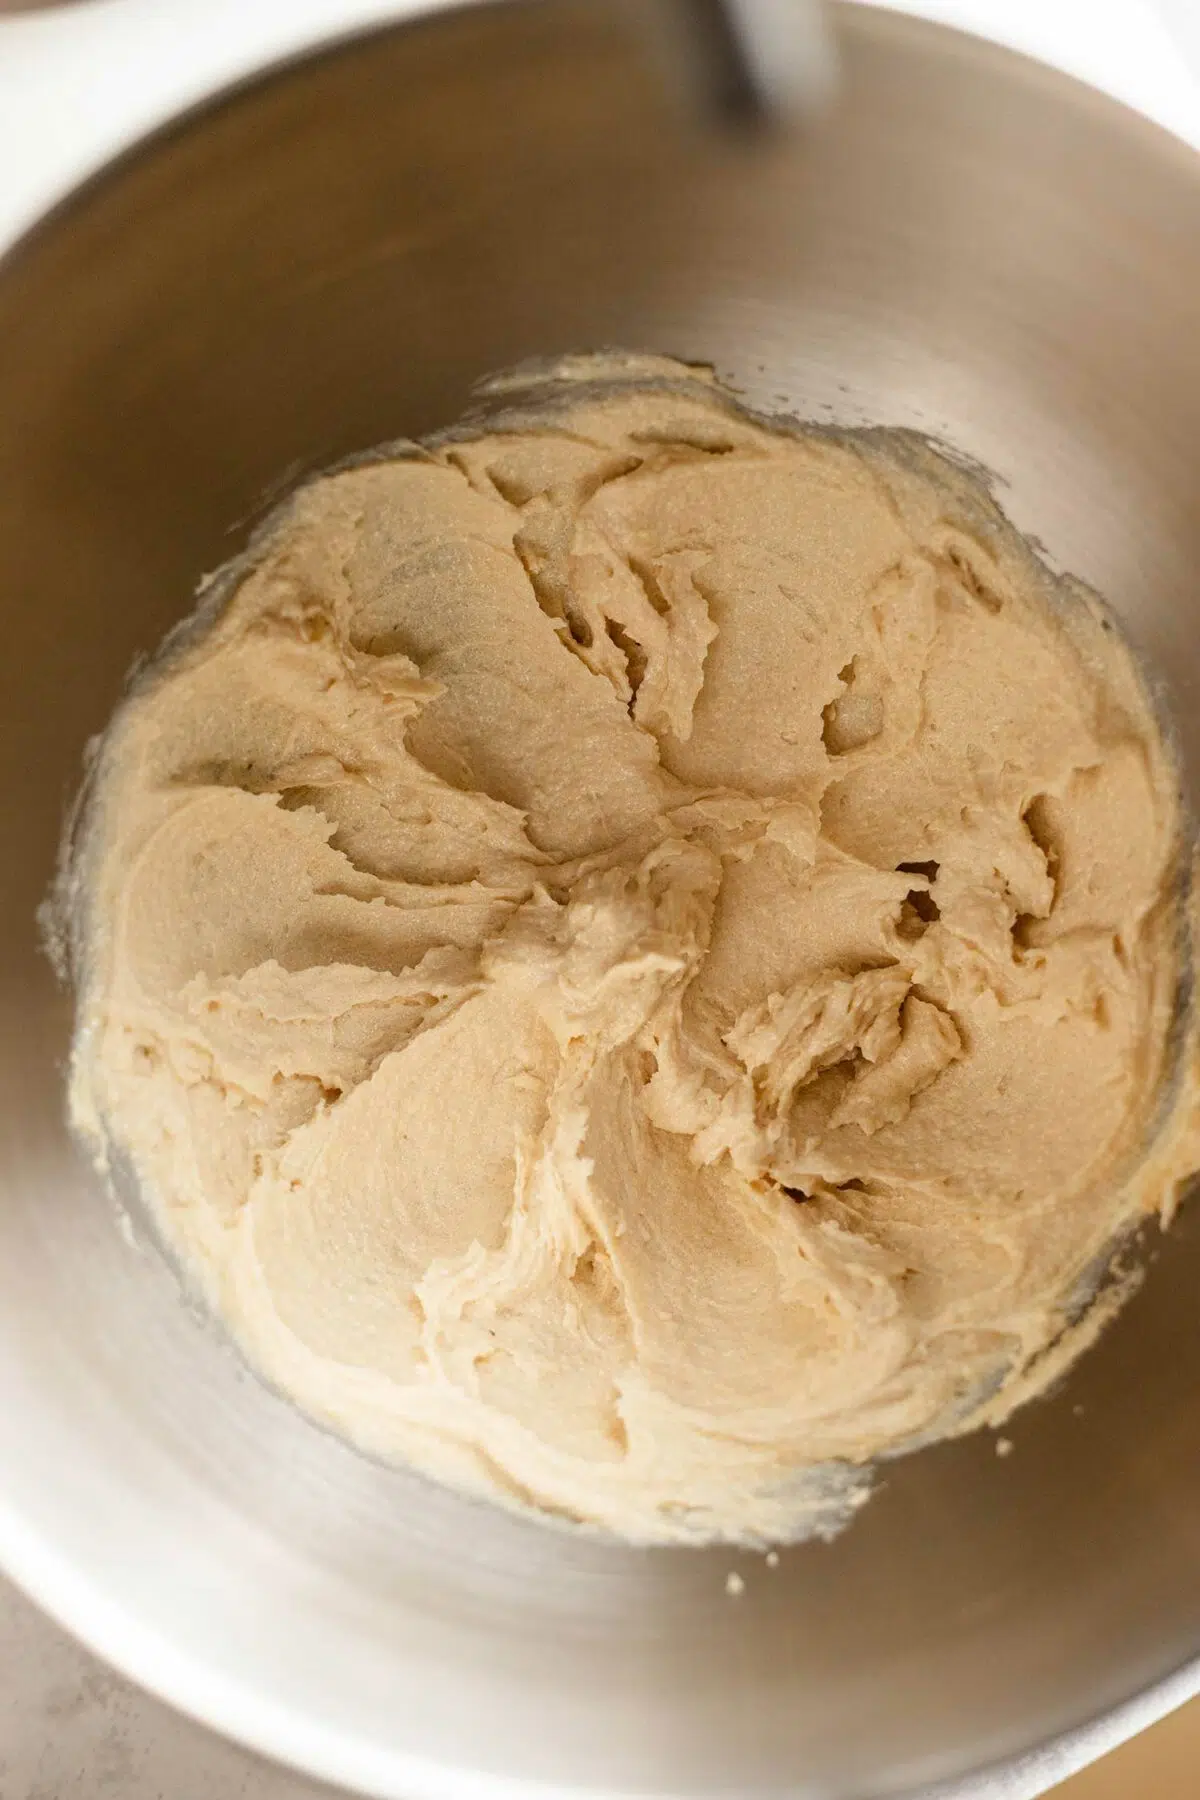
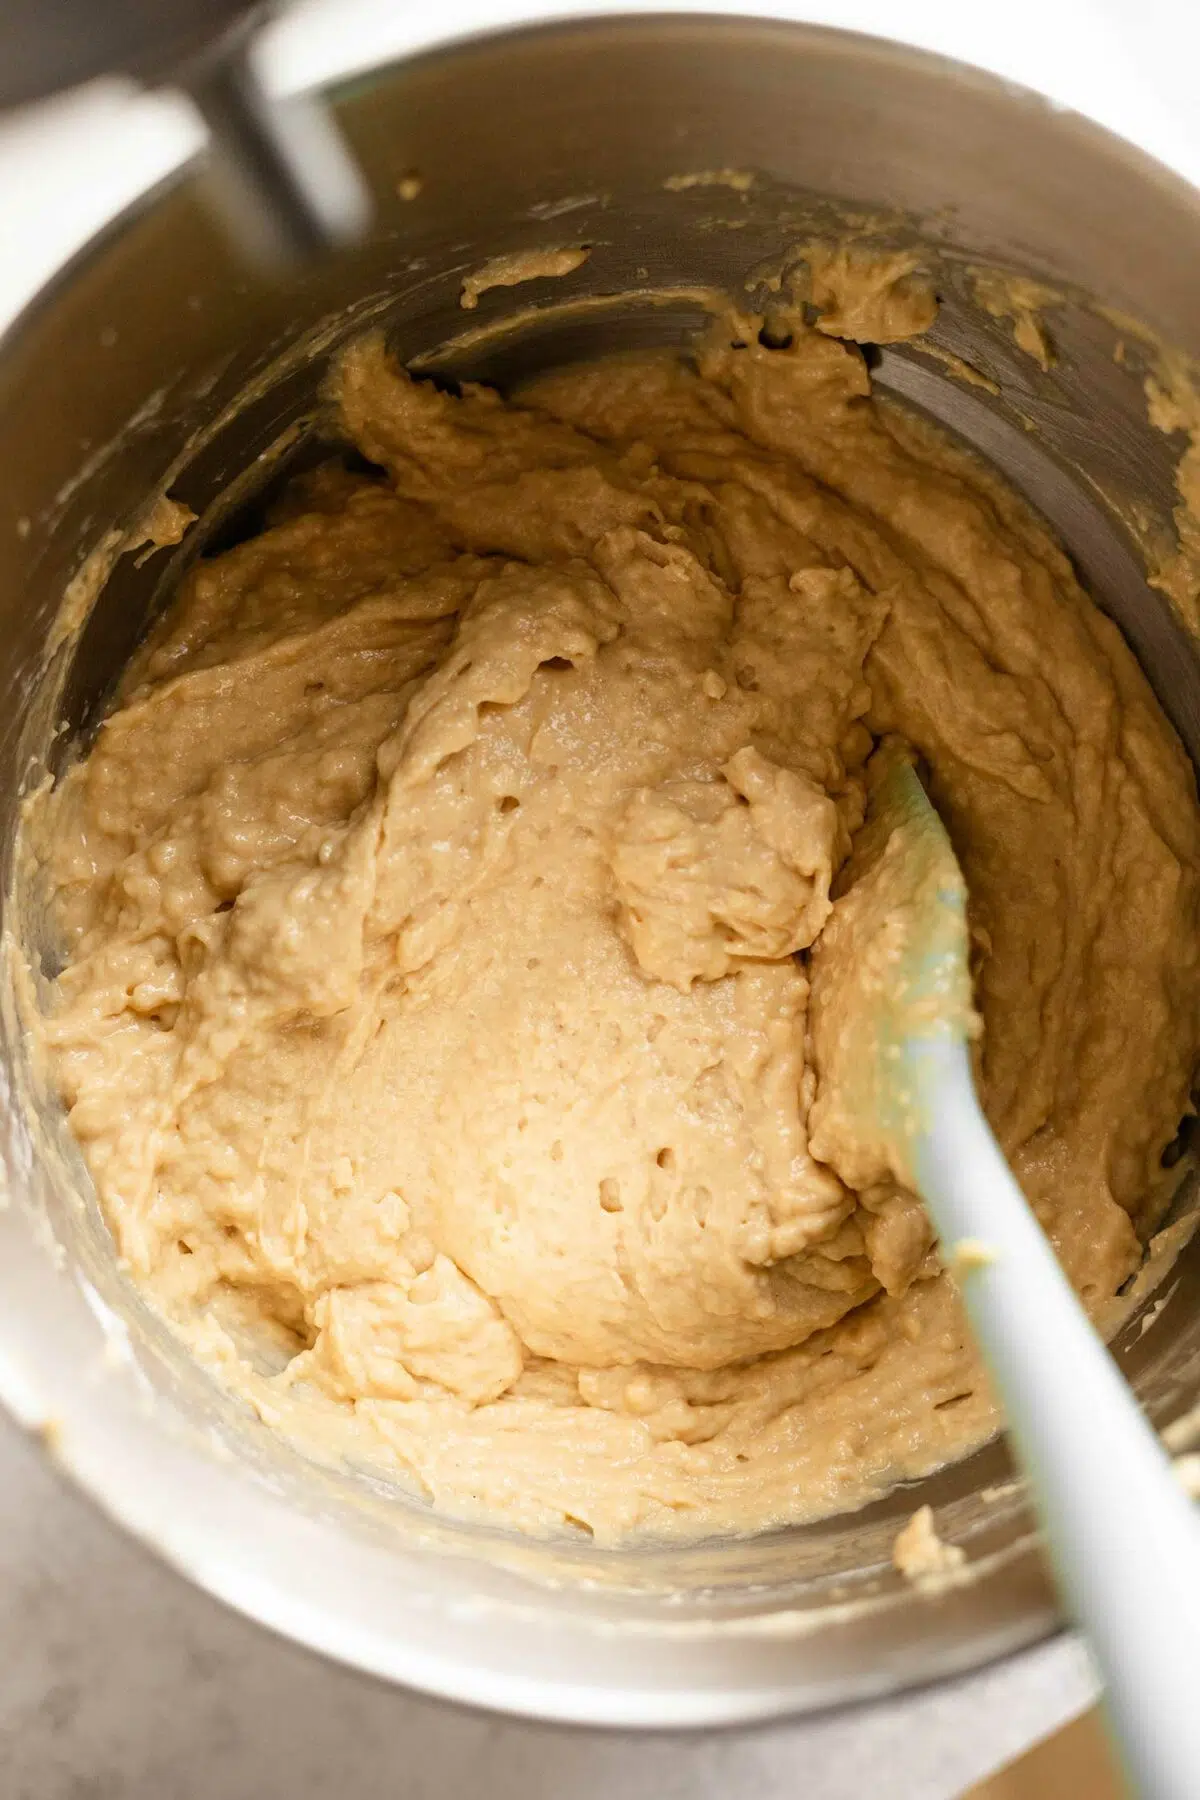
Using a hand mixer or stand mixer with a paddle attachment, beat the vegan butter and brown sugar until they are very well combined and fluffy. Add vegan caramel, vegan buttermilk, vanilla extract, and applesauce and mix until well combined.
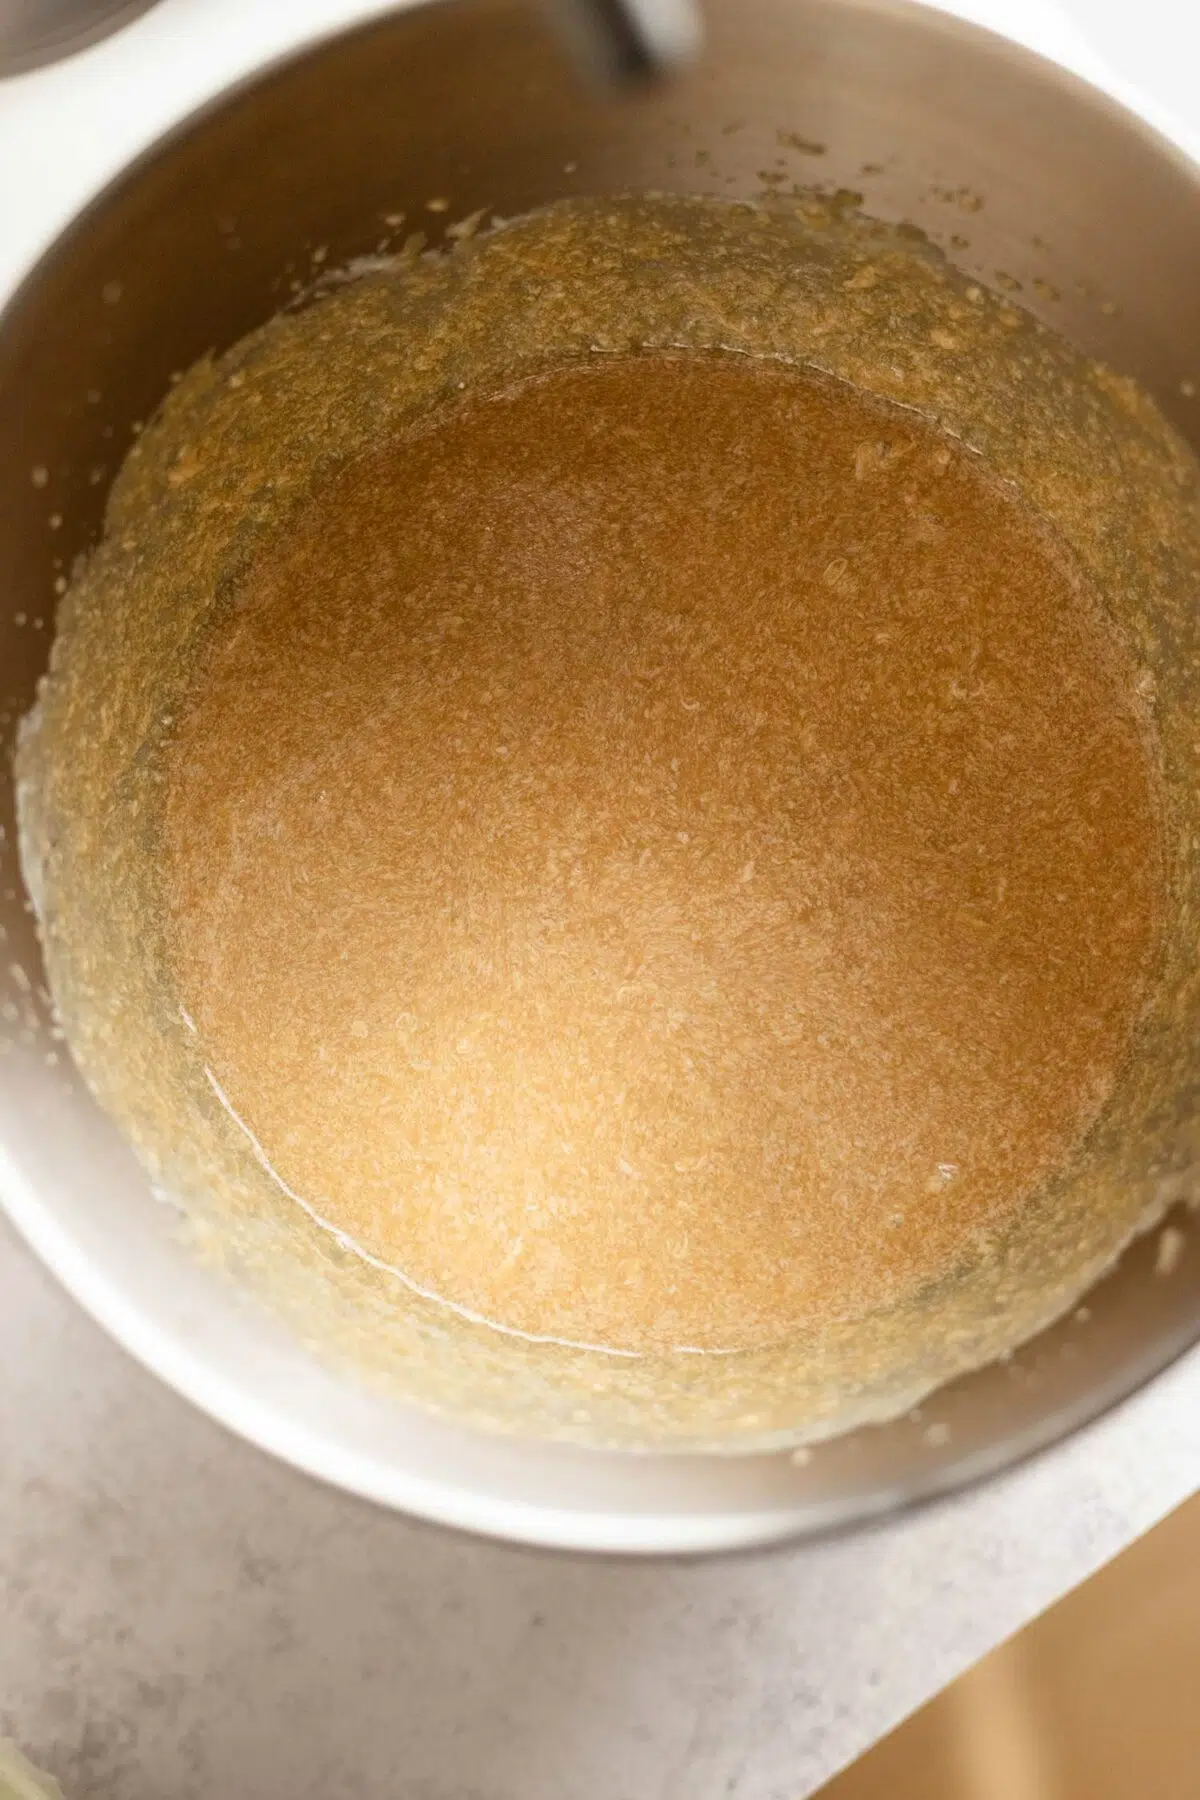
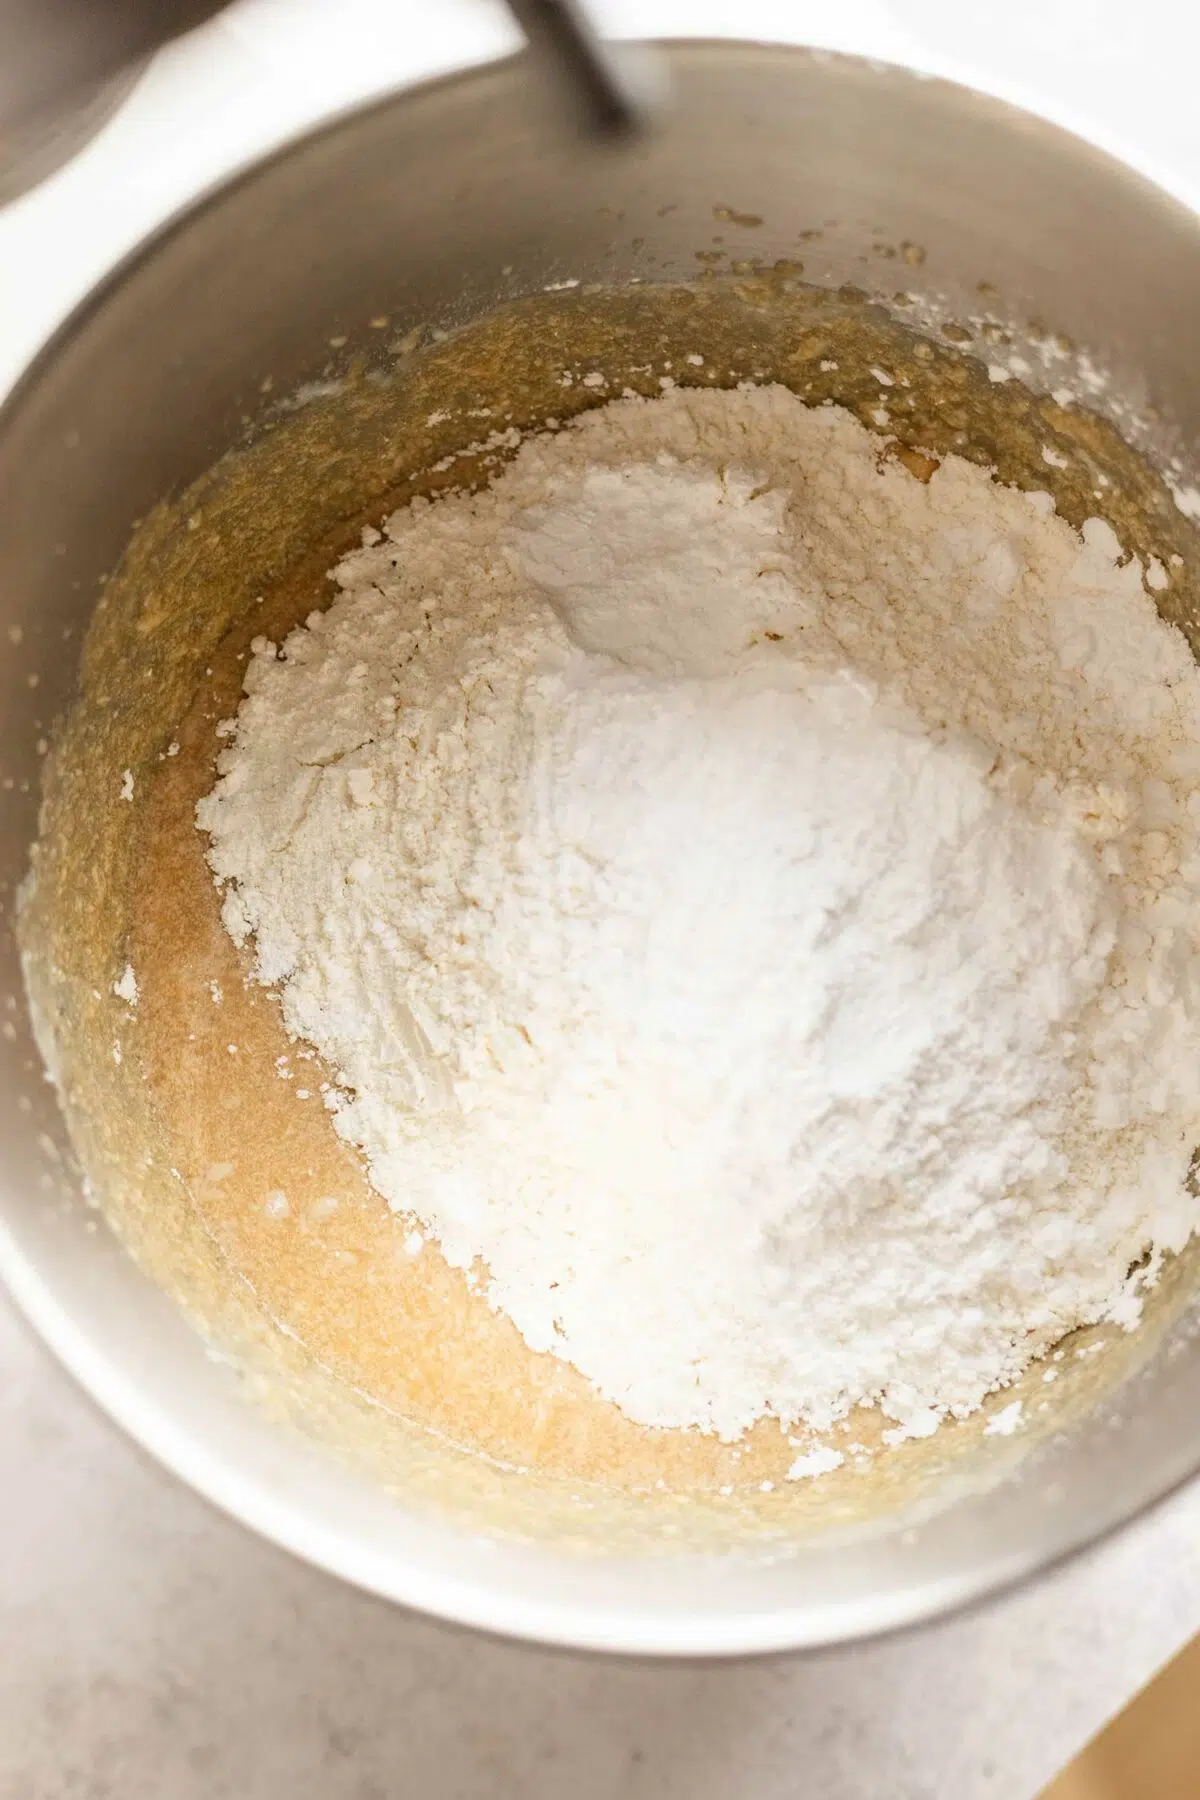
Once you have your wet mixture, add flour, cornflour, baking powder, and baking soda and mix until it’s just combined, scraping the side as needed. Don’t overmix! Overmixing will cause a tough and rubbery texture in the cake.
Step 3: Bake!
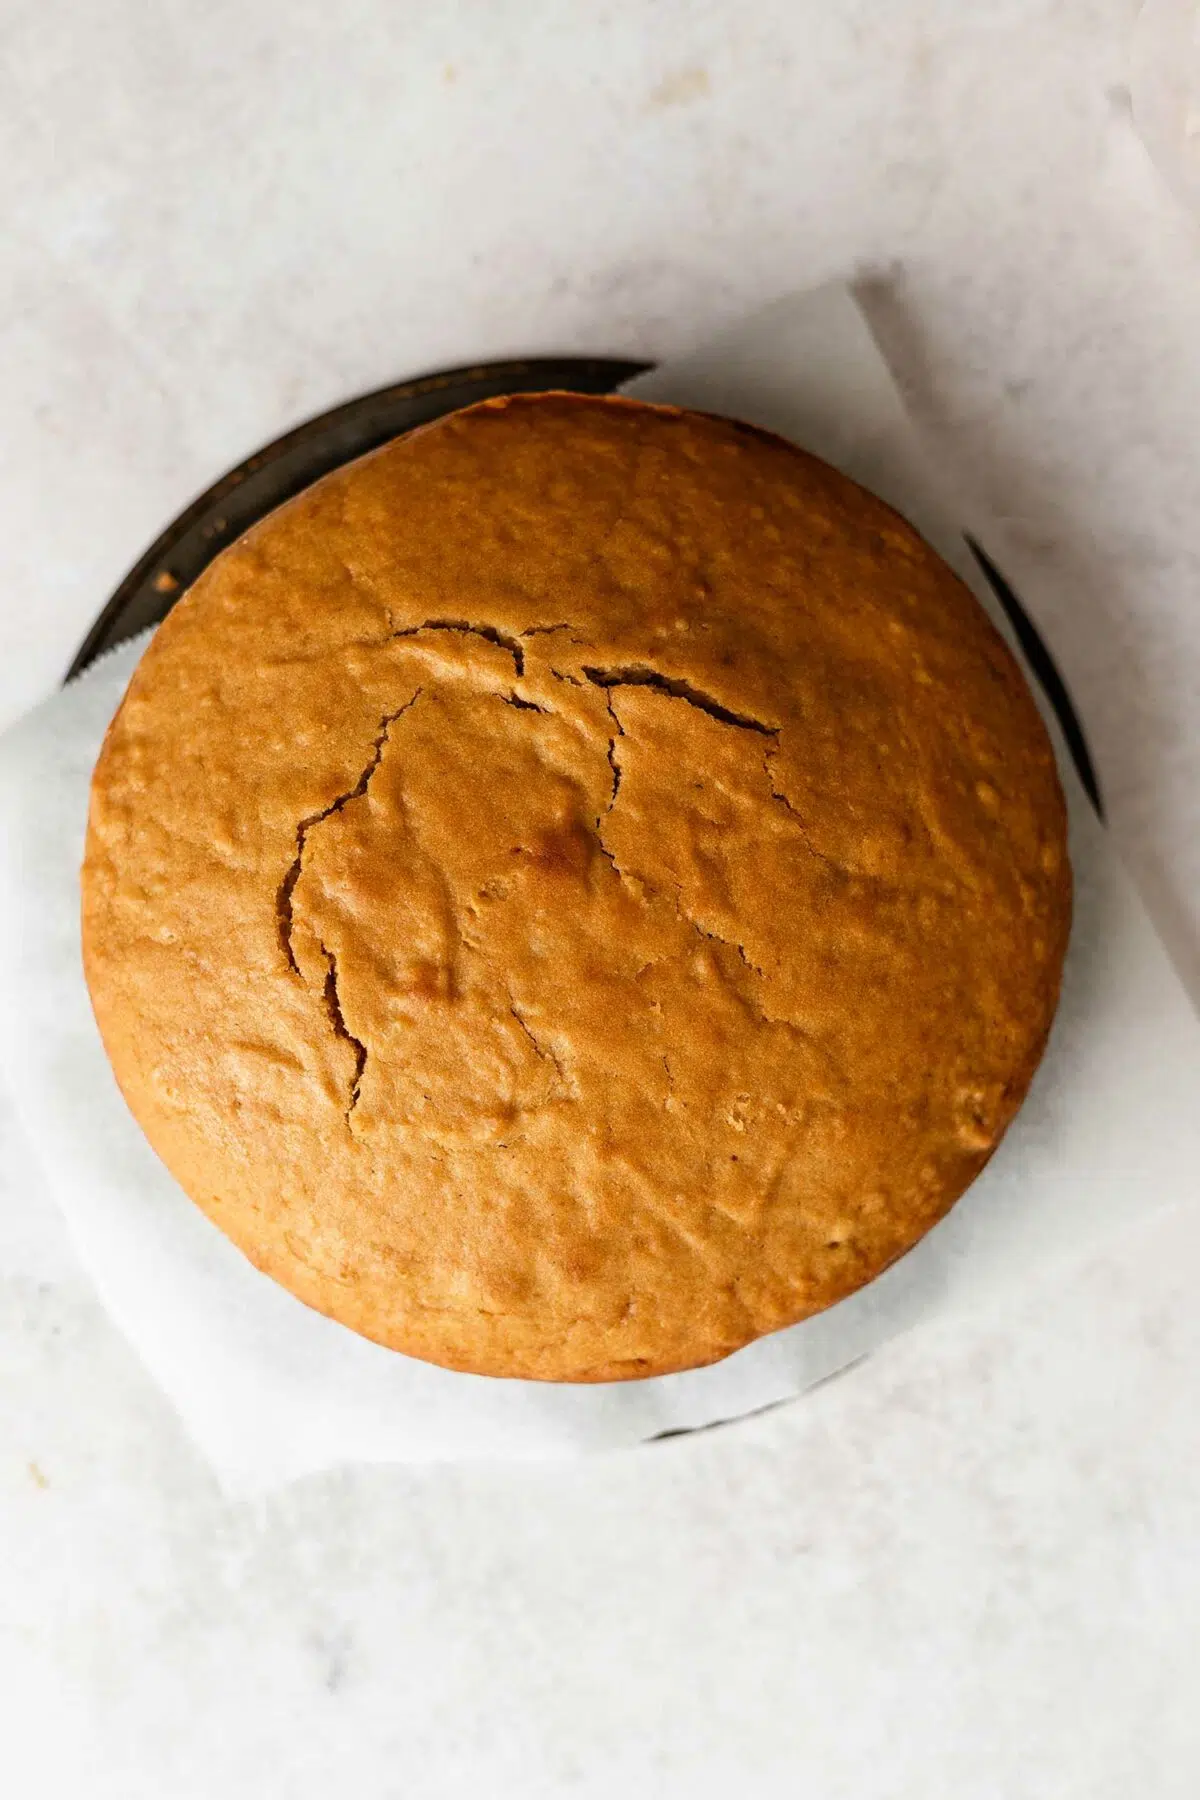
Pour the cake batter evenly into the three prepared cake tins and smooth out the top with a spatula. Place the cake tins in the preheated oven and let them work their magic for 23 minutes. You’ll know they’re ready when a toothpick inserted into the centre of the cake comes out clean. If it comes out with wet batter, bake for another 2-3 mins and test again. Be careful not to overbake!
Remove the cake from the oven and allow them to cool in their tins for 5-10 minutes before transferring them to a cooling rack. Let them rest on a cooling rack until the cakes are completely cooled down.
Step 4: Make the caramel buttercream
Now, it’s time to whip up the caramel buttercream! It’s super easy to make. Using a hand mixer or a stand mixer, beat the vegan butter, vegan caramel, and icing sugar until it forms a rich and fluffy texture. That’s it! Couldn’t be easier than this. See detailed instructions in this vegan caramel buttercream recipe! Now we are ready to finish decorating the cake.
Step 5: Frost and Decorate
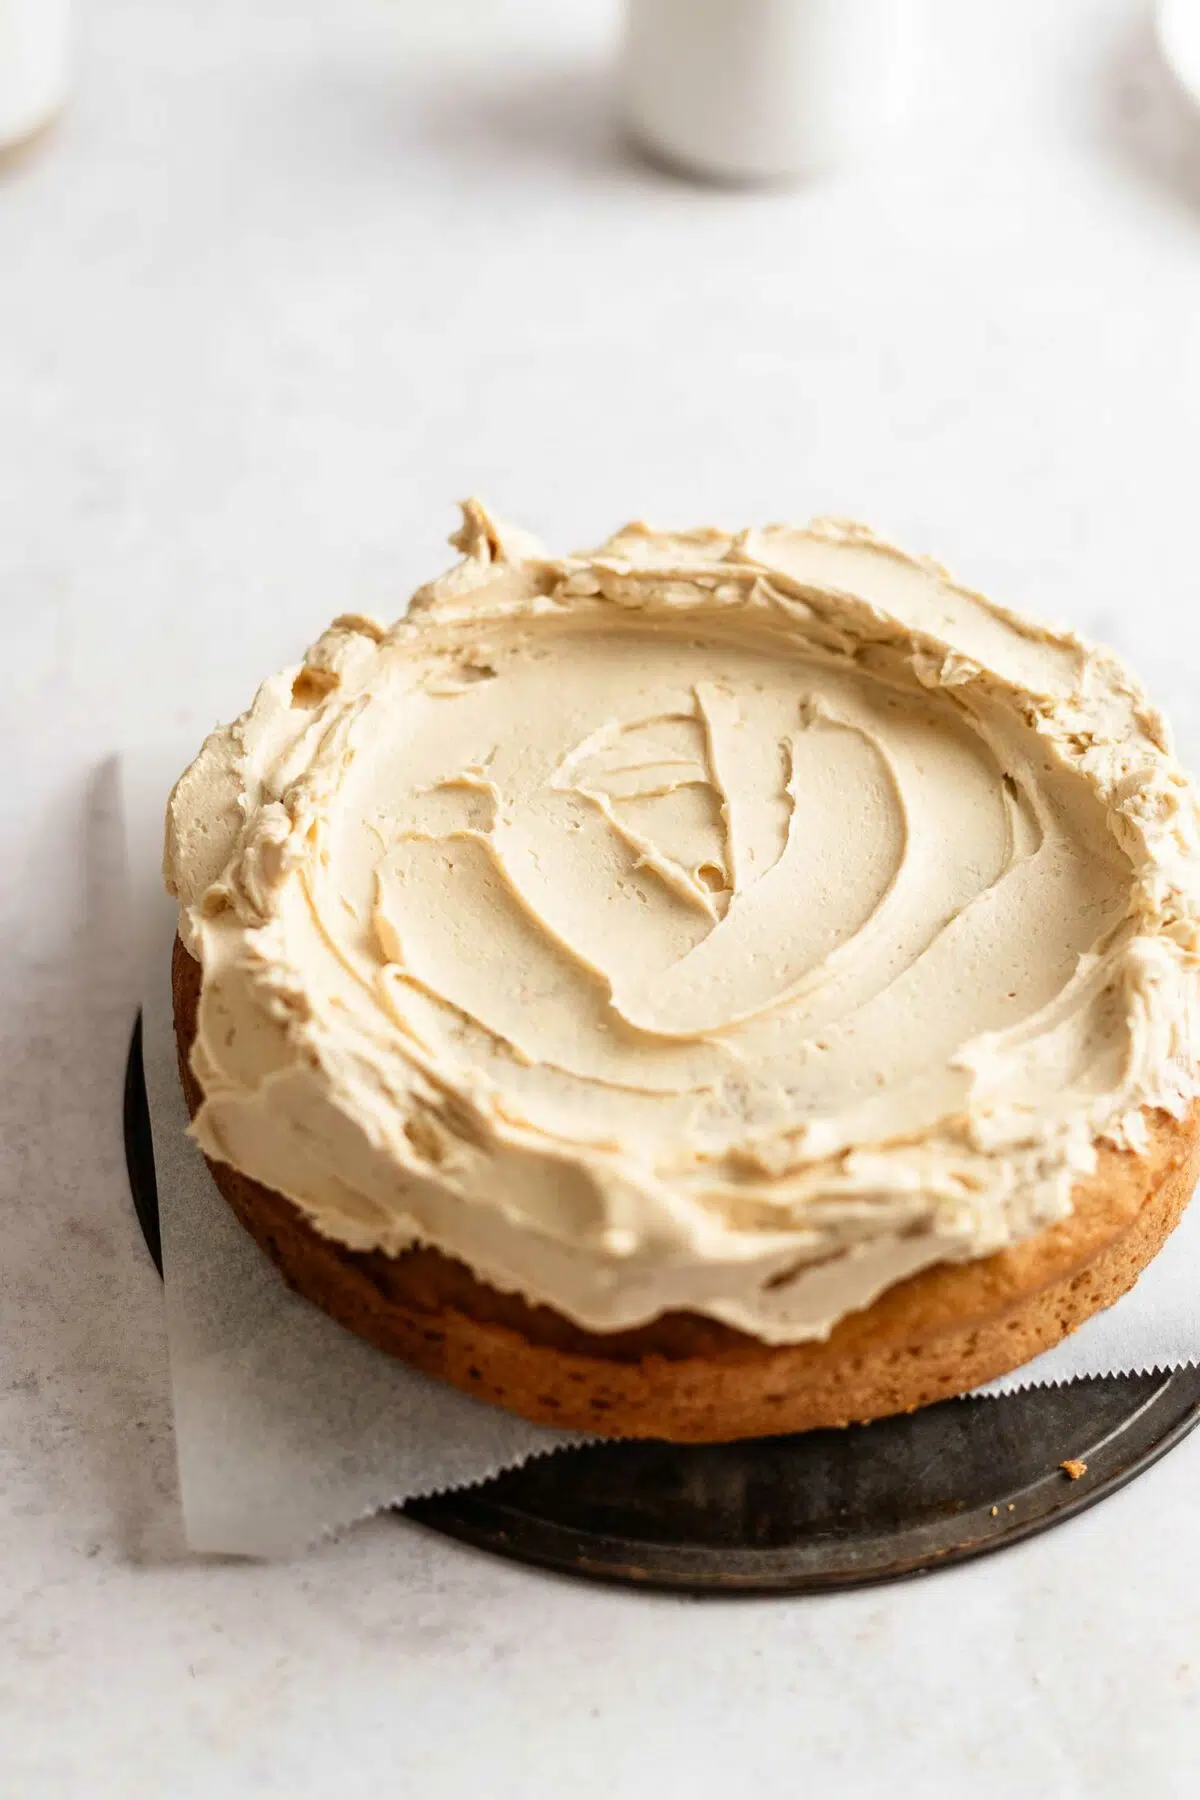
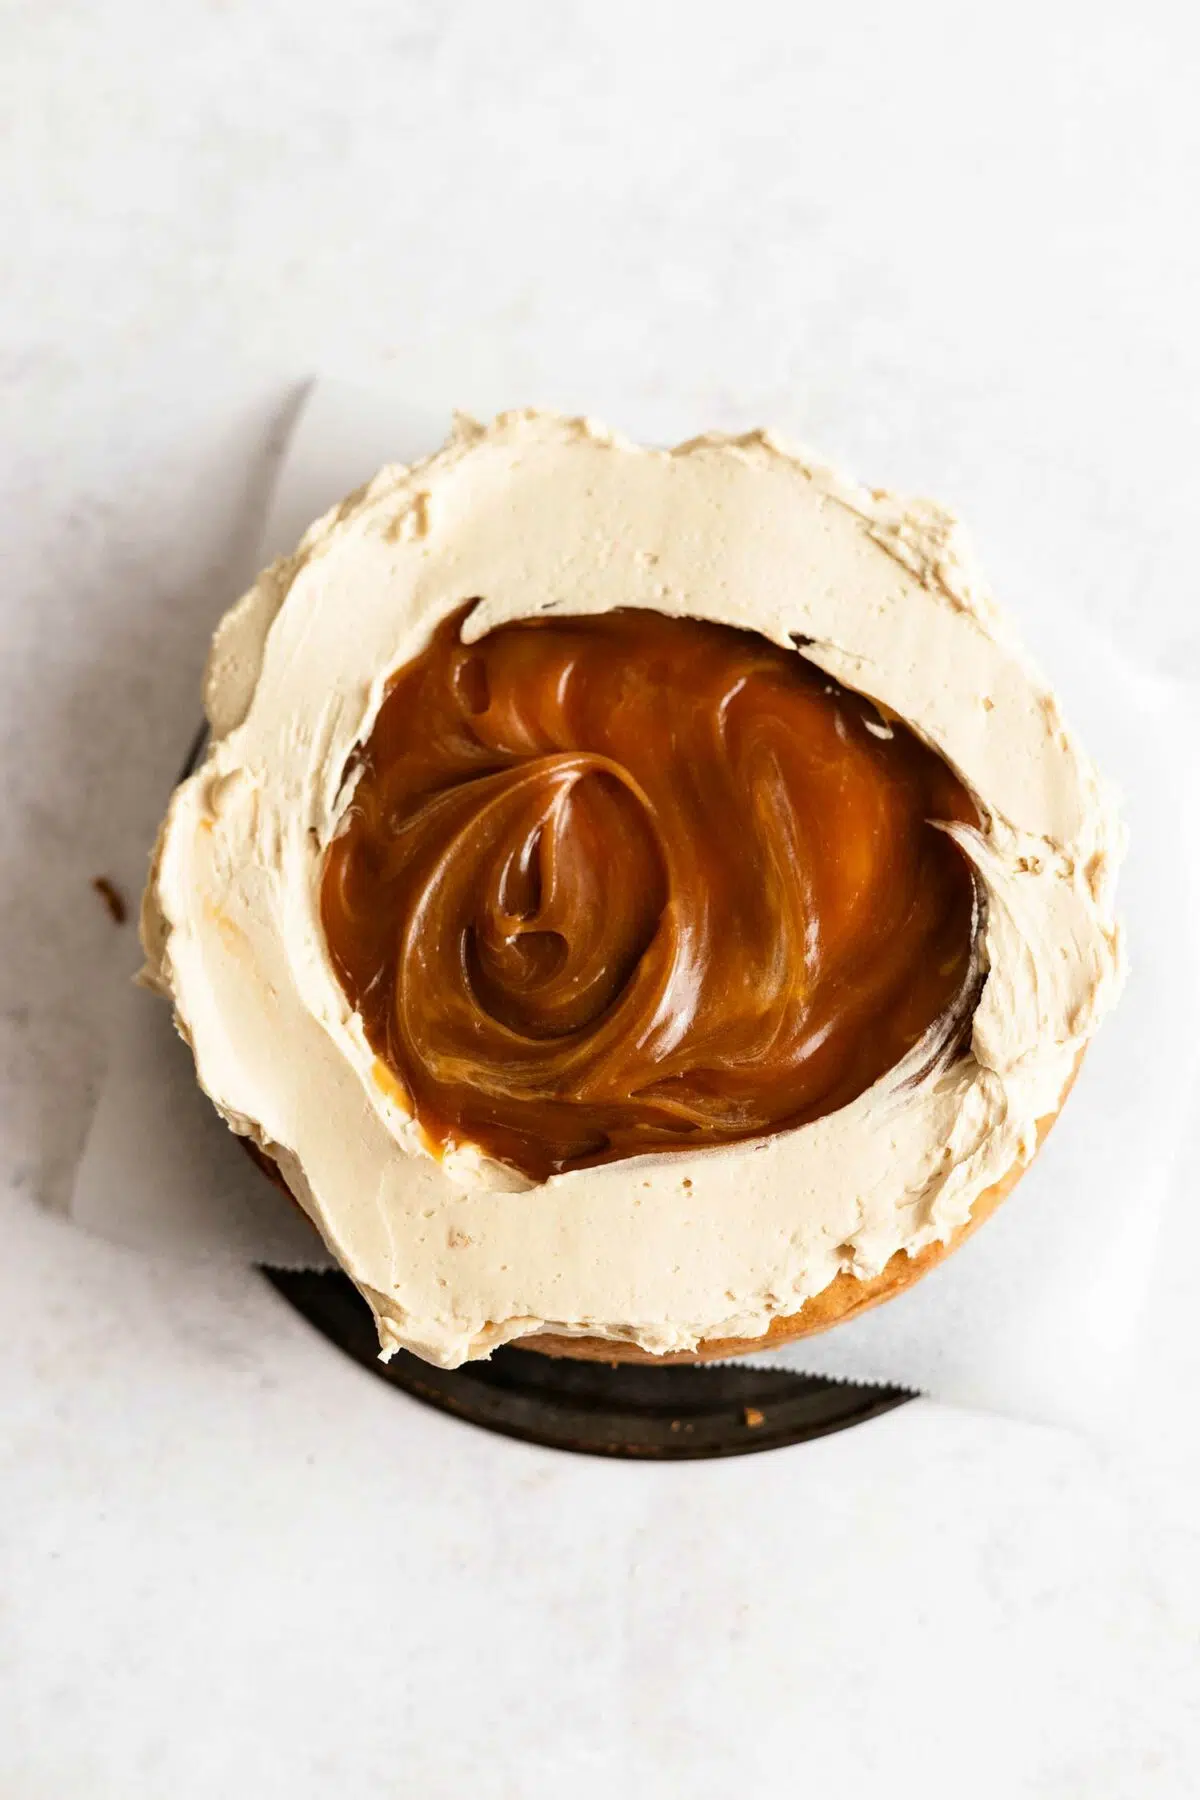
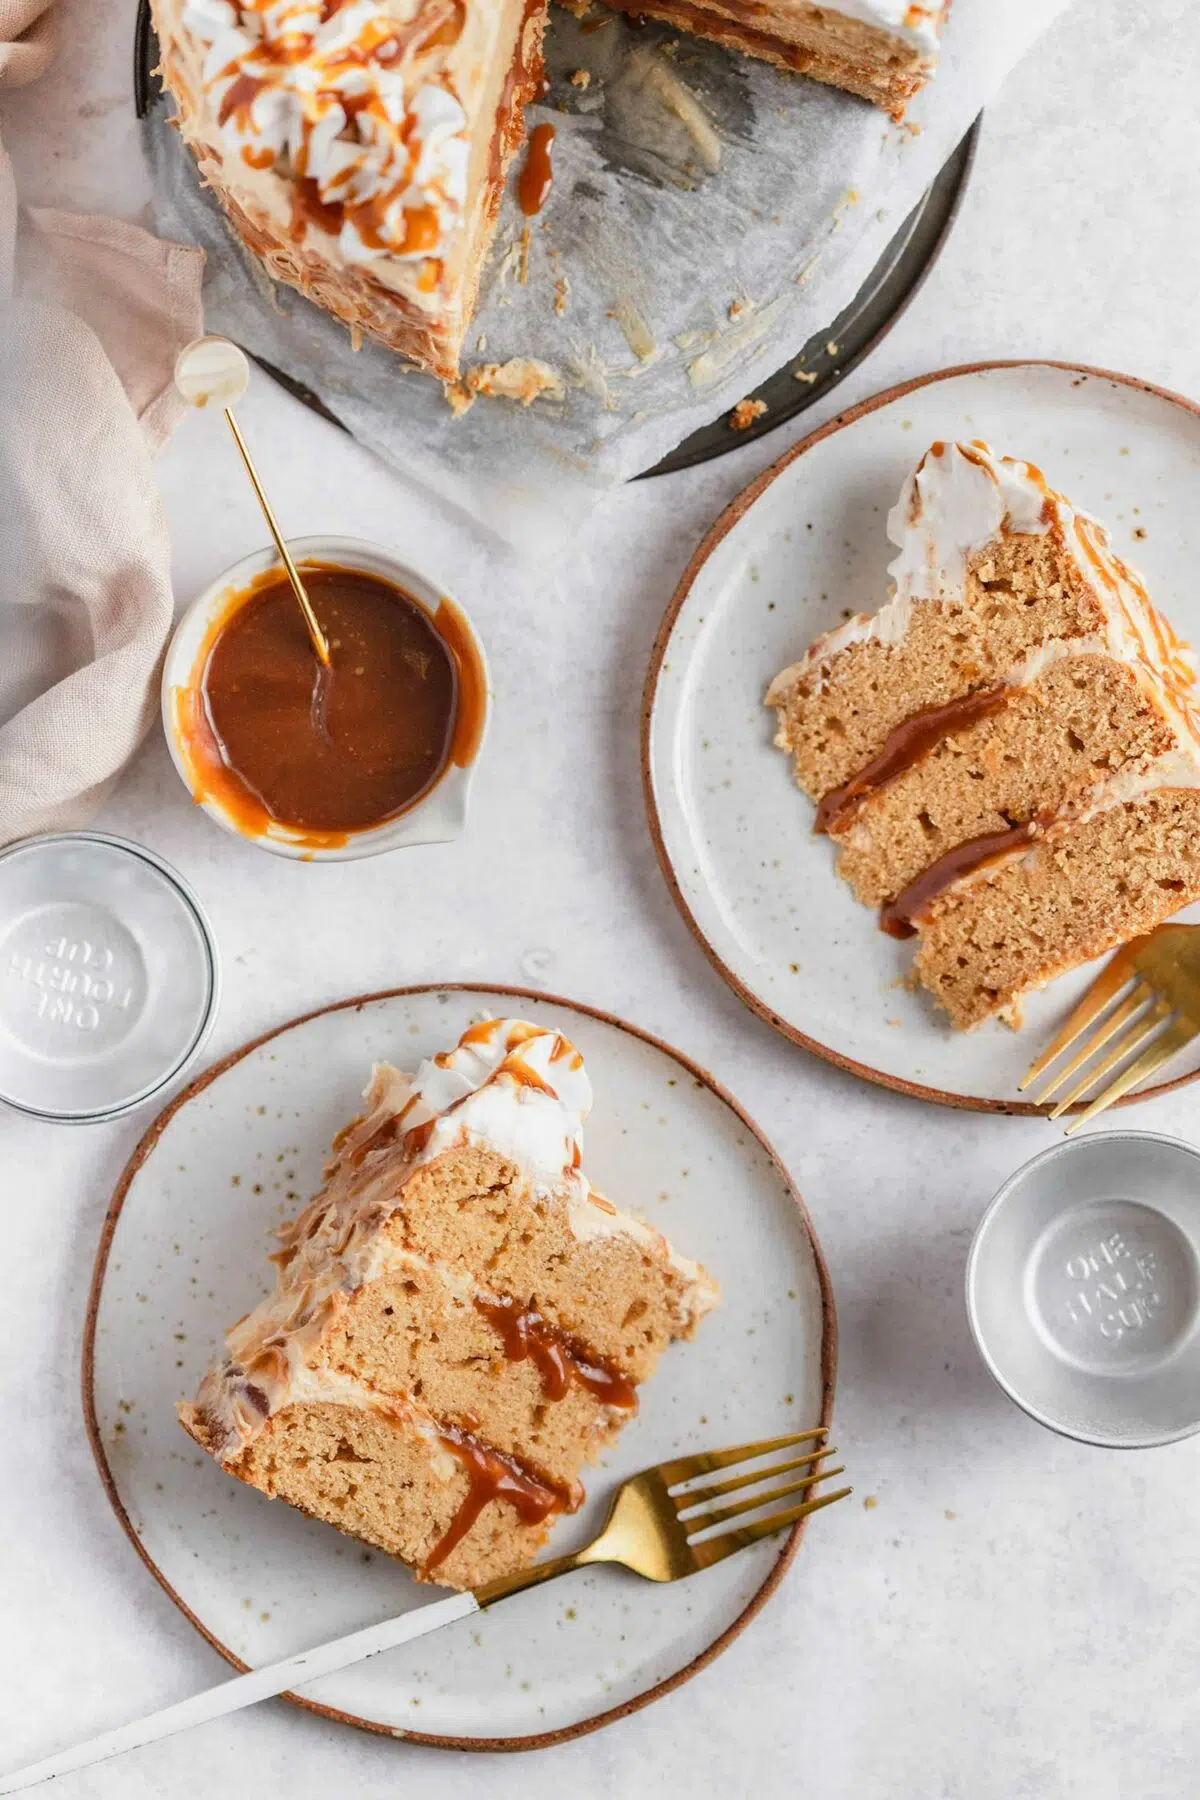
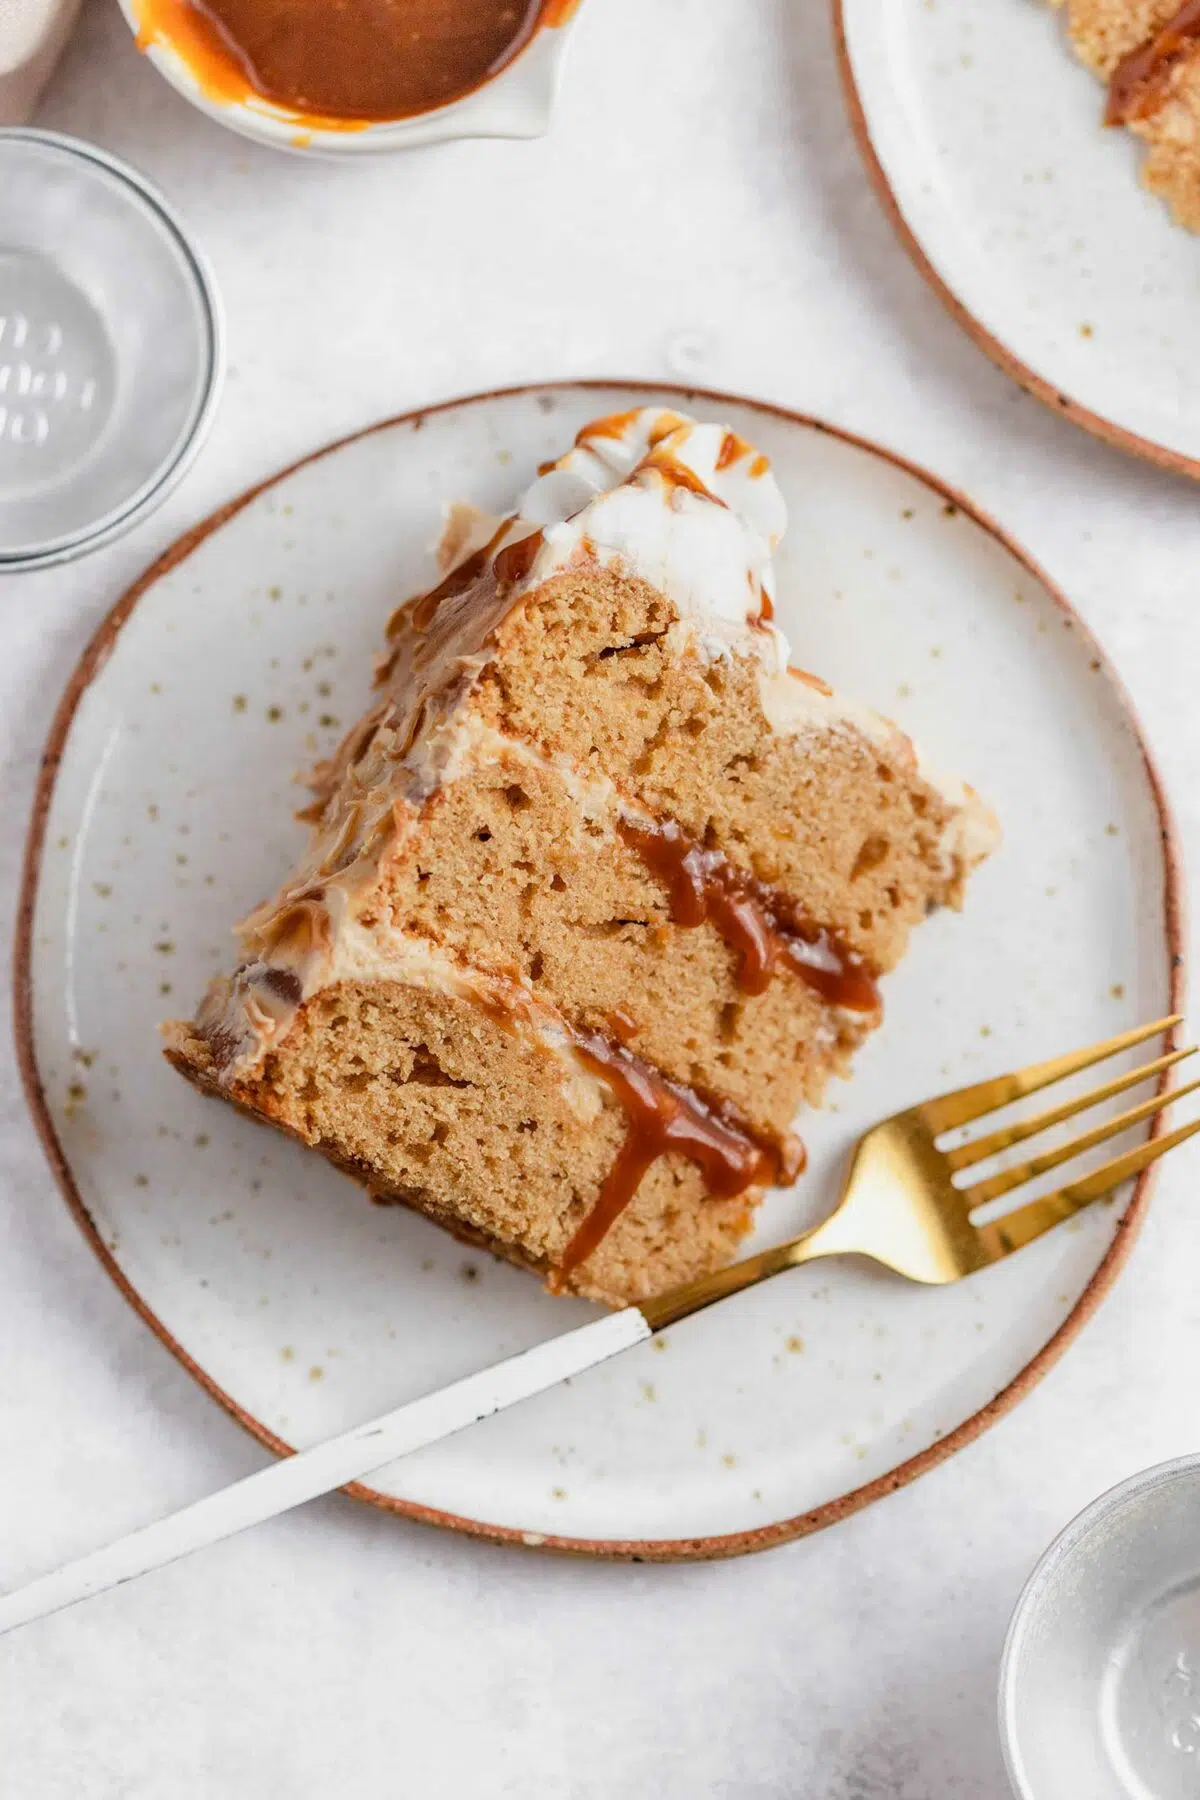
Once the cakes have completely cooled down to room temperature, frost one of the cakes with a generous layer of caramel buttercream, about 1-2cm. You can cut the dome off of your cake if you like before frosting! Now using the same spatula, make a well in the middle of the buttercream and dollop 3-5 tablespoons of vegan caramel and smooth out the top. Place the second cake on top and repeat the process. Cover the last cake and the side with buttercream but this time, dollop a random amount of vegan caramel on top and side and spread with the same spatula, creating a swirling pattern with the caramel.
I made some whipped cream with soy whipping cream for more decoration! You can do the same by whipping up 1/3 ~ 1/2 cup of plant whipping cream with 1-2 tablespoons of sugar to make the whipping cream. Use a piping bag and your favourite star tip to decorate the cake and finish the cake with some more drizzles of vegan caramel. Slice and enjoy!

Serving tips and ideas
- There’s nothing like the classic pairing of cake and ice cream, don’t you agree? Serve a slice of this caramel cake with a delicious scoop of vegan vanilla ice cream for an extra layer of indulgence. Caramel ice cream would enhance the flavour and would be sooo good too!
- Add an extra crunch and intense caramel flavour by throwing some crushed toffee or caramel bits into the cake batter or over the frosting. It not only elevates the look of the cake but also adds a delightful texture.
- Serve a slice with some more plant whipped cream on the side with some fresh berries for a fancy restaurant-like experience! The natural sweetness of fresh berries beautifully complements the rich caramel flavour of the cake.
- For a lovely contrast in texture and flavour, sprinkle some lightly toasted sliced nuts like almonds over the frosting. The nuttiness is paired perfectly with the caramel flavour.
- A fruit that is probably the most loved by caramel, bananas! If you like caramelised bananas, drizzle some caramel sauce when sauteeing bananas in a frying pan and make caramelised caramel bananas. Cool them down completely and you can place them between the cakes or top the cake off with them.
Expert tips and tricks
Use room-temperature caramel
Caramel can be hard when stored in the fridge. And using hard caramel in the mixing process will make it more difficult for the ingredients to combine. Use room-temperature caramel to ensure the batter is the same consistency throughout.
Cooling the cakes, twice
I’m not a fan of waiting when it comes to baking, but, it is very important to cool cakes twice in the process. The first cooling happens when the cakes are in the tin. Let your cakes cool in their tins for at least 5-10 minutes before transferring them to a cooling rack. This helps them hold their shape and prevents any potential crumbling as well as drying out.
The second cooling happens after 5-10 mins in the tin. Carefully remove the cake from the tin, transfer it to a cooling rack, and ensure to cool it down completely to room temperature. This is very important because if you frost a warm cake, the buttercream will start melting and create a mess on the cake, and you don’t want that! These 2 cooling times are very important in the cake-making process.
Adjust the sugar amount
Because there’s a caramel layer between each cake, I used a little less sugar than I usually use in a cake recipe. This is the perfect balance of sweetness for me, however, feel free to adjust the sugar amount up to 1 cup (150g) if you like.
Use a digital scale to weigh ingredients
Always use a digital scale rather than measuring cups when you are baking. It’s so much more accurate and measuring correctly is very important to achieve the best result.
Recipe variations
- Use the same amount of mashed bananas as applesauce to make caramel banana cake!
- Add a pinch of cinnamon or a dash of pumpkin spice mix to the cake batter for a warm, spiced twist.
- Sprinkle a touch of sea salt in the caramel or over the caramel buttercream to create that beloved sweet and salty caramel combo.
How to store
- Room Temperature: If you plan to devour this cake within a day, you can store it at room temperature. Make sure to keep it in an airtight cake carrier or under a cake dome to maintain its freshness. However, if you live in a particularly warm climate, I advise you to store the cake in the fridge or freezer.
- Refrigerator: For longer storage, I recommend keeping your cake in the refrigerator. This preserves its lusciousness for an extended period. Place the cake in an airtight container, a cake tray with a dome lid, or wrap it securely in cling film to prevent it from drying out. Stored in the fridge, your cake can stay fresh for up to 2-3 days.
- Freezer: If you’re not planning to consume the entire cake within a week, the freezer is your best friend. To freeze your cake, wrap it meticulously in cling film or aluminium foil to prevent freezer burn. You can also use a freezer-safe airtight container. When stored in the freezer, your cake will remain delightful for up to 2-3 months. Before serving, thaw it in the fridge or on the kitchen counter to ensure the best texture and flavour.
*Although you can store this recipe in the fridge or freezer, it’s always best to consume it fresh and as soon as possible.
Q and A
Can I make this cake in advance for a special occasion?
Yes, you can prepare the cake in advance! Simply follow the instructions in the How to store section and when you’re ready, bring it to room temperature for the best texture and taste.
Can I make this cake into cupcakes?
I have not tried making cupcakes with this recipe but I believe you could. However, because this is a three-layer cake, I think it will make quite a lot of cupcakes, like maybe just under 20.. But if you are okay with that, simply fill cupcake cups two-thirds full with the batter and adjust the baking time to around 20 minutes or until a toothpick comes out clean. Frost with a piping bag to make cute cupcakes!
Why did my cake turn out dense instead of light and fluffy?
A dense cake can be the result of various factors, such as overmixing the batter, using outdated leavening agents, incorrect measurement, or opening the oven door too early or too often. Ensure precise measurements with a kitchen scale, use fresh ingredients, and follow proper baking techniques to achieve a light and fluffy cake.
Want to master the basics of vegan baking?
Check out Vegan Baking 101 – the beginner’s guide to vegan baking for you to become an excellent vegan baker and familiar with the basics of vegan baking, ingredients, and techniques with useful tips!
You will LOVE this caramel cake because it is:
- easy to make
- decadent and indulgent
- perfect for holiday events or birthdays
- fluffy and moist
- so caramelly
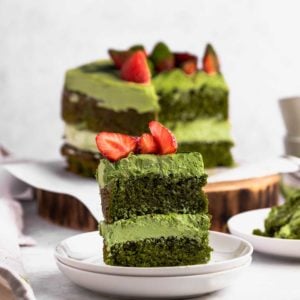
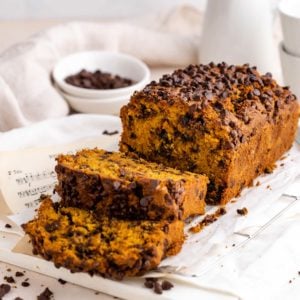
Want more recipes like this?
Try my other delicious caramel and cake recipes you might enjoy!
Visit the cakes and cupcakes page and recipe page for more delicious recipes!
Please leave a comment and rate this recipe with 5 stars in the comment section below if you like the recipe! Let me know and tag me @thechestnutbakery on Instagram too. Thank you for making my recipe, friends!
Recipe Card
Print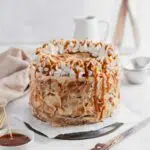
Vegan Caramel Cake
- Total Time: 43 minutes
- Yield: 1 whole cake 1x
- Diet: Vegan
Description
Elevate your dessert game with this divine three-layer vegan caramel cake! Packed with luscious homemade vegan caramel between each layer, this cake is a dream come true – a harmonious blend of light, fluffy, and moist texture and irresistibly rich caramel flavour. Whether it’s a birthday bash, a cosy home gathering, or festive holidays like Thanksgiving and Christmas, I promise you this cake is going to be the star of the show.
Ingredients
For the cake
- 4 & 1/2 cups (490g) plain flour
- 3/4 ~ 1 cup (120~150g) brown sugar
- 1 cup (250ml) soy milk
- 3/4 cup (150g) vegan butter
- 3/4 cup (240g) vegan caramel, store-bought or homemade, and more for filling
- 3/4 cup (200g) applesauce
- 3 tbsp cornflour
- 2 tsp vanilla extract
- 1 tbsp apple cider vinegar
- 1 tsp baking powder
- 1/2 tsp baking soda
For the caramel buttercream
- 3/4 cup (150g) vegan butter
- 1/3 cup (100g) vegan caramel, store-bought or homemade
- 1 & 1/2 ~ 2 cups (150g ~ 200g) icing sugar
For the whipped cream
- 1/3 ~ 1/2 cup (80 ~ 125ml) soy whipping cream
- 1~2 tbsp caster sugar
Instructions
- Preheat your oven to 180C(350°F) and prepare three 7-inch round cake tins. Grease them thoroughly with a little vegetable oil or vegan butter, and line the bottoms and sides with parchment paper to ensure easy cake removal.
- Mix the soy milk and apple cider vinegar together. It curdles and becomes thick like buttermilk. Set aside.
- Using a hand mixer or stand mixer with a paddle attachment, beat the vegan butter and brown sugar until they are very well combined and fluffy. Add vegan caramel, vegan buttermilk, vanilla extract, and applesauce and mix until well combined.
- add flour, cornflour, baking powder, and baking soda and mix until it’s just combined, scraping the side as needed.
- Pour the cake batter evenly into the three prepared cake tins and smooth out the top with a spatula. Place the cake tins in the preheated oven and let them work their magic for 23 minutes.
- You’ll know they’re ready when a toothpick inserted into the centre of the cake comes out clean. If it comes out with wet batter, bake for another 2-3 mins and test again.
- Remove the cake from the oven and allow them to cool in their tins for 5-10 minutes before transferring them to a cooling rack. Let them rest on a cooling rack until the cakes are completely cooled down.
- Using a hand mixer or a stand mixer, beat the vegan butter and vegan caramel until well combined. Add icing sugar and beat until it forms a rich and fluffy texture.
- Frost one of the cakes with a generous layer of caramel buttercream, about 1-2cm. Make a well in the middle of the buttercream and dollop 3-4 tablespoons of vegan caramel and smooth out the top. Place the second cake on top and repeat the process. Cover the last cake and the side with buttercream. Dollop a random amount of vegan caramel on top and side and spread with the same spatula, creating a swirling pattern with the caramel.
- Whip the soy whipping cream with caster sugar until it makes a stiff peak. Use a piping bag and your favourite star tip to decorate the cake and drizzle more vegan caramel.
- Enjoy!


Notes
Use room-temperature caramel to ensure the batter is the same consistency throughout.
Let your cakes cool in their pans for 5-10 minutes before transferring them to a cooling rack. This helps them hold their shape and prevents any potential crumbling as well as drying out.
Feel free to adjust the sugar amount up to 1 cup (150g).
- Prep Time: 20 mins
- Cook Time: 23 mins
- Category: Cake
- Method: Baking

Leave a Reply